

The golden hour includes the first hour after sunrise and the last hour of light before sunset. It is named as such because the sun being parallel to the camera creates a glow of gold light that washes over the image. This is the most beloved and eye catching time of day to capture photographs, and many clients pay extra to shoot in this window of time.
However, if you tried to shoot with normal sunny settings during the golden hour, you may have ended up thoroughly disappointed. There is a trick to ensuring your shots are golden, and you need to know how to shoot with the sun in that position in order to be effective.
How Much Time Do You Have to Shoot?
Typically, you only have fifteen to thirty minutes to shoot before the sun has escaped you. You must be able to see the sun clearly in front of you (parallel to you) and watch it drop down below the horizon. Depending on whether you are up high or down low, the time span will change.
Depending upon what moment of the golden hour you’re capturing in, your images will look very different from one another. Here are some types of images that are possible during the fifteen to thirty minute time span:
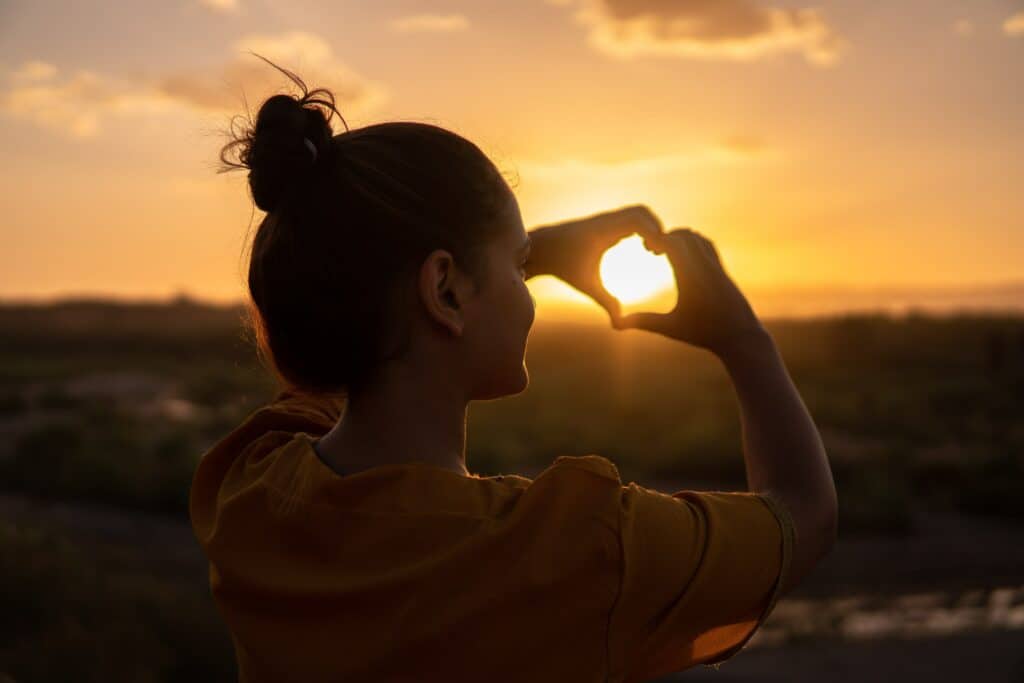
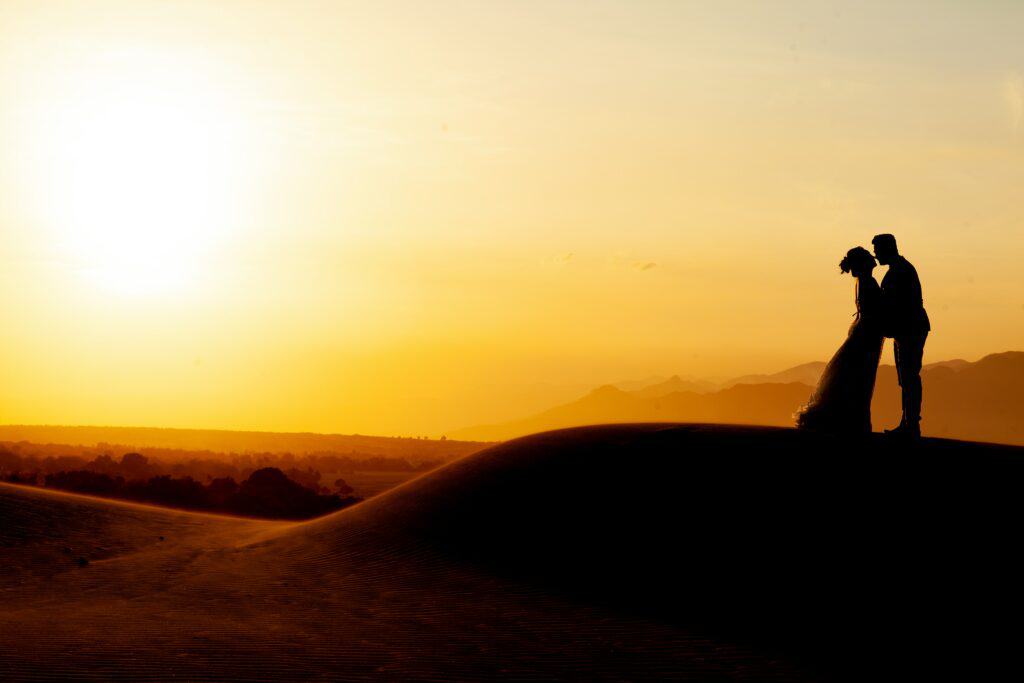

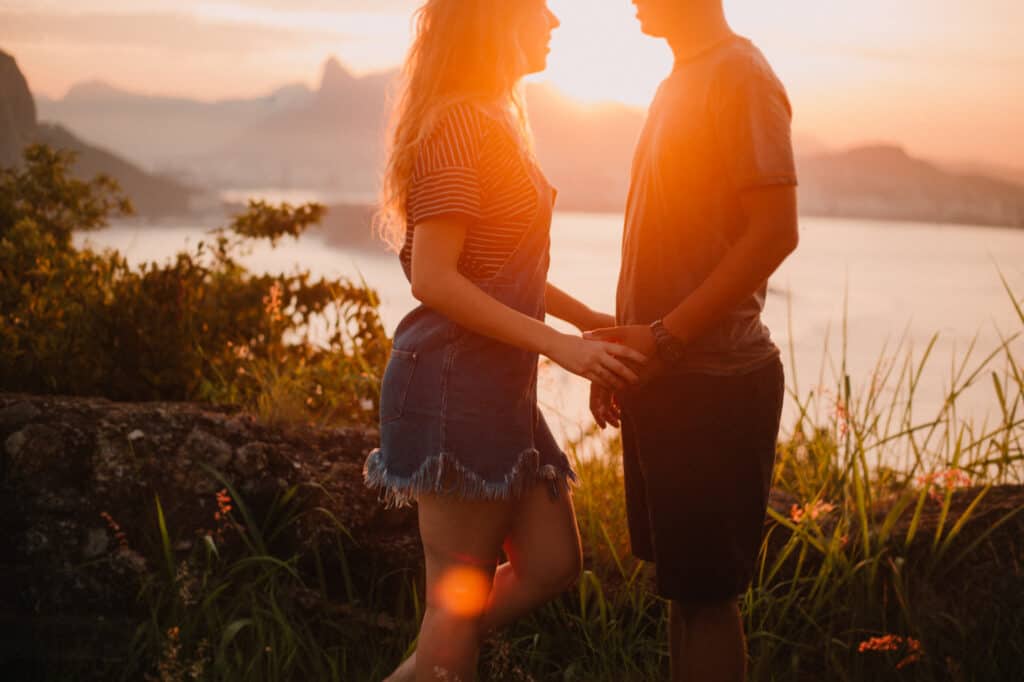
As you can see, the common theme is the notorious warmth that spreads across the image in orange, yellow, and sometimes pink-ish glows. The resulting images are very aesthetic, romantic, and dream-like.
Settings for the Golden Hour
Any equipment you own can be used for the golden hour! There is nothing special or additional to purchase. That is because the golden hour is based on settings, not gear.
The characteristics of the golden hour are glowing, diffused light, with longer and softer shadows. This allows your settings to be more moderate than that of high noon sun or dark nights!
All camera settings relate to exposure, which is how light, dark, or just right your photograph is. Exposure is made up of three key variables,Shutter Speed,ISO, andAperture.
For the golden hour, your aperture can vary depending on the look you want to achieve. Aperture (also denoted as F-Stop or F/insert-number-here) are the numbers on your camera that can range from f/1.2 to f/64. The smaller the number, the wider your aperture. The larger the number, the narrower your aperture (a bit counter intuitive, I know). The wider the aperture, the more light it lets in and the shallower the depth of field. The smaller the aperture, the less light it lets in and the deeper the depth of field.
For portraits, it’s suggested to shoot with a wide aperture (from F/1.8 all the way to F/2.8) which pertains to a shallow depth of field (and allows the golden warmth to really spread across your shot due to the way that the sun hits your camera lens). For landscape, flowers, and other such subject matter, a deeper depth of field is more called for, such as F/8. This also allows you to create sunburst shots in which the sun’s rays can be captured.
Next, ISO. The ISO is your camera’s sensitivity to light. The lower the ISO number, the less sensitive the camera is to light (but the less noise the photograph has). The higher the ISO number, the more sensitive the camera is to light (but the more noise the photograph has).
Because you want to prevent noise, keep your ISO as low as possible, ideally a base ISO level of 100 or 200. With plenty of light available, it shouldn’t be hard to maintain a low ISO level.
Finally, your shutter speed. Shutter speed is how fast your camera can take a picture. In your settings or on the camera screen, this is denoted by 1/-insert number here-. This simply refers to how long the shutter in your camera is open. Shutter speed ranges from 1/8 all the way to 1/8000.
For the golden hour, your shutter speed will likely be the last setting to be adjusted. For landscapes and still life compositions, keep your shutter speed low, around 1/125.
For family portraits with young children, increase your shutter speed to 1/250 or higher so you can capture their movement.
Tips for a Successful Golden Hour Shoot
In conclusion, use the golden hour to your advantage and capture some beautiful golden shots!
Adjust Your White Balance
Although many leave their white balance on automatic, if you’re not getting the images you want when shooting with the golden hour, check your white balance. White balance adjusts colors so that they look more natural, or accurate to the scene.
The warm, angled light during this period of daylight often fools the camera’s automatic settings into using inappropriately cool color temperature. As such, your camera may be preventing you from achieving the golden glow that this time of day is known for. Play with your white balance settings to bring the warmth back!
Have a Plan
It’s best not to ‘wing’ the golden hour because of how fleeting the light is. Use a Sunset / Sunrise Tracker or other such tool to be informed of when the golden hour is to occur. Arrive a bit earlier so you can stake out your spot and adjust your settings. Then, go ahead and start shooting! It’s easy to miss this time of day, so a tracker and early arrival are key.
Take Advantage of the Flare
With the position of the sun, flares are bound to happen. Flares in photography refer to the reflection of bright light, like the sun, in the internal lens elements that show up in the final images. This can manifest as a light leak, a wash, or even just actual flare spreads along the span of the photograph.
Some photographers love this look, others hate it- but if you are of the kind that likes it, the golden hour is the absolute best time to capture these.
In conclusion, use the golden hour to your advantage and capture those beautiful warm images!