
To capture the images you dream of, you’ll ultimately need to grasp how to control the camera manually. This seems daunting, but it’s not too bad once you break down the three key components you need! The puzzle pieces are ISO, aperture, and… shutter speed.
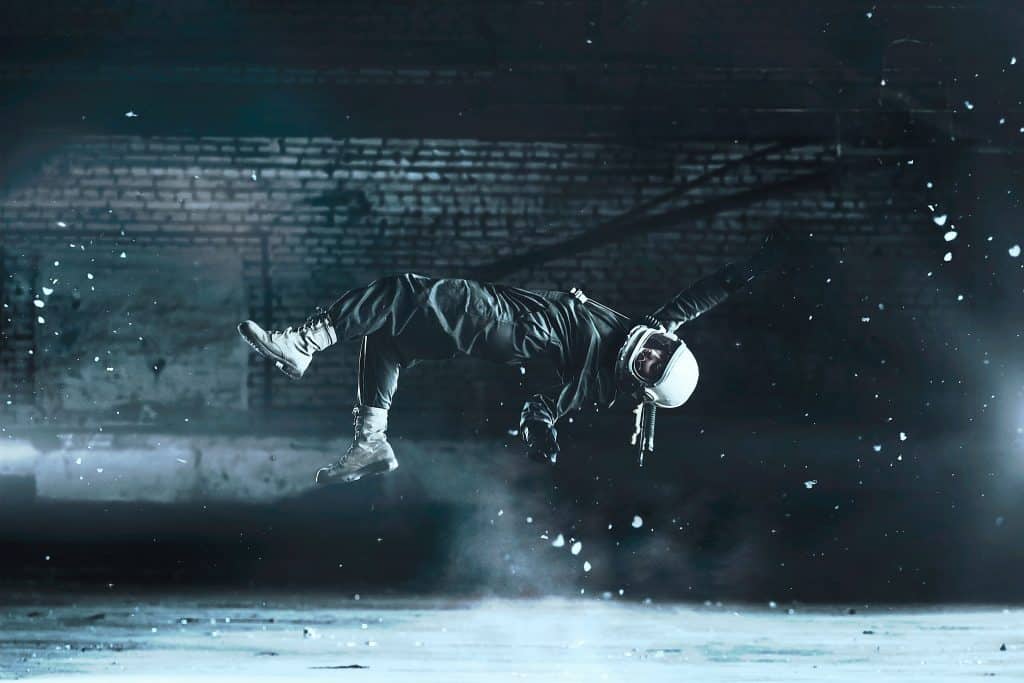
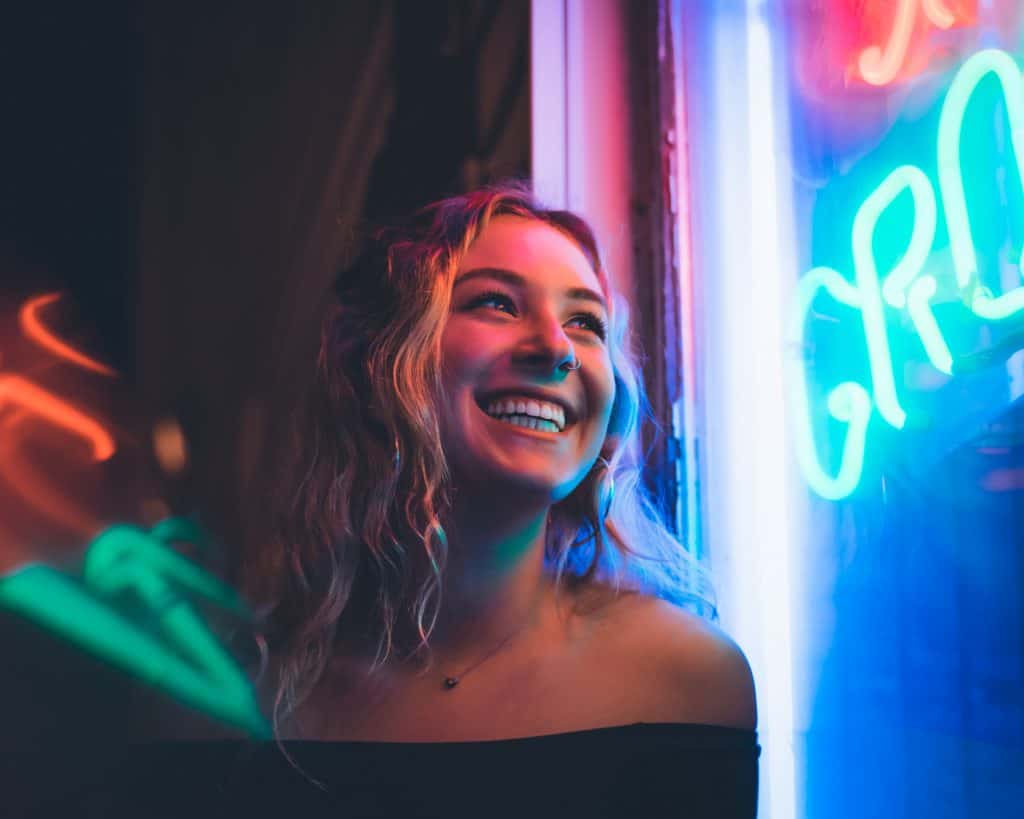
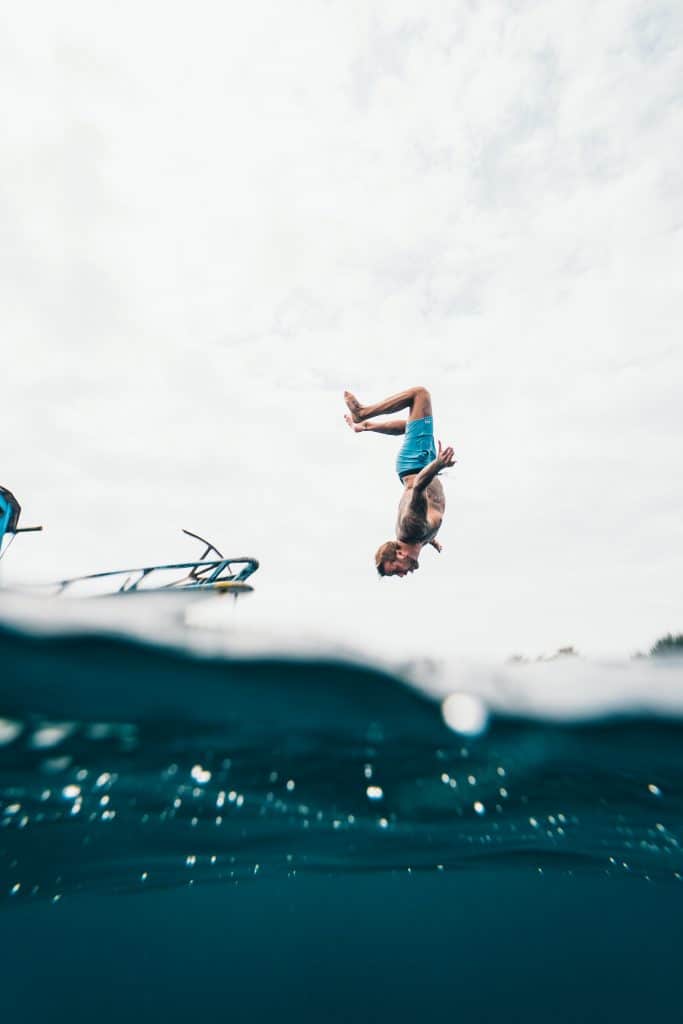
Shutter speed mishaps are the main reason new camera enthusiasts are disappointed in their images. If you set the wrong shutter speed, then your images will either be blurry, or they will be too dark. Get it right, and you can catch a snowboarder frozen mid-air!
Here is what shutter speed is and how shutter speed works.
What is Shutter Speed?

In layman’s terms, shutter speed is how fast your camera can take a picture. In your settings or on the camera screen, this is denoted by 1/-insert number here-. This refers to how long the shutter in your camera is open. Shutter speed ranges from 1/8 all the way to 1/8000.
The shutter is like a door. It opens and shuts (hence the name). Every time it opens and closes, a picture is taken. The larger the number after the 1/—, such as 1/1000, the faster the shutter moves. The smaller the number, the longer the shutter remains open because it moves slower.
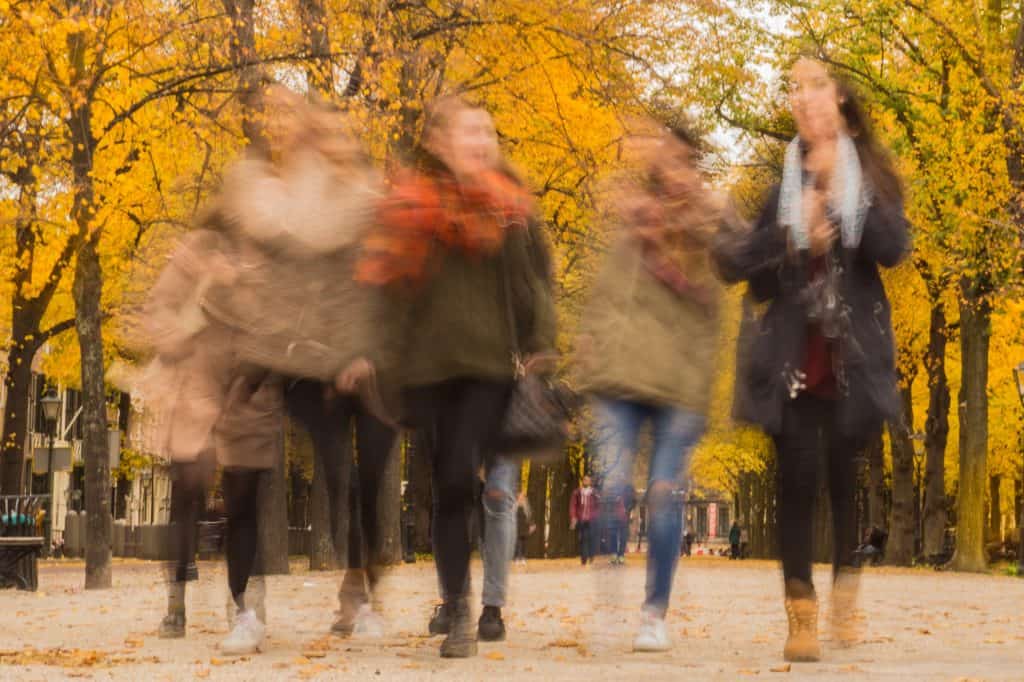
Fast shutters capture photographs more quickly than slow shutters. Keeping your shutter moving quickly is what freezes action! When the shutter is slow, the motion blurs because the doors don’t close quickly. When the motion blurs and the shutter is slow, this is called long exposure. We will talk more about long exposures later in the article.
Because the shutter is like a door, it unintentionally controls how much light hits the sensor. The shutter is located right between the lens and the aperture, which is the hole that leads to the sensor. The faster it moves, the less time light has to hit the sensor, and as such, your photographs will be darker. The slower the shutter moves, the more light hits the sensor, and your image will be brighter.
Shutter Speed and the Exposure Equation
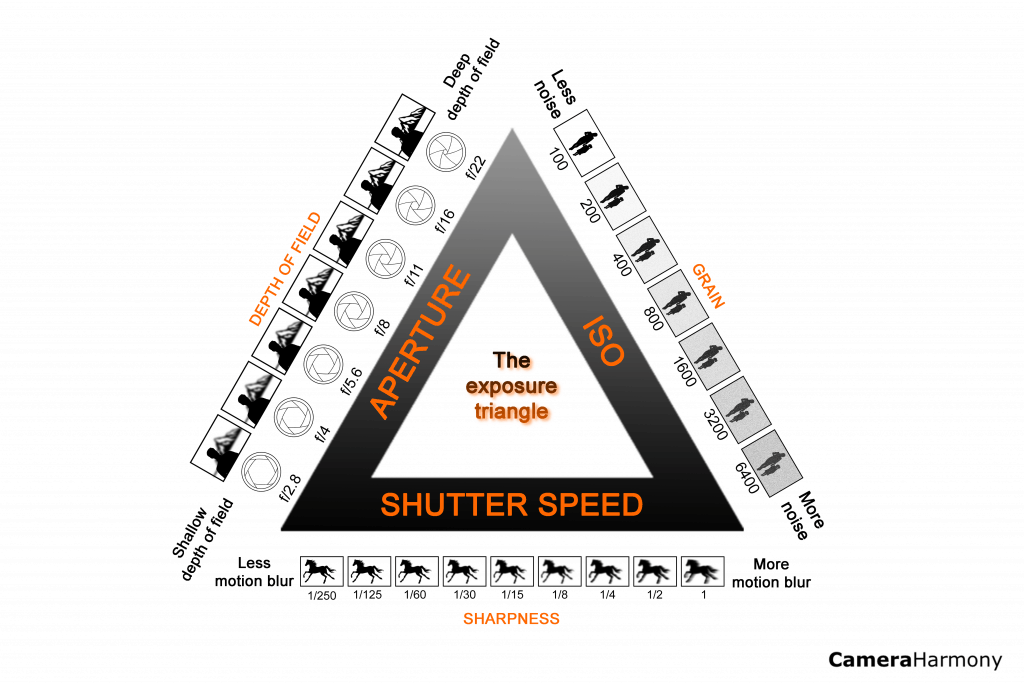
As mentioned in the introduction, to use your camera to its fullest potential, you need to grasp how to control the ISO, aperture, and shutter speed manually. These three factors make up the exposure triangle or exposure equation.
Exposure is the amount of light that reaches your camera. Too much light and your image will be too bright. Too little, and it’ll be too dark. Controlling your exposure is how you bring out the vividness of your shot or the moodiness of a solemn moment.
Exposure is a formula: ISO + shutter speed + aperture = exposure.
Like a mathematical formula, if one variable changes, the rest are affected by the change.
Here is their correlation, broken down in the simplest of explanations:
The ISO is your camera’s sensitivity to light. The lower the ISO number, the less sensitive the camera is to light (but the less noise the photograph has). The higher the ISO number, the more sensitive the camera is to light (but the more noise the photograph has). Noise is the obnoxious little specks you see in photographs.
The aperture controls how much light does (or doesn’t) hit your sensor. The lower the aperture number, the more light the camera lets in. The higher the aperture number, the less light the camera lets in. The lower the aperture number, the shallower the depth of field. The larger the aperture number, the deeper the depth of field.
Finally, the shutter speed. The higher the shutter speed number, the darker the image. The lower the shutter speed number, the lighter the image. Fast freezes action, and slow causes motion blur.
Together, these three components keep balancing each other to create the perfect exposure for your photograph!
The aperture and the shutter speed affect how much light can reach the sensor, and the ISO controls what happens to the light when it touches the sensor. This is why a fast shutter speed causes a darker image because if you imagine a shutter as a door that opens and closes, the faster you open and close the door, the less time light has to fill a room. Therefore, the light has less time to reach the sensor, so everything is darker!
How To Control Shutter Speed
As a general view, you can control the shutter speed on most cameras by setting your camera to either Manual Mode or Shutter Priority Mode.
Depending on the camera brand, Shutter Priority may be defined by an S in the menu dial or Tv (such as Canon) in the menu dial. Shutter Priority mode is when you only adjust the shutter speed, and the camera automatically adjusts the aperture and ISO accordingly to reach its definition of perfect exposure. It’s generally not recommended to rely on this automatic mode because the camera’s sensor is not always accurate and does not always make the right decisions.
In Manual Mode, you control all of the variables yourself. Nearly all cameras have a dial that you spin to change the shutter speed. Turning to the right (increasing the number) raises the speed, and turning to the left (decreasing the number) slows it down.
Freezing Action and Speeding Everything Up
Many people find freezing the action to be the most eye-catching aspect of photography. To be on the safe side of motion being frozen no matter what, going higher than 1/4000 is recommended, with 1/8000 being the maximum. Many sports photographers shoot at 1/8000.
But that being said, lighting may not always be ideal, and you’ll often need to go to a somewhat lower shutter speed to maintain proper exposure. The shutter speed you need to freeze action depends on how fast your subject is moving.
Here is a general chart:
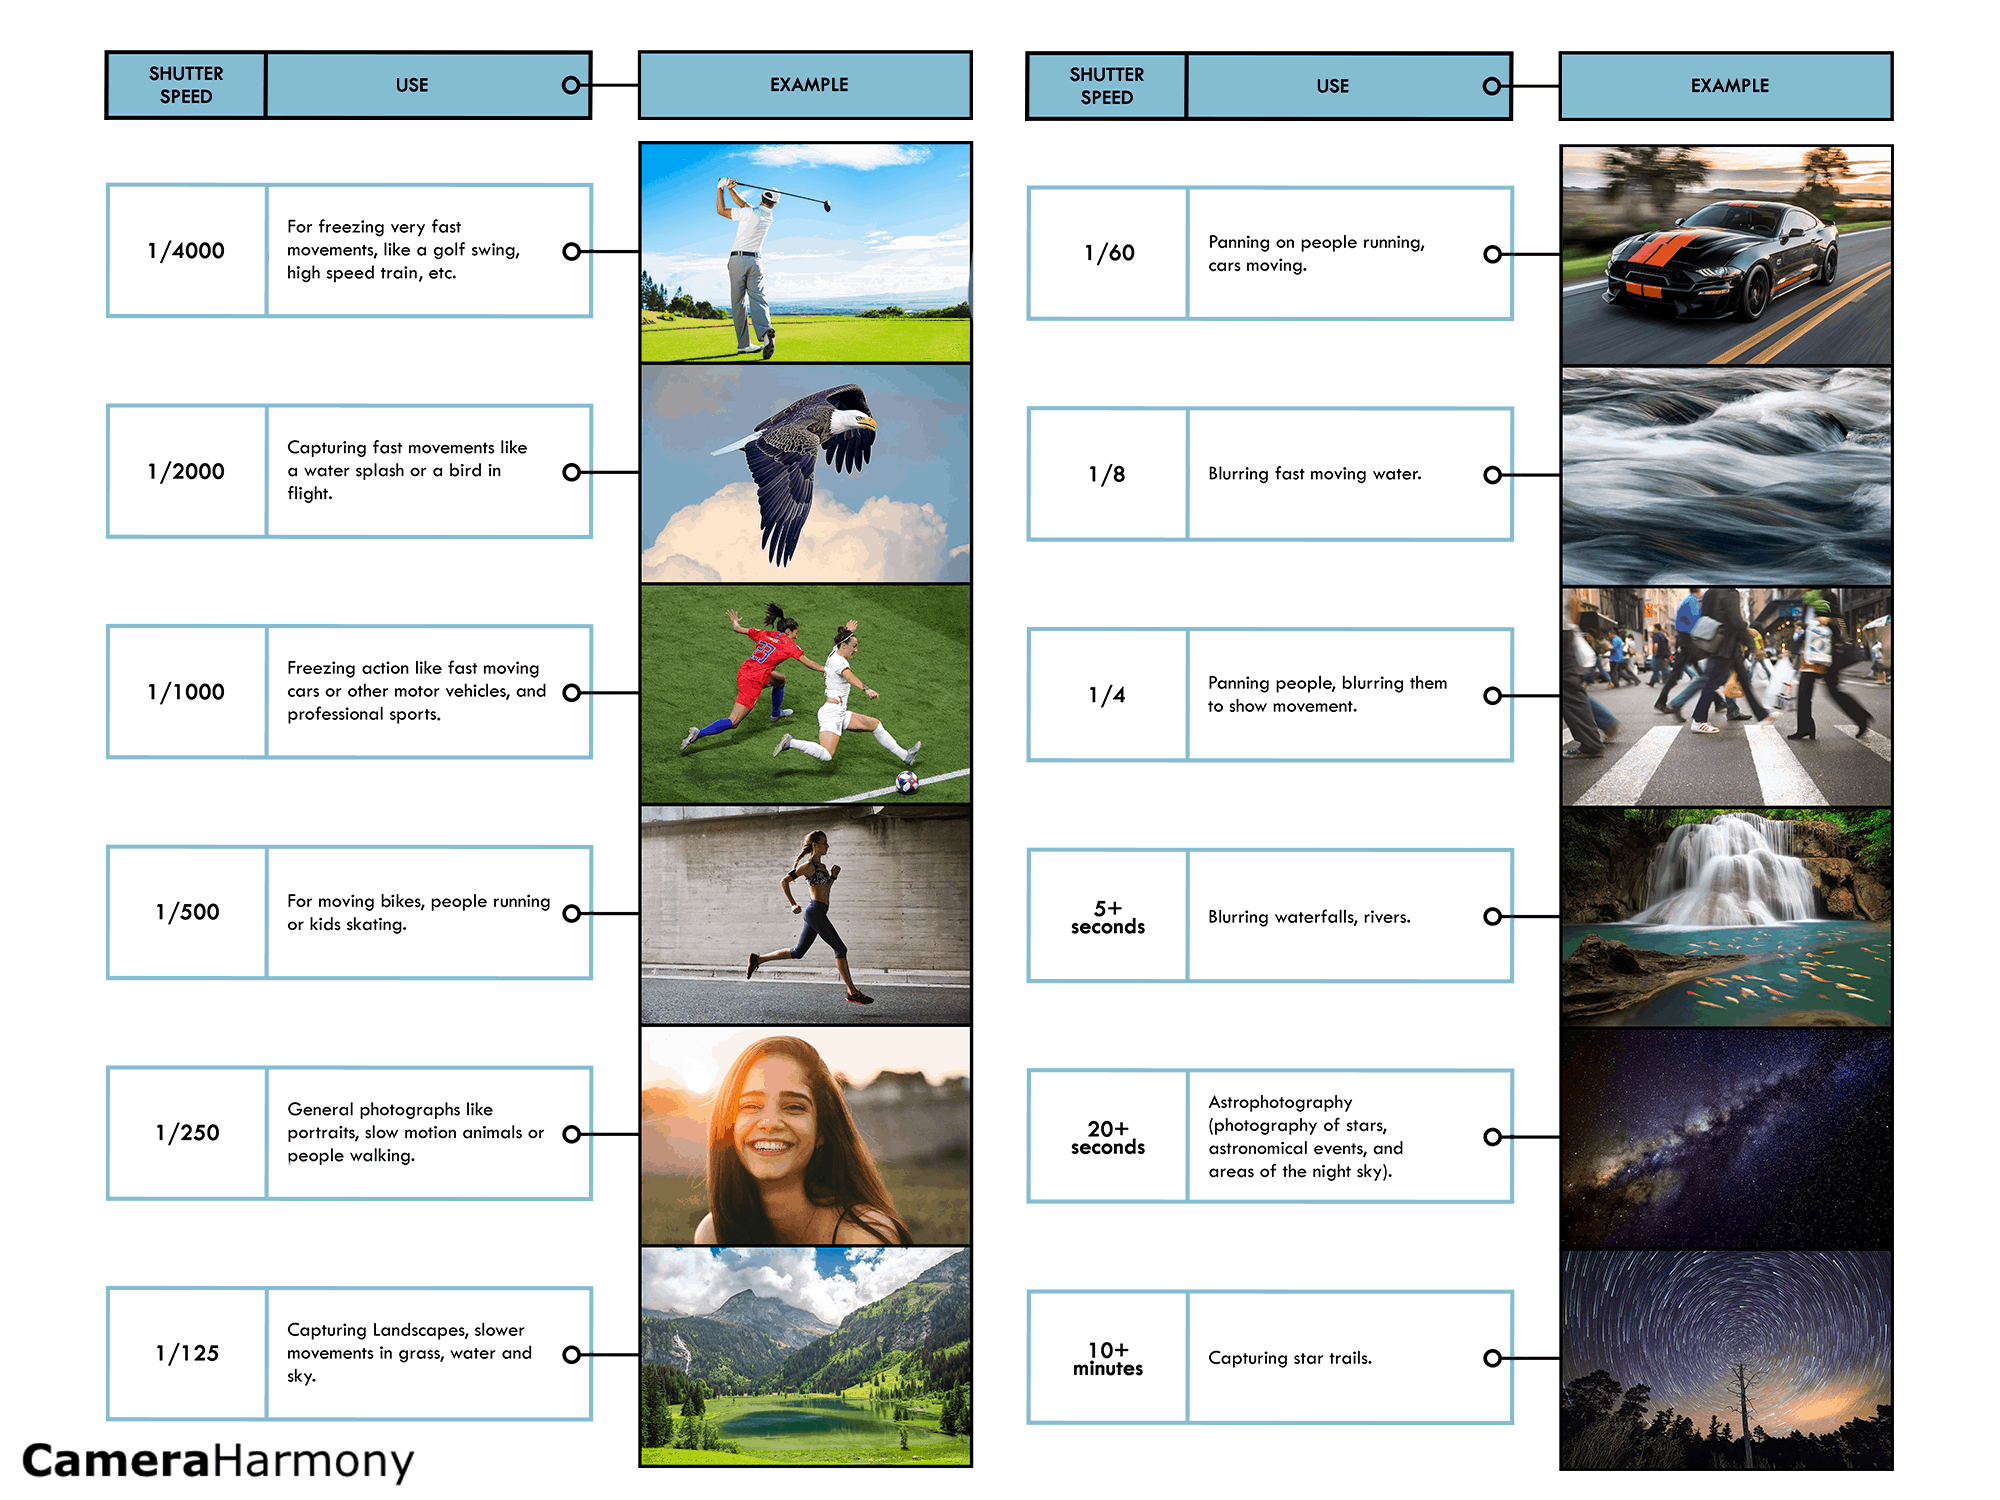
1/125-1/150 is great to snap a person strolling.
1/500-1/1000 seconds will capture a person running or jogging.
1/500-1/2000 seconds will freeze an animal running.
1/800-1/2000 seconds will photograph faster movements, such as a bird flying.
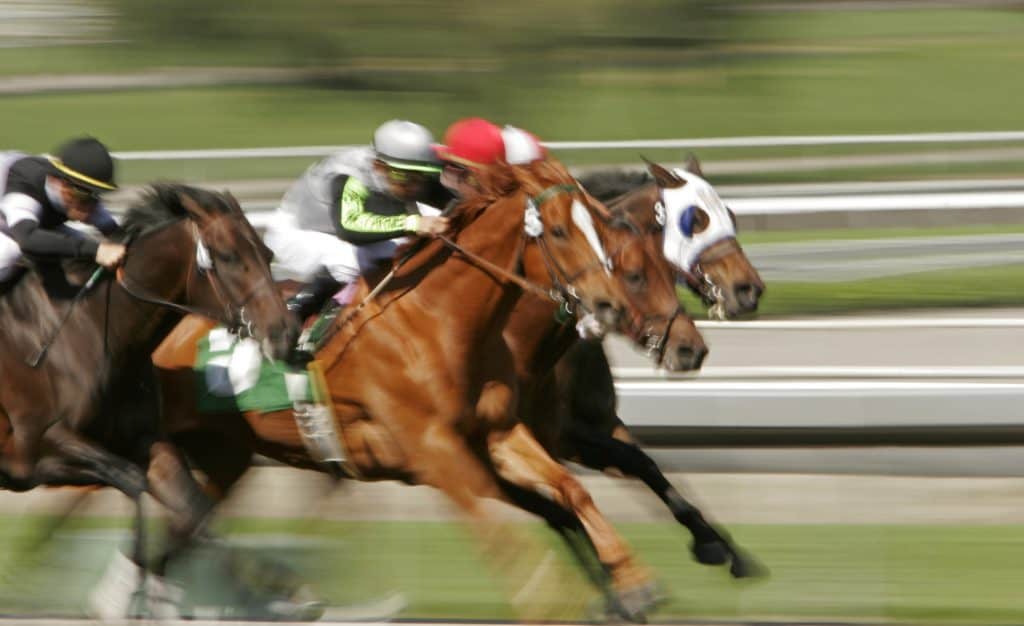
1/500-1/8000 seconds is excellent for anything faster, such as a car racing on a track or horses galloping at the Kentucky Derby.
Equally, anything about 1/125 allows you to photograph handheld and not need a tripod.
Long Exposures and Slowing It All Down
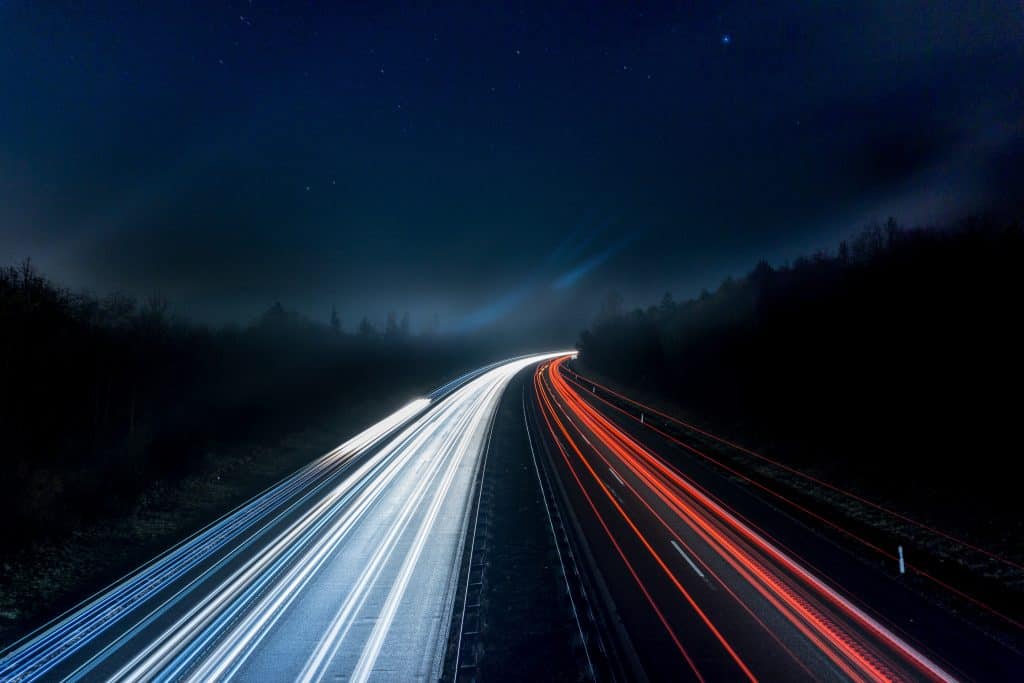
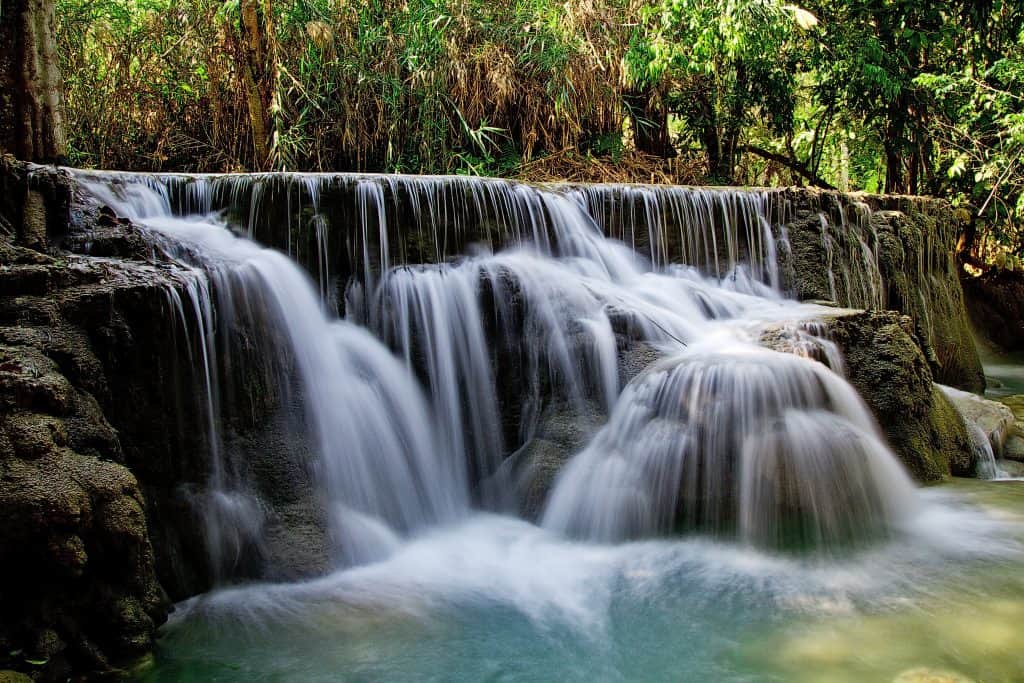
Long exposures are when the shutter is open for an extended period of time. This is used to blur movement or obscure elements and create a more artistic-looking image. If you’ve ever seen a photograph of a freeway with light trails or a waterfall with water that looks silky smooth, those are achieved with long exposures!
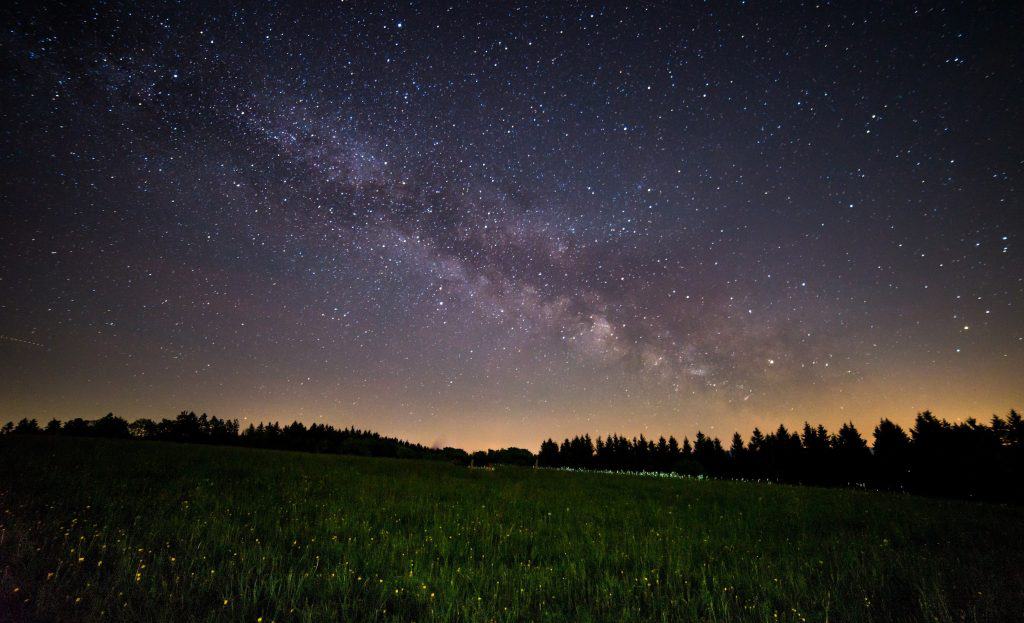
Long exposures are also used to capture astrophotography and the night sky. Photographers place the camera on a tripod and let the shutter stay open for a very long period of time, perfectly still. The result is a thousand stars and sometimes even galaxies immortalized in a photograph.
Long exposures are achieved with shutter speeds of the following:
Landscape (making water look silky): Around 1/60
Speed light trails: Around 1/10” – 1/15”
Night sky: Around 1/20”
The longer the shutter is open, the lighter the image will be. That is why other than landscapes, you rarely see long exposures during the daytime.
So, how do landscape photographers do it? It might seem impossible, given that a slow shutter speed equals a very light image, but there is a solution! You can put a Neutral Density, or ND, filter onto your lens.
Neutral density filters darken the frame so that you can photograph in very bright conditions. If you like shooting with super wide apertures, like F/1.4 but have to contend with the bright afternoon sun, you’ll want to place a neutral density filter on your lens. This is because the wide aperture will still overexpose your frame even when using the fastest shutter speed and the least sensitive ISO. After all, too much light enters the lens. But with a neutral density filter, you can modify how much light enters your camera and make your frame much darker.
Going back to long exposures, if you find that setting your shutter speed too slow makes the photograph too bright, a neutral density filter can aid by darkening the frame enough to keep the shutter wide open. This is how those landscape photographers do it.
Shutter Speed and Image Stabilization
You may notice a few acronyms attached to the lens name when shopping for lenses. Letters such as “IS” in Canon equipment, “VR“ in Nikon, “OSS“ in Sony, and so forth are all brand terms for the same feature: image stabilization.
Image stabilization is a system inside of a lens intended to reduce blurring associated with the motion of a camera. This mechanical system will ensure that your hand shaking or something bumping into your lens won’t cause an image to blur!
So, how does this pertain to shutter speed? Image stabilization is also handy if you like to shoot in low light. Image stabilization allows you to shoot in darker conditions without motion blur because you can lower your shutter speed even more. Image stabilization will ensure that a slow shutter speed won’t be affected by your hand shaking or the wind blowing a camera while on a tripod.
If you photograph many night portraits or in light that is not ideal, having a lens with image stabilization is a worthwhile investment.
If you capture photographs in brightly lit situations, you can save money. A fast shutter speed will stabilize an image and prevent motion blur, even if your hand shakes!
Shutter Speed and Frames-Per-Second
Every camera has something called FPS, or Frames-Per-Second. This discloses how many pictures a camera can snap per second of shooting. To access this feature to its maximum potential, you have to go to the menu of your camera and set it to either “Burst Mode” or “High-Speed Continuous Shooting” (depending on your camera brand). Your camera will then fire off as many photographs as it is capable of taking per second.
This relates directly to shutter speed and can aid you in using slower shutter speeds.
To capture the fastest FPS, set your shutter speed to something fast. This lets you photograph every action sequence, such as a dog chasing after a ball.
If you have to use a slower shutter speed due to low light but still want to freeze the action, set the speed to something higher than 1/50 and then make sure your camera is in Burst Mode / High-Speed Continuous Shooting. If you keep firing off and taking advantage of the FPS, at least one of the images will be perfectly still with no motion blur solely because of how fast the camera can take photographs!
Shutter Speed and Aperture
Shutter speed doesn’t always have to be about the motion in your shot. You can also use shutter speed to help you shoot at the aperture you want. This technique is used by landscape, still life, and portrait photographers all the time.
If you’re using wide-open apertures in brighter light, raise the shutter speed all the way to its maximum of 1/8000 to darken the shot enough to counteract the wide-open aperture, which lets the sensor get a lot of light.
Or, if you want to shoot with a deeper depth of field and a narrow aperture, slow your shutter speed down to contend with the sensor getting less light due to the narrow aperture.
Shutter Speed with Strobes and Other Artificial Light
Everything we have been chatting about has to do with natural light. What if you’re a photographer looking to get into a photo studio? Your shutter speed rules may change a bit here.
If you use continuous light (photography lights that stay on), your shutter speed can remain the same as you are shooting outdoors because continuous light is meant to mimic natural light.
If you use strobes, flashes, or speedlites – that’s a different story. These lights burst a very bright light in synchrony with your camera shutter. They are usually attached to the hot shoe (the silver metal component at the very top of your camera) and communicate with your camera through that. They can also be attached to a tripod and communicate via a remote control or wireless unit with your camera. When you click the shutter button, the flash goes off.
That being said, your shutter speed can be faster than the light from the flash. If you make your shutter too fast, you will get only half of the frame lit up or none! The light will travel slower than you photograph it! As such, you will become limited on your shutter speed, often to a speed of 1/250 or so, to ensure the image is illuminated.
Conclusion
In conclusion, accidentally setting your camera to a slow shutter speed or too fast is often the reason for much photography frustration! Understanding how to control your shutter speed will fix many common problems and help you capture those “wow” photos of frozen movement!
Remember, the larger the number after the 1/—, the more your action will freeze, but the darker your photo will look, and vice versa. You can adjust ISO and Aperture accordingly when you keep this in mind!