
Photography is one of the most amazing art forms in the world. What could be better than immortalizing a beautiful moment? But rivaling the artfulness is its difficulty – photography can be confusing, from a slew of settings to learn to figure out which camera and lens to buy.
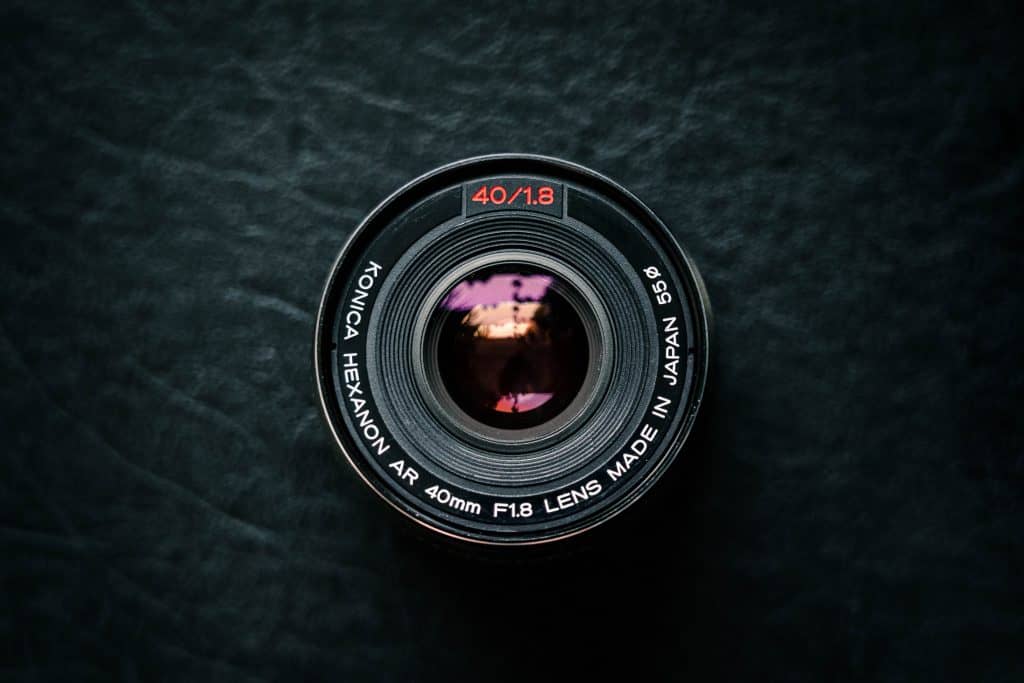
If you’ve ever gone lens shopping, you know that the little numbers are all different – one of which is the confusing F/–.– you will see it etched onto the side of a lens! This is called a F/stop, and the F/stop refers to the lens’s aperture. The aperture, my friends, is one of the essential features of the lens. So what exactly is an aperture, and why should you care about it?
What is Aperture?
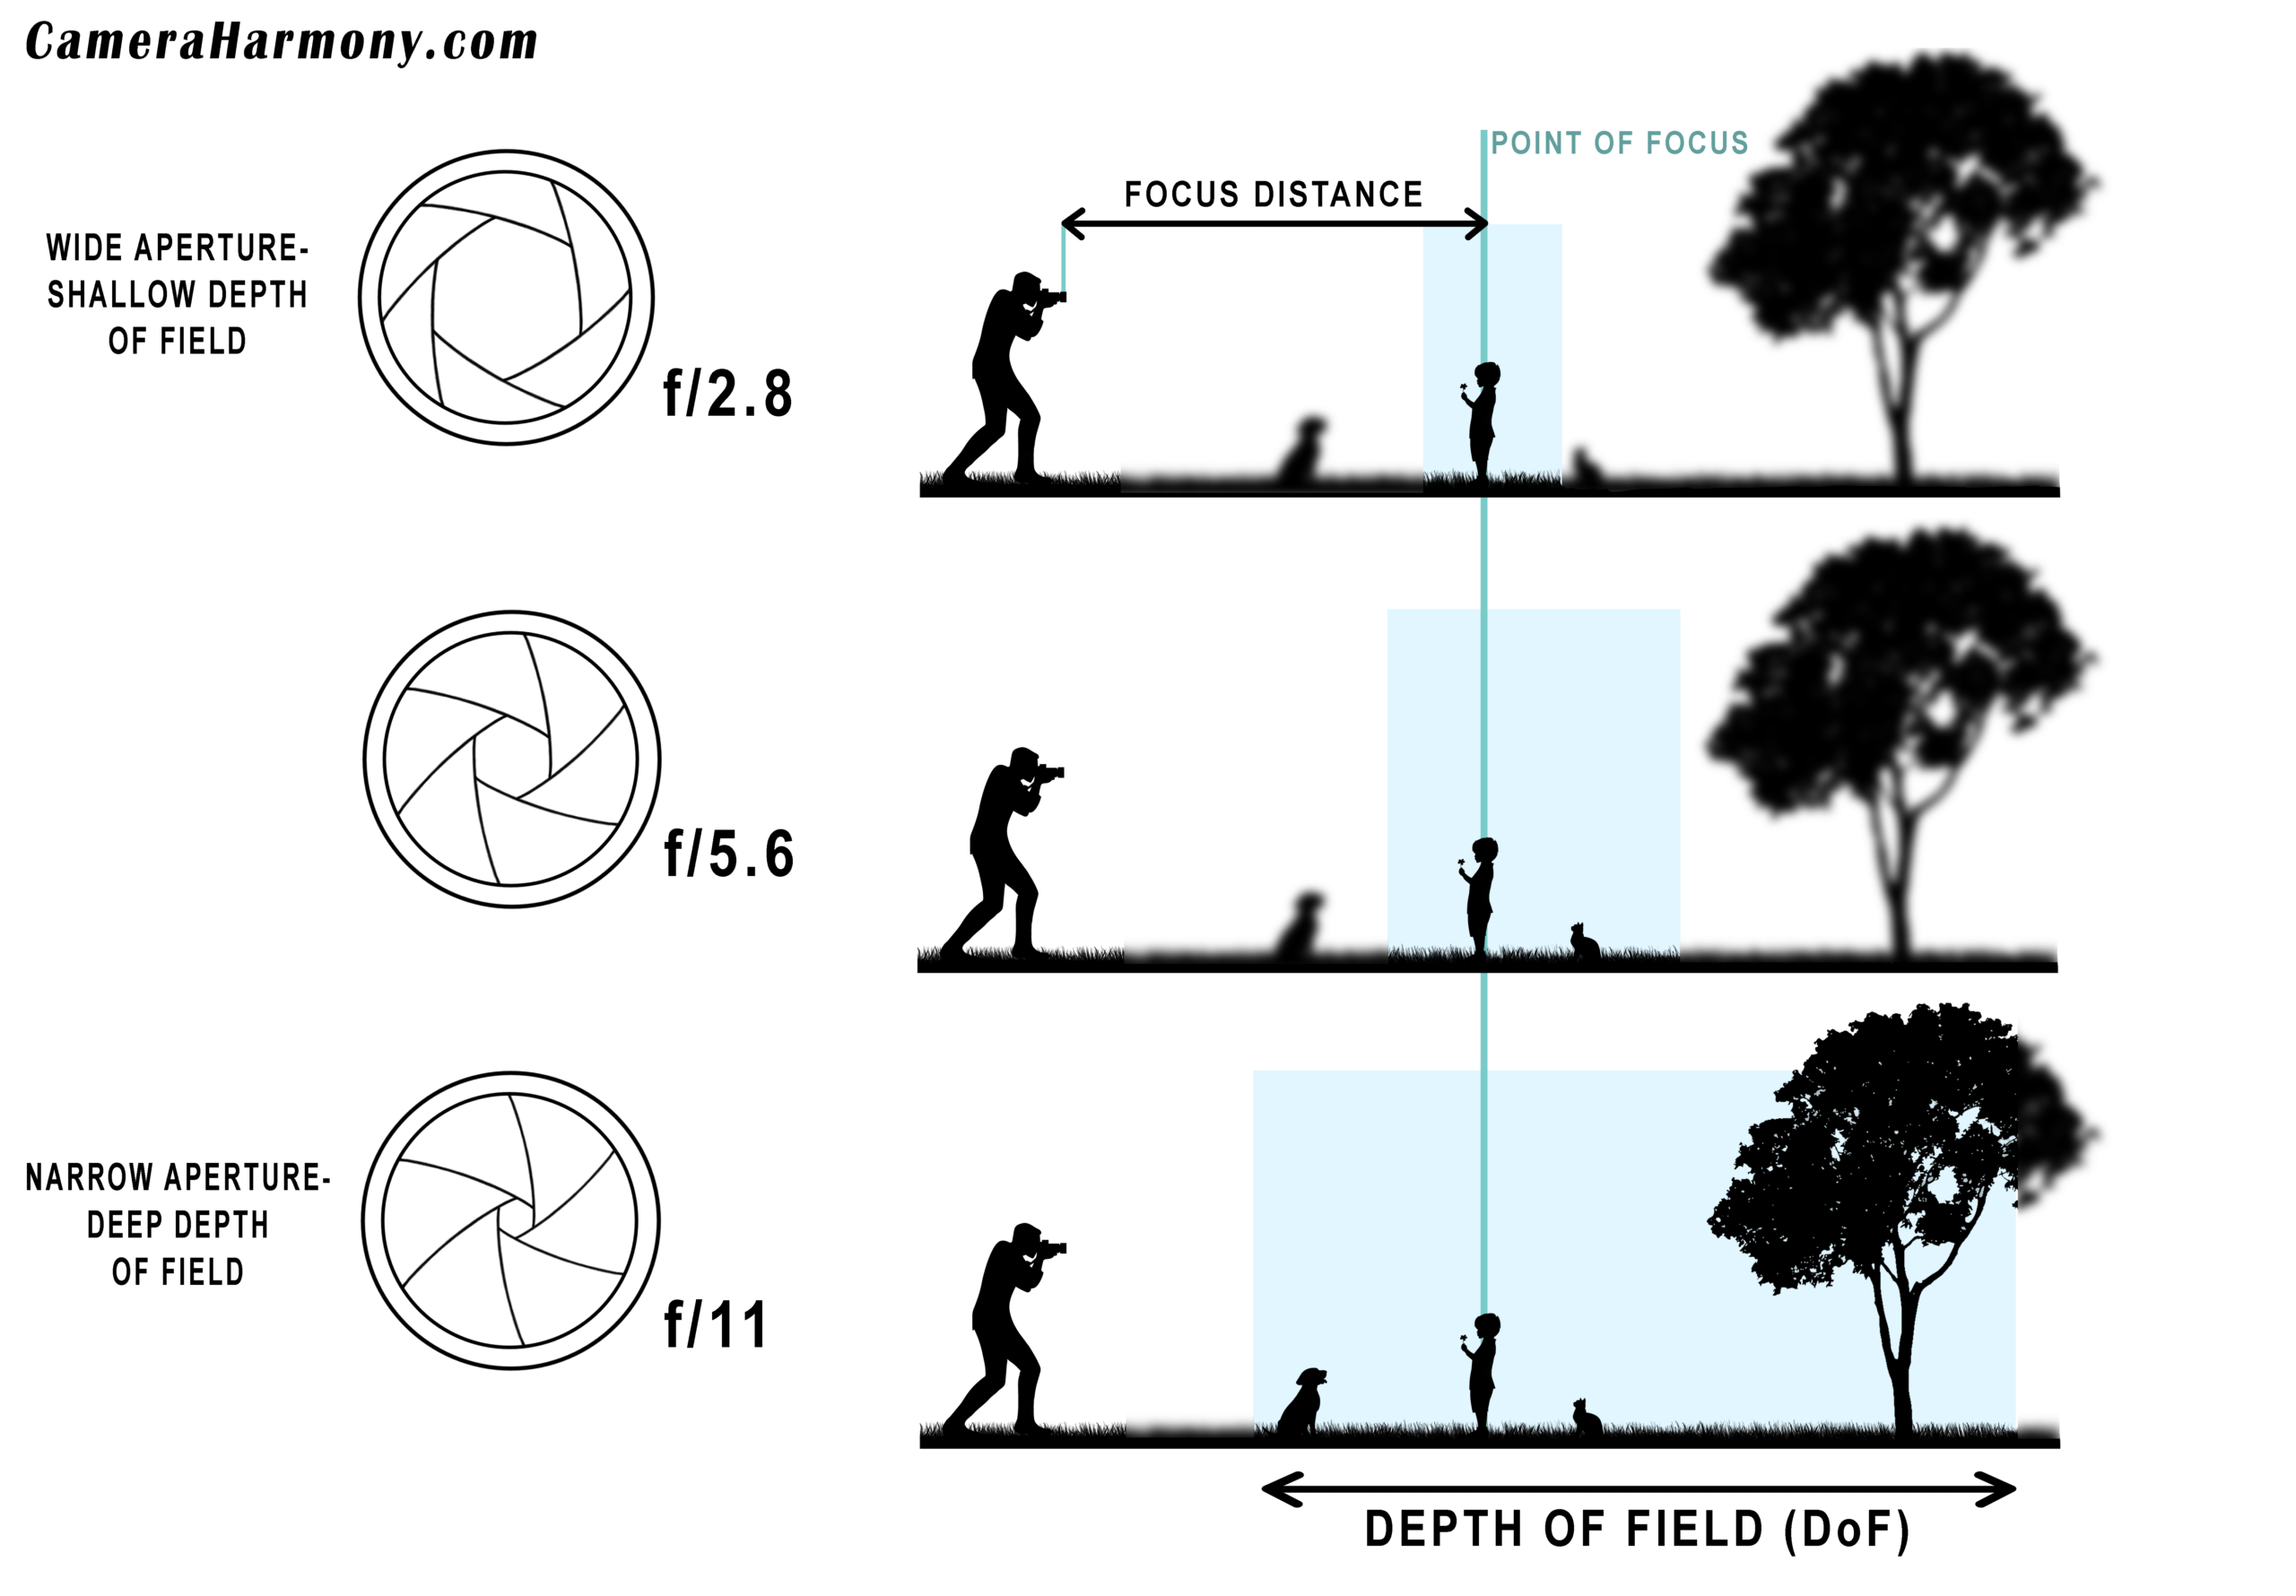
To discuss aperture, we must quickly discuss a common photography term, “depth of field.” Depth of field refers to how much of an image is in focus. When a depth of field is shallow, that tends to mean that just the subject is in focus, and the rest of the image blurs away. When a depth of field is deep, the subject, the foreground, and the background are in focus. This background blur is called a “bokeh.”
The aperture controls the depth of field.
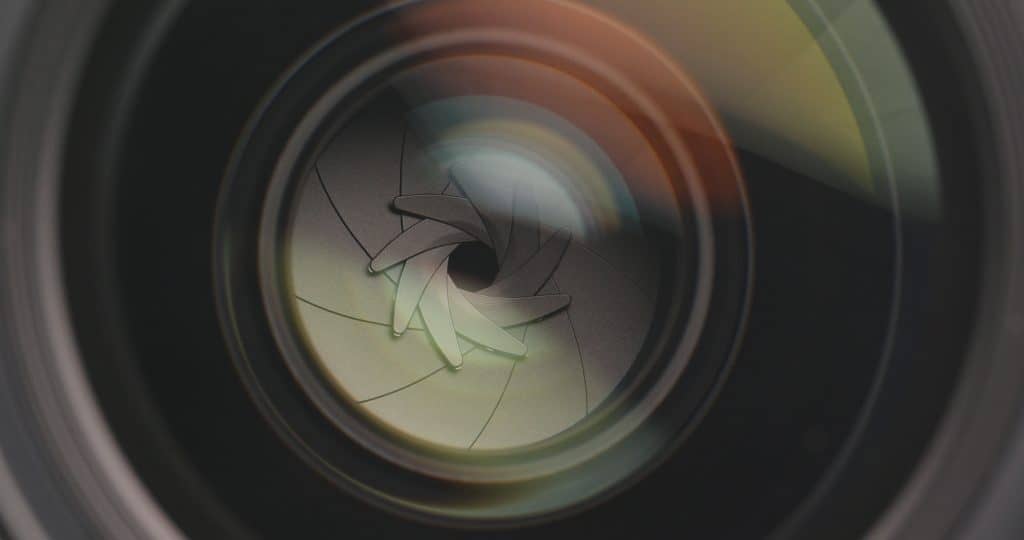
The aperture is the window in the lens that controls how much light does (or doesn’t) hit your sensor. It’s a hole, but I like to call it a window because it can ‘open and close its curtains’ to control the light impact. If you look inside your lens, you’ll see the aperture as a circle with blades. These blades combine tightly to make a small circle or completely retract to show a big opening.
The pupil in our own eyes is just like a lens aperture! Pupils get wide and round in the dark to let in as much light as possible and get smaller in bright conditions to minimize how much light comes in.
Aperture (also denoted as F-Stop or F/insert-number-here) are the numbers on your camera that can range from f/1.2 to f/64. The smaller the number, the wider your aperture. The larger the number, the narrower your aperture (a bit counterintuitive, I know). The wider the aperture, the more light it lets in, and the shallower the depth of field. The smaller the aperture, the less light it lets in and the deeper the depth of field.

What aperture you choose dramatically influences your personal style as a photographer. Some photographs with everything in focus, and some like it super soft and out of focus.
Aperture and Exposure
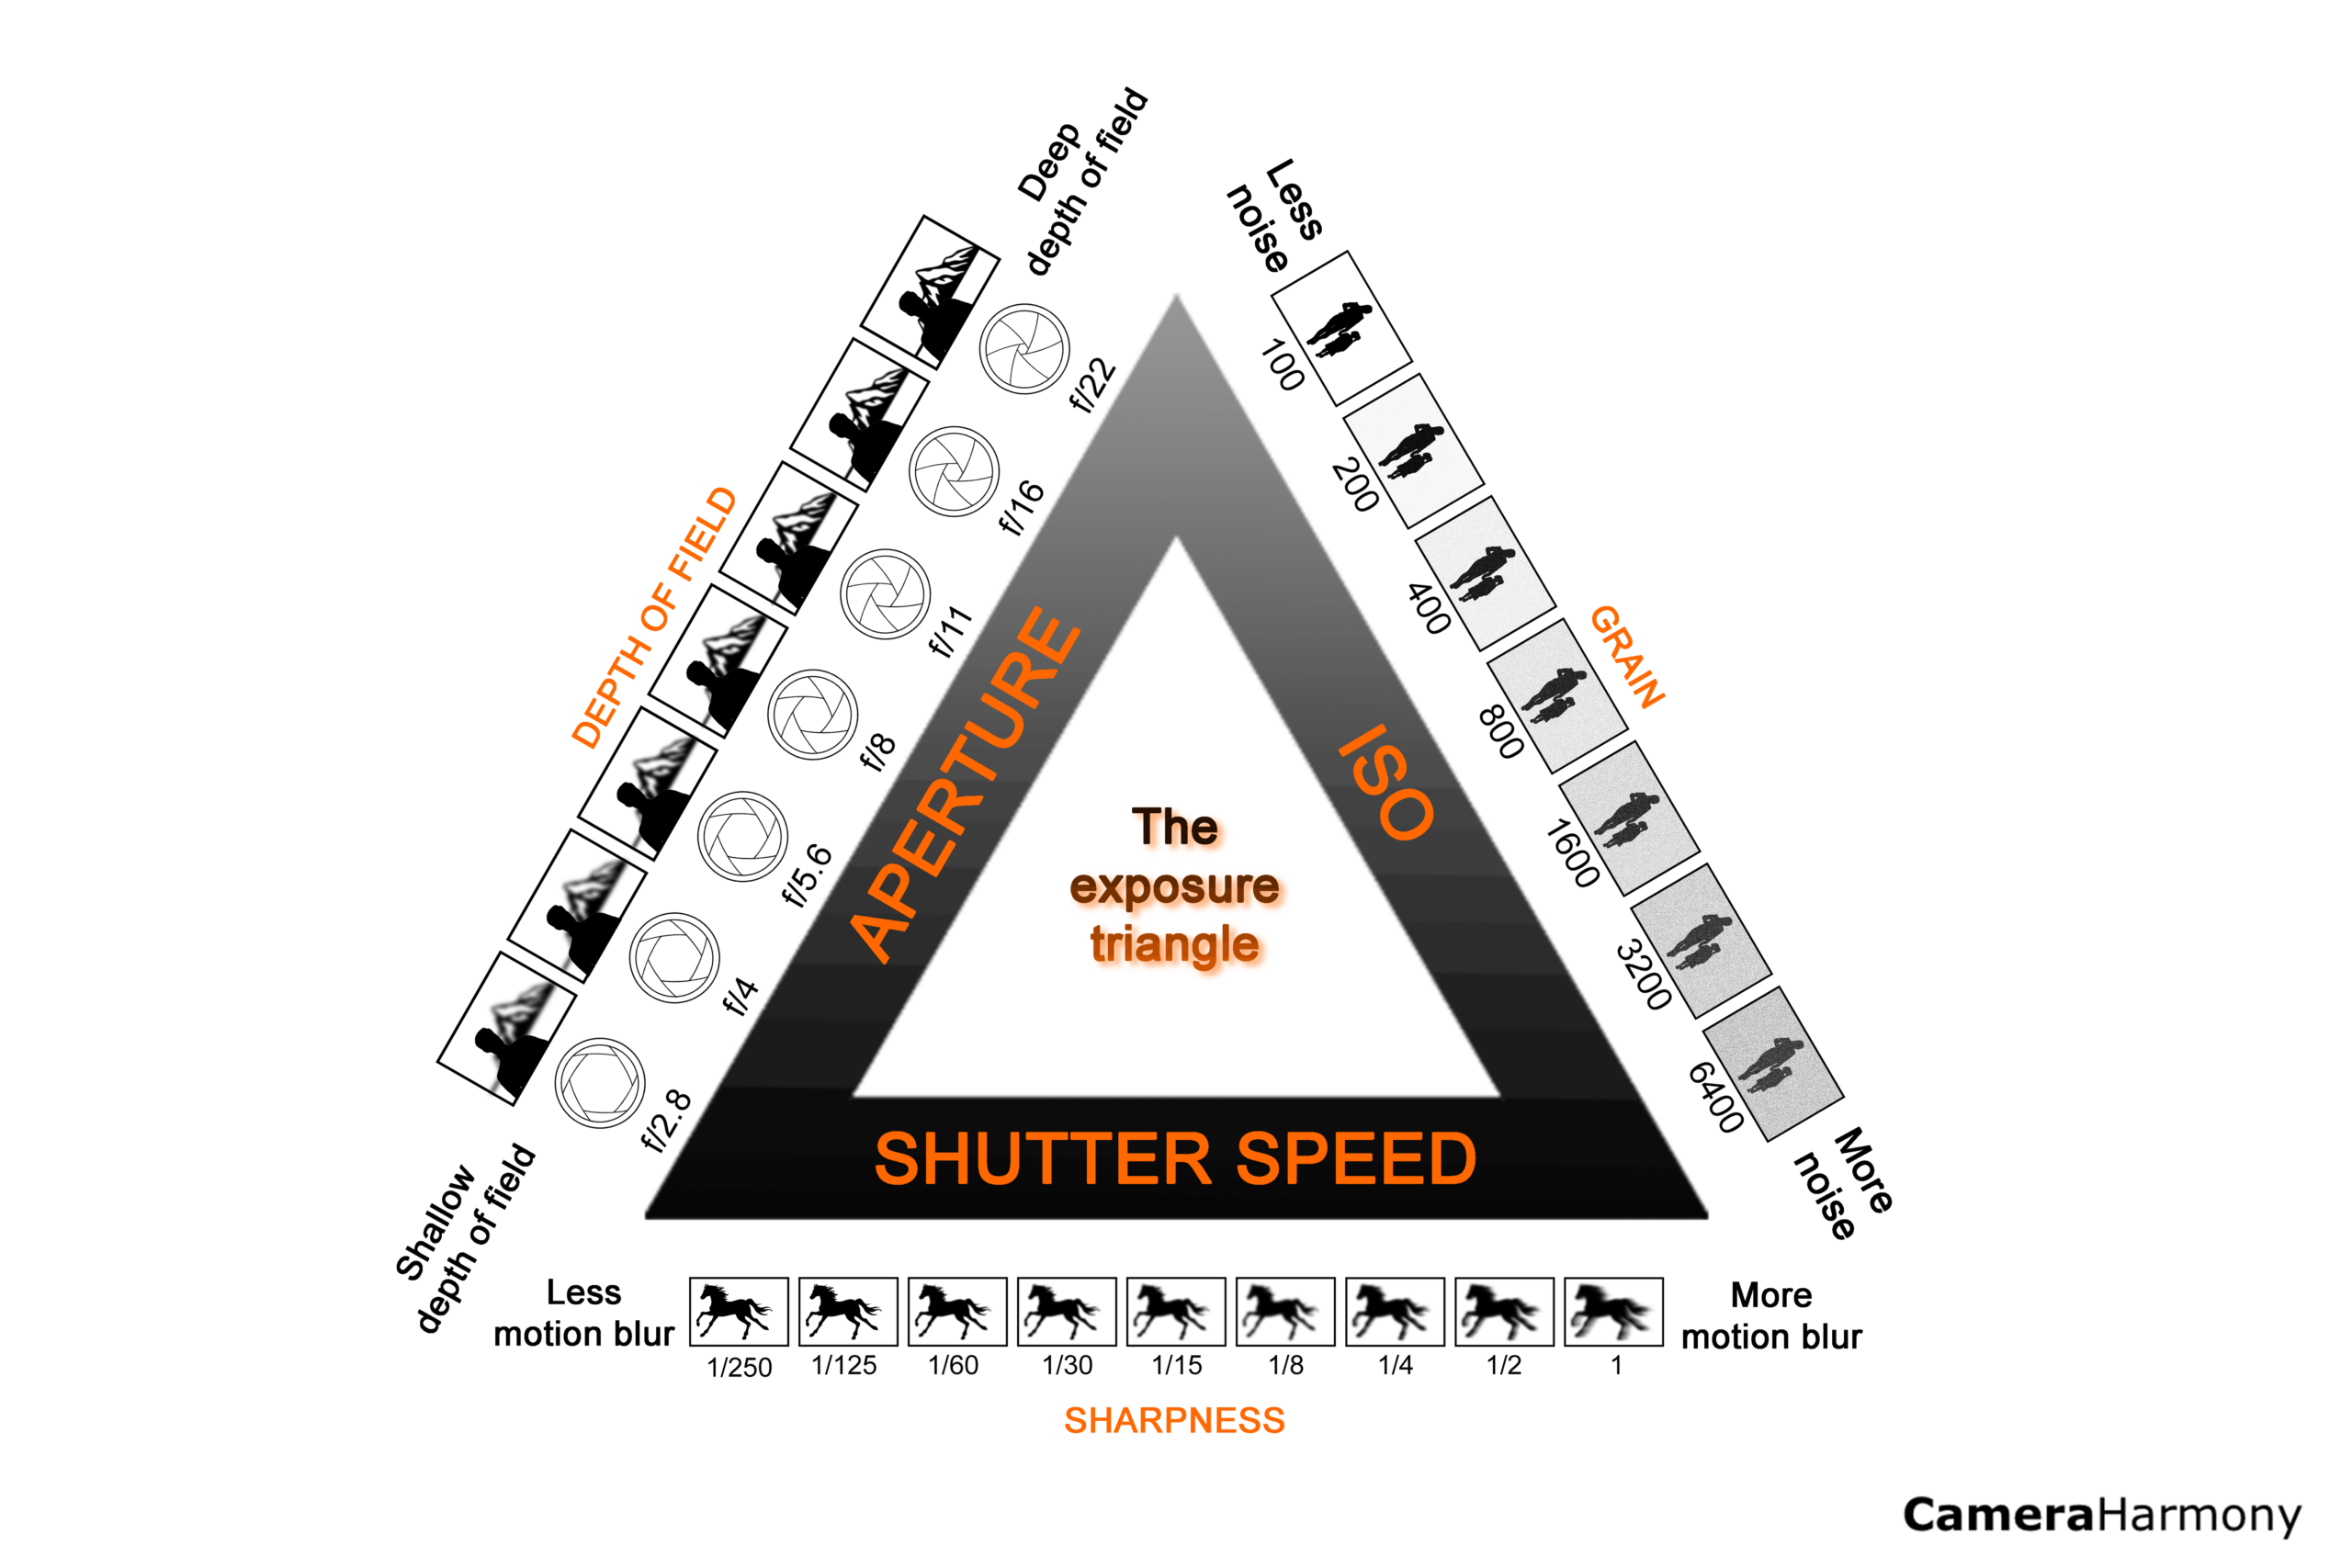
Exposure is the amount of light that reaches your camera. Too much light and your image will be too bright. Too little, and it’ll be too dark. Simple, right? To create exposure, you need your ISO level, your shutter speed, and (you guessed it) your aperture. Exposure is a formula.
ISO + shutter speed + aperture = exposure.
Like a mathematical formula, if one variable changes, the rest are affected by the change.
Here is their correlation, broken down in the simplest of explanations:
The ISO is your camera’s sensitivity to light. The lower the ISO number, the less sensitive the camera is to light (but the less noise the photograph has). The higher the ISO number, the more sensitive the camera is to light (but the more noise the photograph has). Noise is the obnoxious little specks you see in photographs.
Tip: ISO is the number on your camera that range from 100 – 126000 and higher. For most cameras, anything above 2500 ISO starts to show a little noise and goes up.
The shutter speed is how fast your camera takes a photograph. The higher the shutter speed number, the more frozen the action (but the photograph will be darker). The lower the shutter speed number, the more motion blur your photograph will have (but the photograph will be lighter).
Tip: Shutter speed is the numbers on your camera ranging from 1/-15 to 1/8000. 1/2000 – 1/4000 are the best to freeze action. 1/300 is excellent for portraits. Anything lower than 1/100 will begin to slow the camera down a lot.
Now, the aperture. The lower the aperture number, the more light the camera lets in. The higher the aperture number, the less light the camera lets in.
My tip to best work this formula is to eliminate one changeable component. The one that I always keep stable is the aperture. Because the aperture affects your depth of field, I always set my aperture to be as wide or narrow as I want for my photograph. Then, all I have to do is adjust my ISO and shutter speed to expose the image properly. Much easier to change two settings than three at once.
Variable Aperture
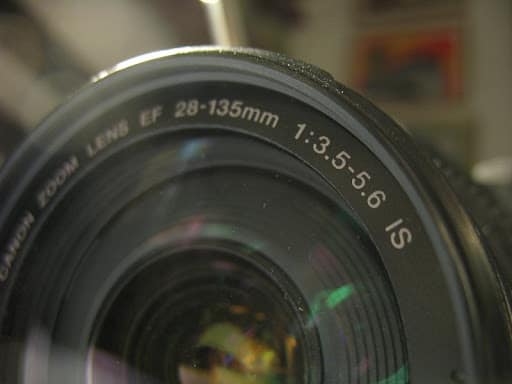
Some lenses don’t have apertures that you’re able to control. These apertures change their width depending on how much or how little you change the focal length. The lens’s focal length is the distance between the lens and the image sensor when the subject is in focus, denoted in millimeters.
Some zoom lenses will have their aperture range from wide when the lens is zoomed out to narrow when the lens is zoomed in. This can be problematic if you’re shooting in difficult lighting conditions because you’re not able to control how much light lets into the lens as easily as when you can keep the aperture the same size. However, these lenses tend to be lighter and less expensive, which is a big bonus!
An example of a lens with a variable aperture is Canon EF 75-300mm F/4-5.6. The aperture starts at an F/4 when the lens is at 75mm but then gradually changes to an F/5.6 as the lens is zoomed all the way to 300mm.
Fixed Aperture
These are the lenses you’re going to want to look at. Fixed apertures are apertures that you can control, and they do not change their width unless you manually make them. These apertures can also be significantly wider than variable apertures, such as widths of F/1.2, F/1.4, etc. That being said, these lenses can be much heavier and more expensive because of the consistent aperture.
An example of a lens with a fixed aperture is the Canon 70-200mm F/2.8 L IS USM. The aperture stays a consistent F/2.8 throughout the entire zoom range, from 70mm all the way to 200mm.
How Do You Control Aperture?
Aperture can be controlled in a variety of ways. You can either let the camera set it automatically with an Auto mode, or you can manually toggle the aperture.
Outside of Automatic, cameras usually have two modes: Manual Mode and Aperture Priority (AP) Mode.
Manual Mode is when you manually control all of the variables (as the name implies).
Aperture Priority Mode is when you set the aperture you want to keep. The camera adjusts the ISO and shutter speed to ensure exposure is ideal for your aperture selection.
I don’t like Aperture Priority mode because you have to remember that cameras are machines, not brains – they should not think for you. The camera’s programming may suggest that a specific exposure is ideal, but when you look at the photograph, you may not like what you see. In Manual Mode, you are the one who dictates how a picture should be exposed.
Some lenses have something called an Aperture Ring on them. This looks similar to your focus ring. The Aperture Ring lets you control the aperture directly on the lens rather than going through the camera. This is very common in videography lenses as it’s more challenging to control the aperture in the camera when it is filming something – but this feature has started to spread to more and more lenses as of late. Sony and Sigma both have Aperture Rings on their photography lenses.
How Does Aperture Factor into the Lens Cost?
A quick Google search on lenses will likely show you that lenses with wider apertures are more expensive than lenses with shallow apertures. Lenses with fixed apertures are more expensive than lenses with variable apertures.
Lenses with small aperture numbers are so expensive because the low number allows you to photograph in low light with higher quality. They’re also more complex to make. This is because a wide aperture lets you use a low ISO number and a high shutter speed number without getting a lot of noise.
My rule of thumb was always to invest in lenses with a lower aperture number because you can always narrow the aperture (increase the number), but you cannot decrease it lower than its maximum! Remember, it is always easier to raise your aperture if the image is too fuzzy than to have a lens that doesn’t go any lower.
Deep Depth of Field
Deep depth of field is when more of your frame is in focus. For example, the background, subject, and foreground are equally in focus and clear. Deep depths of the field are from narrow apertures.
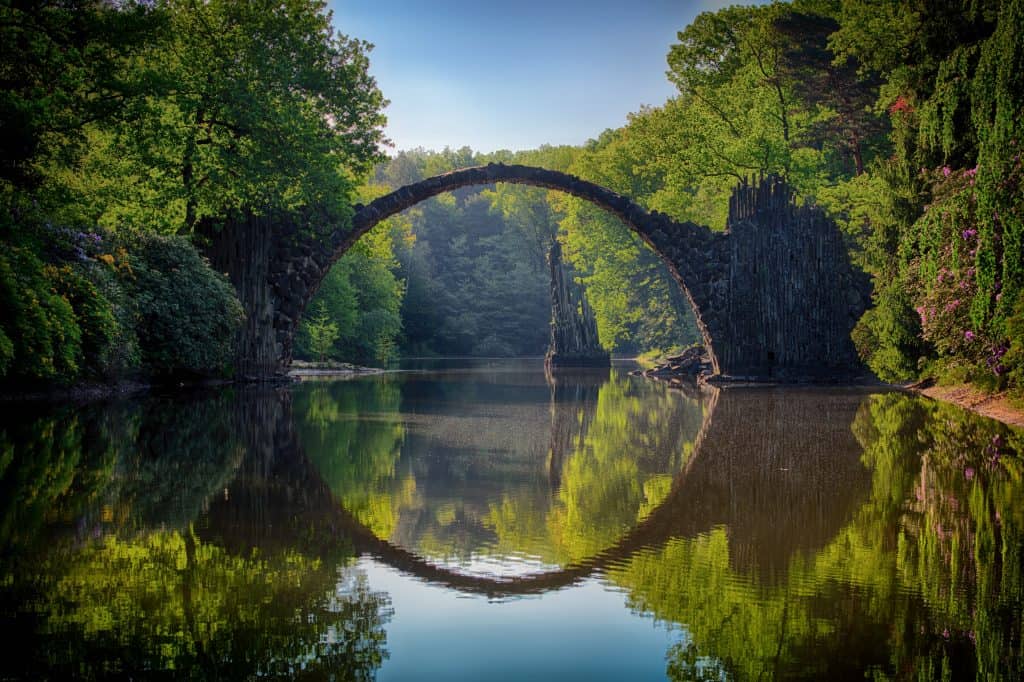
Although a blurry background has become the trendy type of photograph, deep depths of field are often found with landscape photographers, astrophotographers, and photojournalists. When the location is as much a part of the story as your subject, a deep depth of field is key!
Since the aperture doesn’t jump from either shallow and blurry or deep and in-focus, you will often be ranging in your depth of field depending on your photography. For example, many headshot photographers use a deeper depth of field because they want the subject’s entire face in focus but not so deep that the background is in focus too. The sweet spot is around F/8.0!
Remember that the narrower you make your aperture to create a deeper depth of field, the darker your photograph will be. Deep depths of field work best in bright and sunny conditions and can be very difficult to achieve in lower light.
Shallow Depth of Field

Shallow depth of field is the quintessential ‘professional photograph’ look. A lot of this is due to the average person not being able to take a photograph with this distinct look!
A shallow depth of field is when the subject is in focus, and the rest blurs away. This allows a beautiful separation between the subject and the background and ensures that attention is not taken away from the main point of the photograph.
Shallow depths of field are great to use when the background is less than ideal and distracts from your subject. It’s also great for detail shots, so your audience focuses only on the parts you want them to see.
A shallow depth of field is excellent for low light because the wide aperture makes the most use of the available light! However, you will need a filter for sunny locations.
The Big Problem: Focusing with Wide Apertures
As great as shallow depths of field sound, to any new photographer who has tried it, you may find that focusing is more difficult when you’re playing with wide aperture numbers of F/2.8 and lower. The most difficult is F/1.2 (the widest on most lenses. Some specialty lenses go to F/0.95, but they’re very niche and hard to find).
When you focus your camera on a subject, it establishes a focal plane. It has to be on the focal plane to get your subject in focus. Focal planes are imaginary horizontal or vertical lines. Anything that stands on the imaginary line will be in focus, and anything not on the line will be out of focus. Simple, right?
The problem with a wide-open aperture is that your invisible line is very narrow. As you decrease your aperture number and widen the opening, the invisible area in front and behind the plane of focus will get smaller and smaller. When shooting super wide open, like F/1.2, even the smallest movement out of the invisible line will cause your subject to be out of focus.
Fear not; there is a simple solution to this dilemma: move further away from your subject!
The farther away you are from the subject, the easier it is to get the subject in focus. You can get the subject in focus and still maintain an extremely creamy depth of field. This is because as you move back, your subject becomes smaller and fits on your invisible line better. This is how you can keep a creamy soft depth of field and still have your whole subject in focus. With new technology and higher megapixel counts, cropping a bit tighter is a breeze!
What Aperture Should You Use?
What aperture you should choose depends on several factors. Ask yourself these three questions first:
How much does my subject need to be in focus?
What is the lighting like at my photo shoot location?
What is the aesthetic of this photo shoot?
The first question already creates your baseline. If you’re shooting products or fashion, more of your subject needs to be in focus to show off the item you’re capturing. But if you’re photographing dreamy portraits, you will want a more shallow depth of field.
Since the aperture is the direct pinhole that lets light hit the camera sensor, you also have to factor in what the lighting is like at your location. If your location is super sunny and bright, but you need to use a shallow depth of field, throw on a neutral density filter (this limits the amount of light that hits your sensor)! But you’ll need a narrower aperture if you do not have a neutral density filter. Likewise, if your location is very low light, you’ll need to use a wider aperture to work with the available light or bring in artificial lights to shoot a deeper depth of field.
Depth of field correlates directly with aesthetics – deeper depths of field look more editorial or photojournalistic, while shallower looks appear more whimsical or portrait-like. The type of photographer you are relates heavily to this choice.
Bonus: Why is Aperture Also Called F-Stop?
Apertures are denoted by F/–.– because this is a mathematical formula where F is the focal length, the slash mark indicates division, and the number given denotes the radius of the aperture opening.
Conclusion
Now that you know what aperture is, it will become easier to make a lens choice!
Remember, you can always narrow an aperture, but you cannot make it wider than its widest point – so look for lenses with wider apertures so that you have more versatility. Fixed apertures can be controlled, and variable ones cannot.
The aperture plays directly into the exposure equation, so try to decide your aperture before adjusting the ISO and shutter speed (as this will make your settings easier!).
Finally, play around with shallow and deep depths of field and figure out where your personal style lies. Now go out there and capture great photographs!