

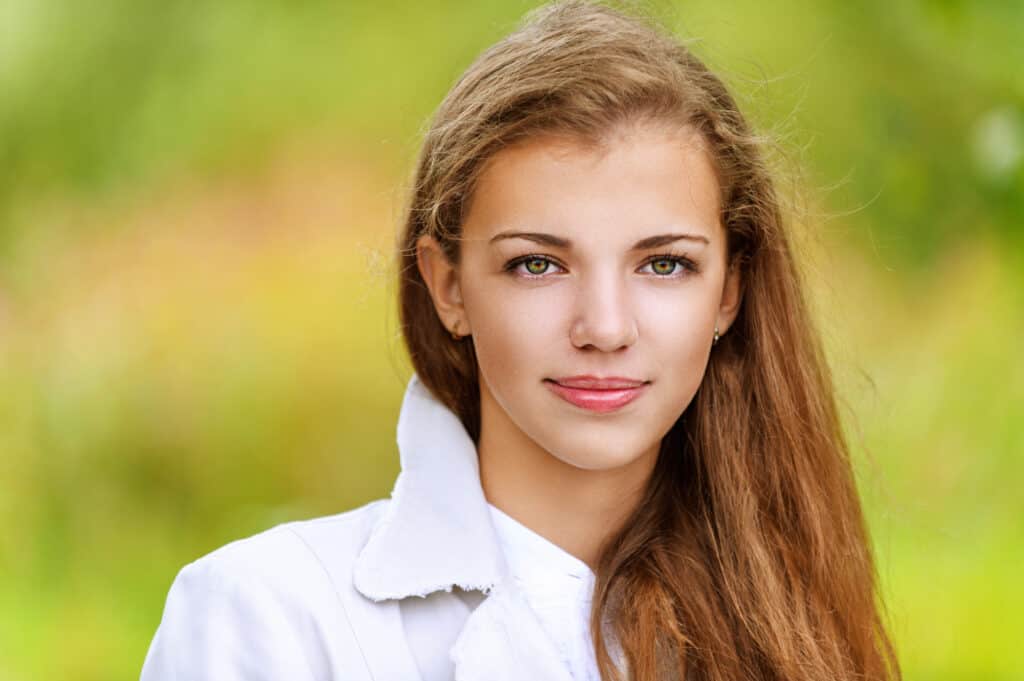
A Portrait from the French verb “portraire” to portray, is defined as a likeness of a person especially one showing the person’s face, however a portrait should do more than portray the physical likeness of a person. A good portrait should reveal the subject’s unique nature.
The aim of a portrait is to evoke an emotional response in the viewer, a curiosity about as well as empathy towards the subject. In this article we will explore some of the steps you can take to bring your portraits to the next level.
Portrait photography types
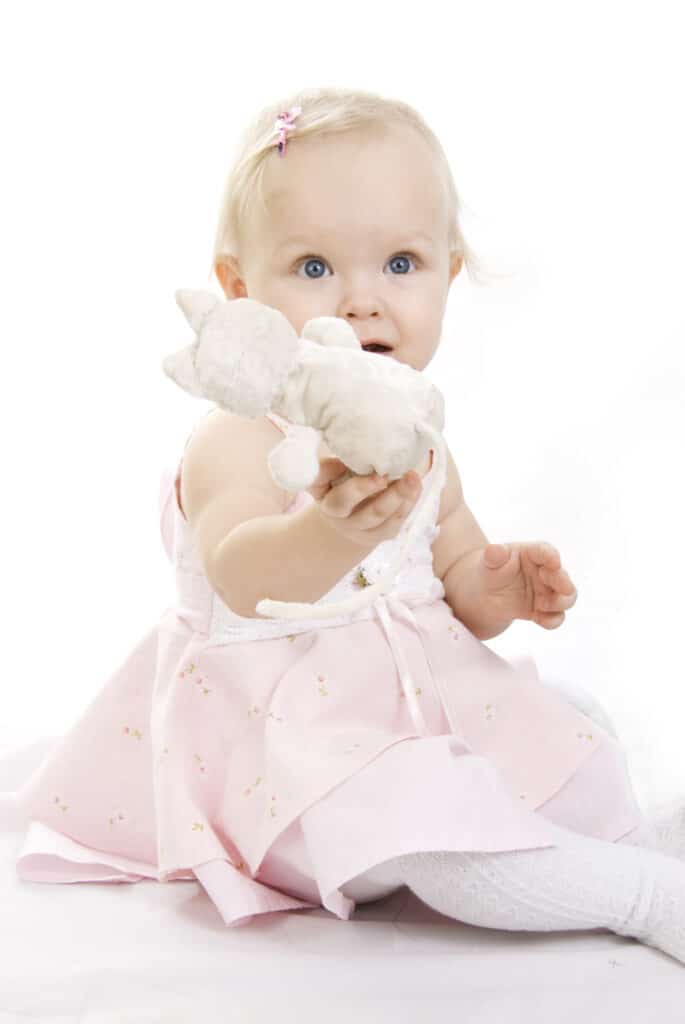
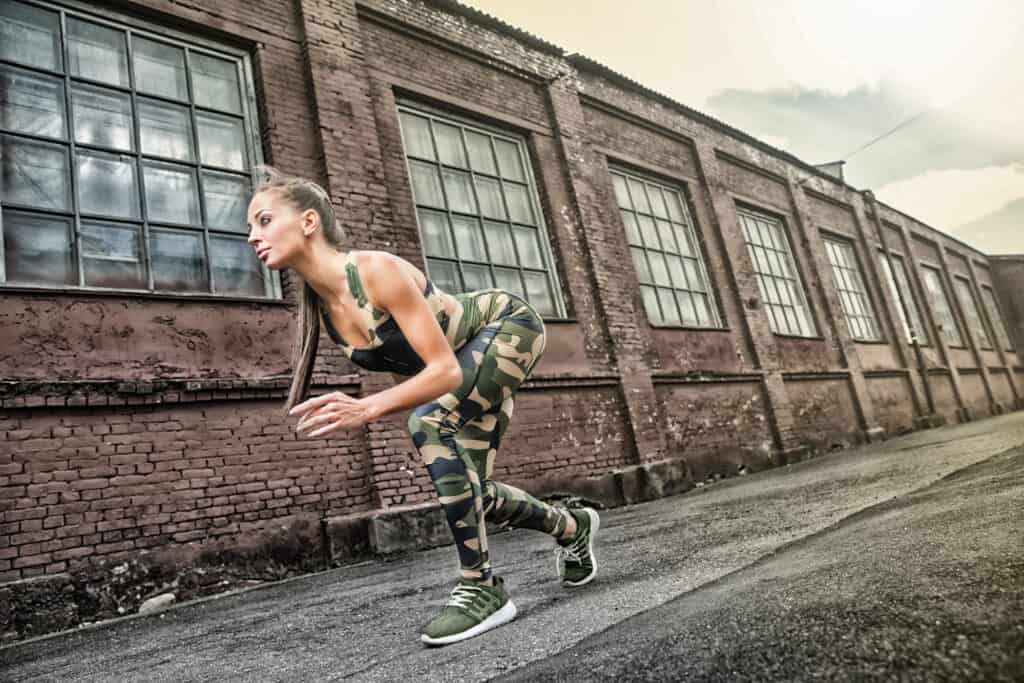
There are a number of portrait photography styles, knowing the kind of portrait you want to shoot will help you in determining the location, wardrobe, props, models and most importantly the light setup needed to create the final vision. Are you trying to portray the subject’s beauty, femininity, masculinity, strength, power or a child’s innocence and excitement? Take the time to research and learn the different photography styles and the steps needed to execute them.
- Formal portrait/Headshots
- Family portrait/newborn/Lifestyle
- Environmental portrait
- Boudoir
- Glamour
- Fashion (editorial/high fashion/catalogue)
- Conceptual
- Surrealism
Planning the shoot
Plan your photo session, I find having a well laid out plan for a photo session makes for a smooth flowing shoot. Freeing you to engage with your subject, directing the shoot and making sure you achieve the goals set for the session.
Attempting to make decisions on props,light, or location during the session will distract your subject and interrupt the flow. Here are some suggestions of items to include in your plan
- The concept: This is a brief description of the idea behind your photo session and the style you will be using to execute it.
- Where and how will the final image be used. Whether the image will be going to print, or displayed on a digital platform. knowing how the image will be used is important in informing your composition decision. How you frame the shot vertically/horizontally. Or as in the case of editorials the amount of negative space around the subject.
- Create a mood board on a sharing app such as pinterest. Upload sample images in various styles, highkey/lowkey/vintage/urban/black and white etc. You can use this to communicate with your clients and assist them in deciding on the final look.
- If you are looking to execute a particular concept, make a list of poses, positions, expressions as well as ways in which the models interact with each other and their environment
- List the clothing items, colors, and styles as well as accompanying accessories.
- List of props needed to execute the concept.
- Timeline for the shoot: This will serve as a guide during the shoot, to make sure you are able to complete the shoot within the allocated time, and to avoid exhausting your model.
- Shoot Date/Time
- Shoot Location(s) -Include directions
- Your model’s contact details
- List of equipment needed on the day (Cameras/lenses/filters/Camera batteries/memory cards/tripods etc)
- List of lighting equipment (Speed lights/studio lights/reflectors/light boxes radio transmitters etc.). Diagrams with your light setup, this is especially important if you are using a light assistant.
- Water,snacks, blanket,umbrella, change of clothes, to keep yourself, model and crew warm/cool and hydrated.
- And last but not least, backup (camera/memory cards/batteries etc.)
Know your gear
Portrait photography requires you to have a high level of alertness, you need to be present for your subject, engaging with and directing them. As such having an intimate knowledge of your gear and being able to make technical and artistic decisions on the fly is imperative to the success of your shoot.
Portrait Lenses
It is possible to shoot a portrait with pretty much any lens, depending on the type of portrait you wish to capture you may consider the following lenses:
- 50mm/85mm f/1.8 lens
The 50mm f/1.8 Lens is a prime lens, this is a rather affordable, relatively light weight lens. At 1.8 this is a fairly wide aperture letting in a great deal of light, this makes it especially useful in low light situations. When used wide open it can result in a soft beautifully blurred background, also known as ‘bokeh’.
This being a fixed focal length lens, you would need to come real close when taking a close up of your model’s face, If you are not very familiar with your model, this lens might leave you both a little uncomfortable.
- Wide Angle lens 16-35mm
This lens is best suited for environmental portraits, allowing you to include a large portion of the background, and help add to the narrative of the image. The short focal length (16-35mm) means that you can hand hold the camera while shooting at slow shutter speed without the risk of camera shake. Wide Angle lenses have an inherently large depth of field, which means that most of the scene will be in focus.
Use this lens creatively to capture awesome portraits in unique perspectives. Avoid shooting real close and filling the frame with your subject’s face, this will result in exaggerated/distorted facial features, similarly hands and feet stretched forward will appear disproportionality enlarged.
- Telephoto lens 70-200mm
A personal favourite of mine, in contrast to the wide angle lens a telephoto lens of this range, has the effect of compressing perspective, resulting in flattering portraits.
Additionally such a lens will allow you to keep a comfortable distance from your subject, while still being able to zoom in to capture subtle facial expressions. Telephoto lenses have a shallow depth of field, this will come in handy if you wish your subject to stand out against a blurry background.
Long lenses are heavier by design. To avoid camera shake when working with long lenses, be sure to use a fast shutter speed, as a general rule, your shutter speed when shooting at 70mm should not be slower than 1/80 or 1/200 when shooting at 200mm. If your telephoto lens comes with a stabilization button, be sure to switch it on when shooting handheld, and to switch it back off if shooting on a tripod.
Polarizing filter
If your model is wearing glasses, you may end up with unwanted reflections, attaching a polarizing filter to your lens can help reduce such reflections.
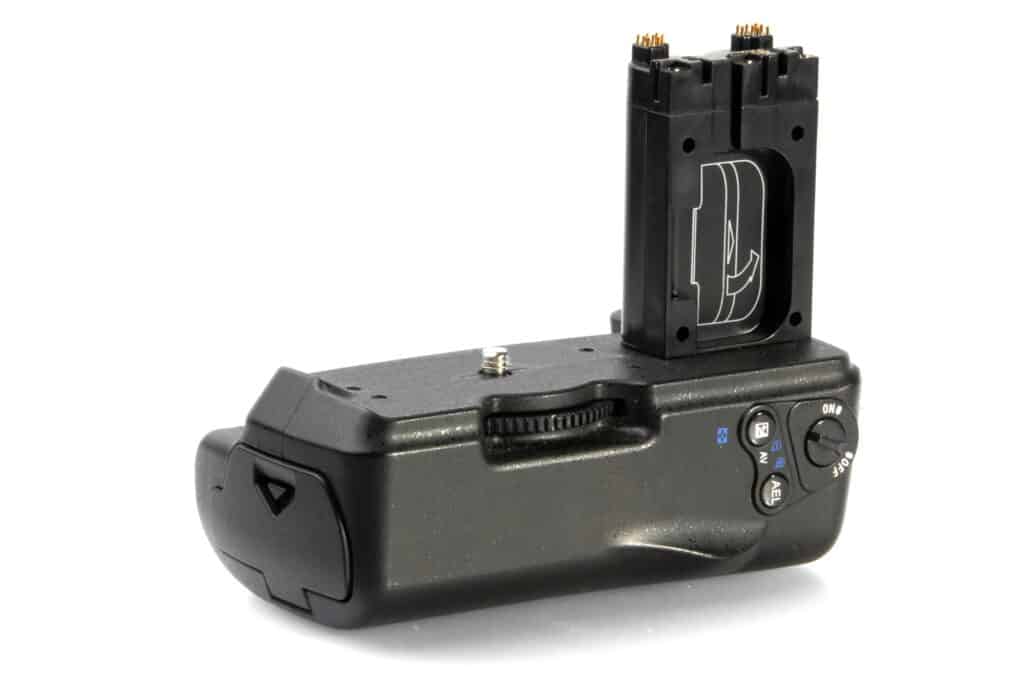
Battery grips
A battery grip is a device that attaches to the bottom of your DSLR. It can hold more than one camera battery, as well as having a shutter button. Here are some of the advantages to using a battery grip, for portrait sessions:
- Providing an extra power source, saving you having to change batteries in the midst of the shoot.
- The shutter button comes in handy when holding the camera vertically.
- The added weight of the battery grip acts as a stabilizing force, keeping your camera steady when working with heavy lenses.
Memory cards
Memory cards come in various brands, sizes and speeds. Selecting a reputable brand may be worth the extra cash, to avoid losing your images due to data damage.
The memory card’s speed refers to the speed at which data is written to the card as you capture the images. If using an especially slow card you may notice the camera lagging, when trying to capture fast paced/action images, where you are taking several images in one burst.
As an extra precaution, you can opt to divide your session over a number of cards, should you damage or lose one of the cards. The remaining images will be preserved.
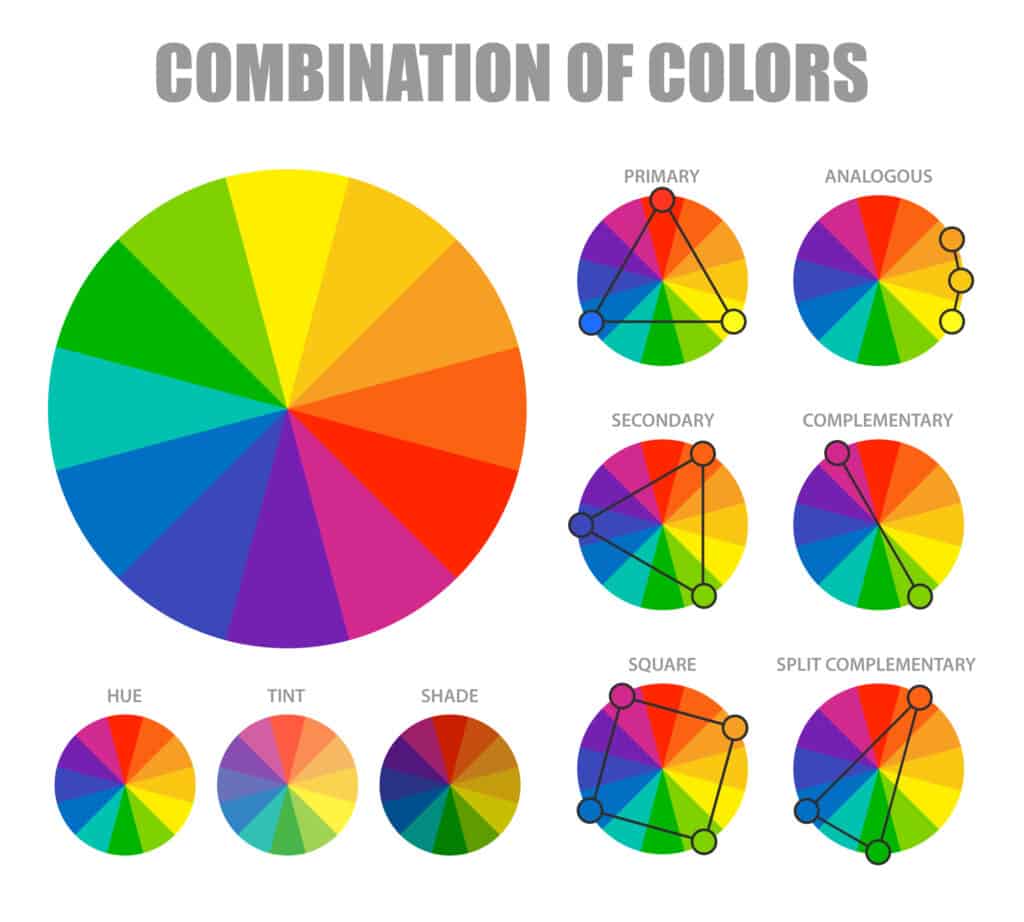
All about color
Color does more than add beauty to an image, it sets the right mood for your shoot. Learning about color theory, how colors interact with one another, as well as our emotional, psychological and cultural responses to colors, will go a long way in helping you determine the color palate for your shoot.There are a number of color wheel apps available to help you create the desired color scheme.
A complimentary color scheme will result in a high contrast/loud image.
Take into consideration the colors of all the elements of the shoot:
- Natural environment when shooting outdoors, season and time of day
- Studio backdrops
- The subject’s wardrobe
- Any additional props
- Light source(s), ambient light, studio lights, speed lights
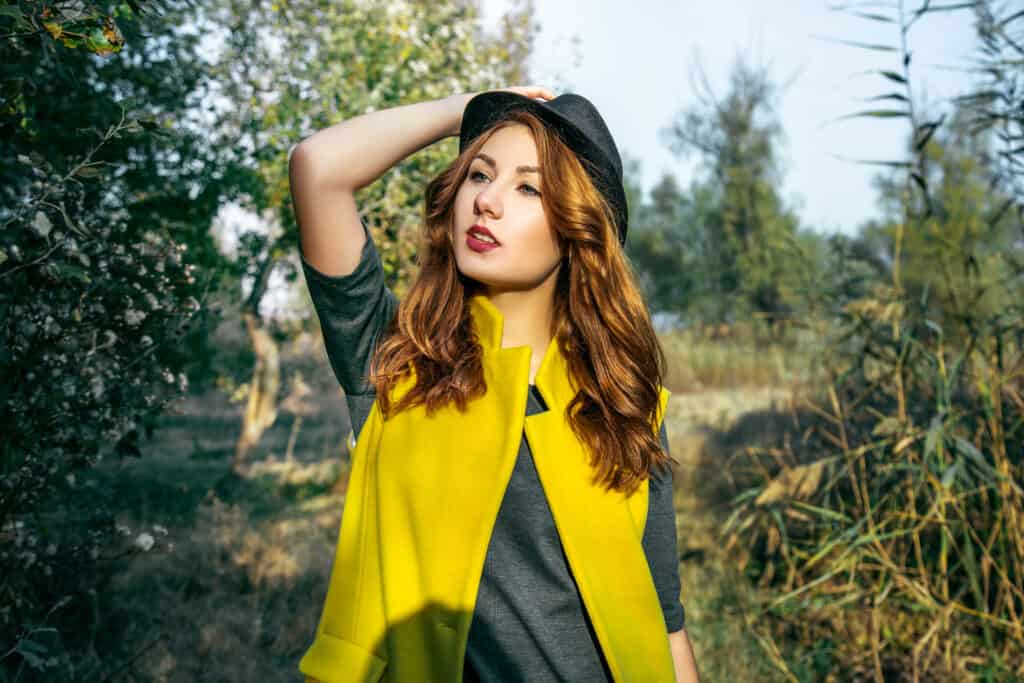
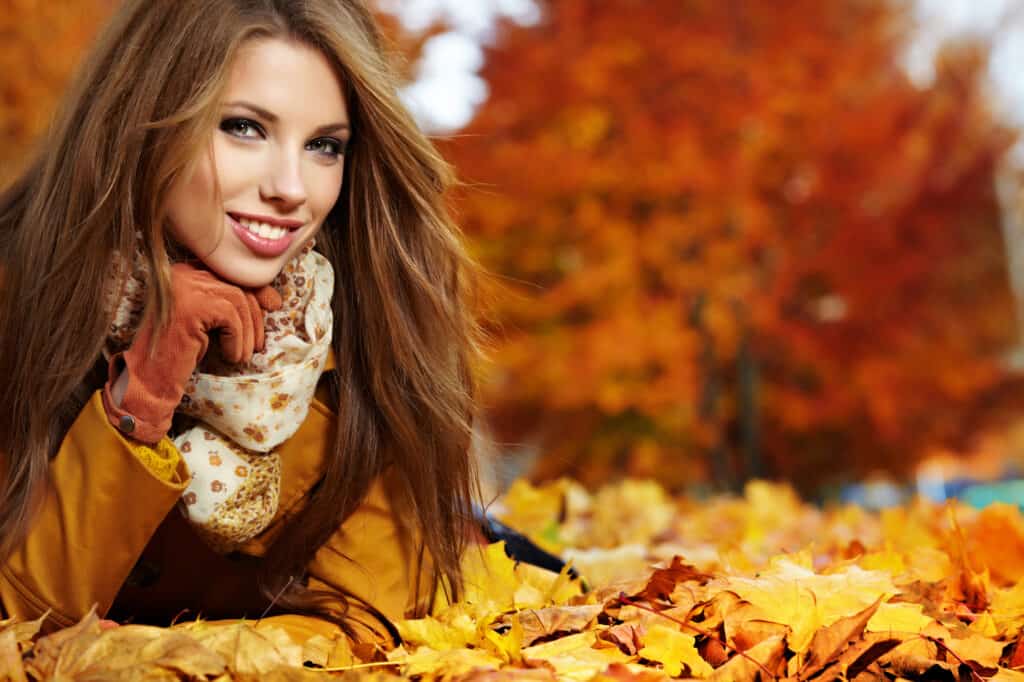
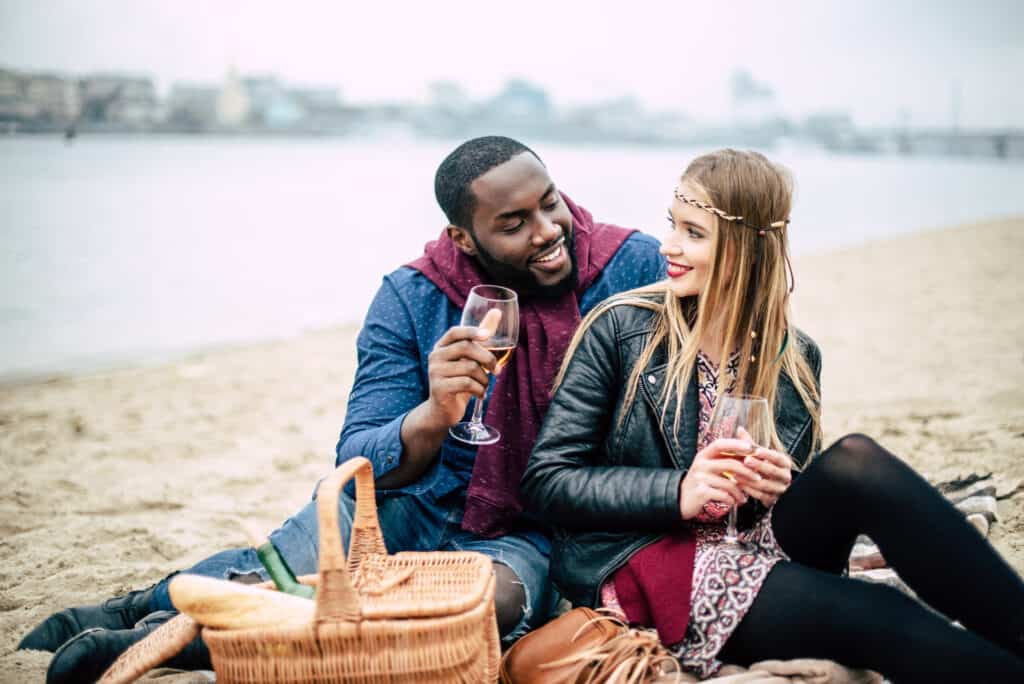
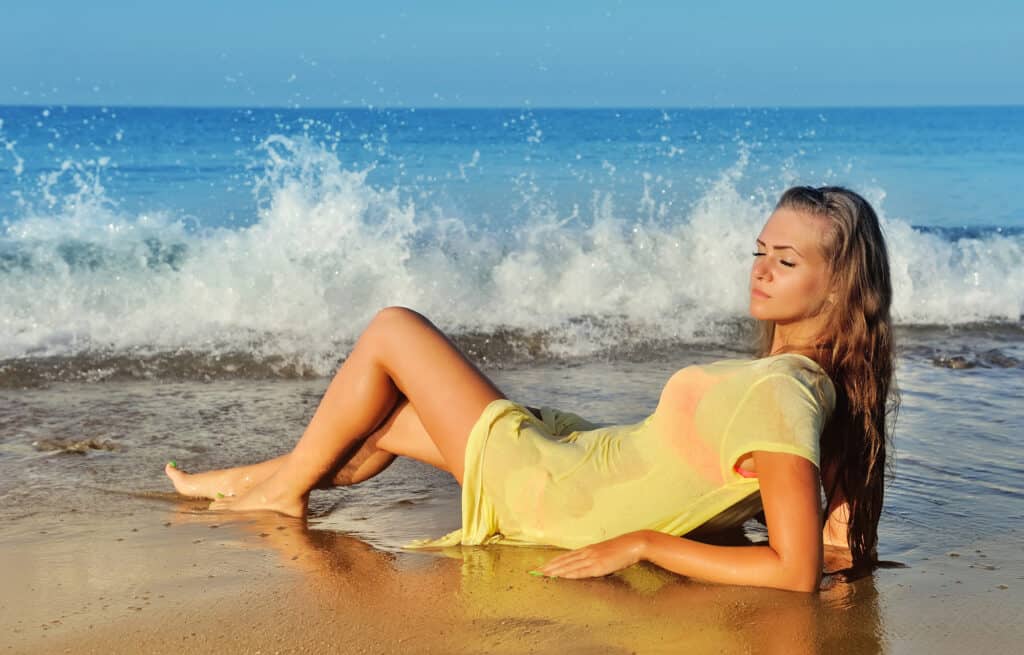
This scene features an analogous color scheme. Analogous colors are next to each other on the color wheel, evoking a feeling of harmony. Additionally black and/or white serve as accent colors.
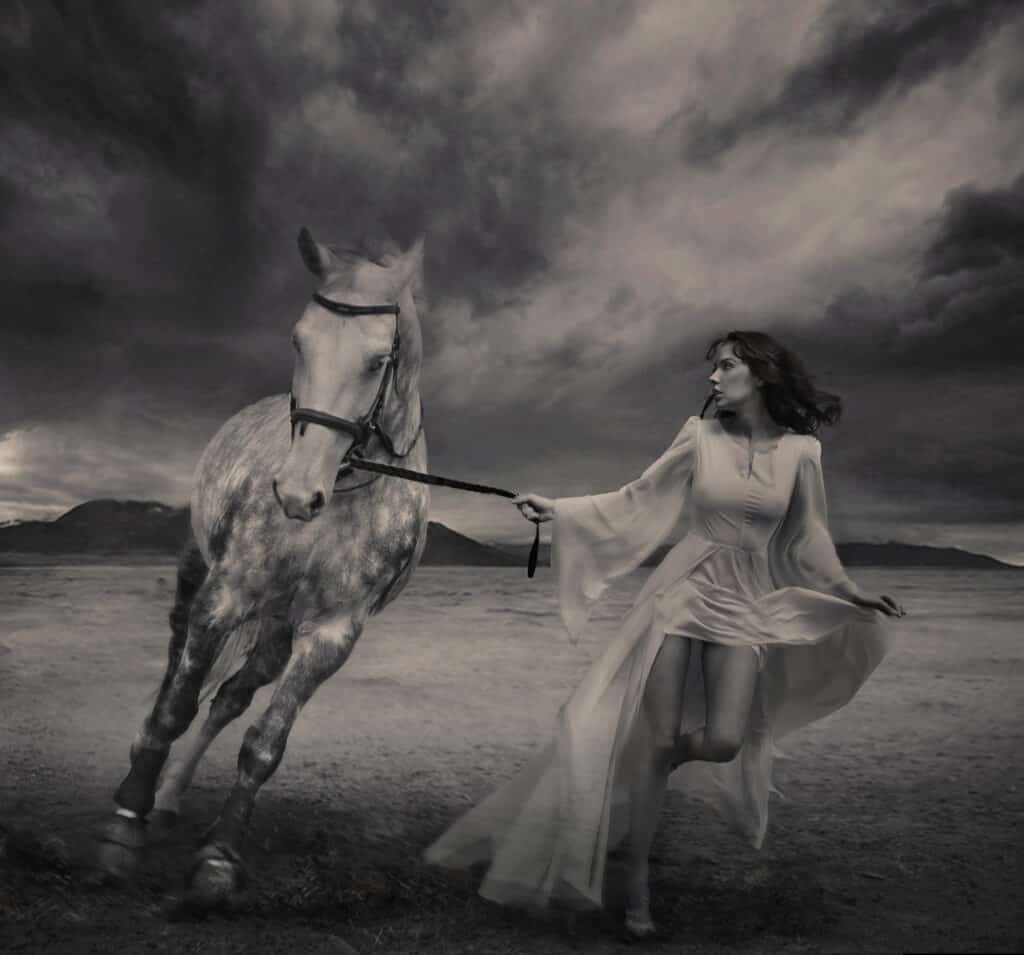
- Color for Black and white
When setting up for a black and white shoot, consider a color scheme with a wide range of tonal values. Such that when the image is converted to black and white, its dynamic range would include the blackest black, the whitest white in addition to a variety of grey tones in between.
Wardrobe
If the subject’s character is the main focus of the portrait, aim to keep the wardrobe neutral, avoid strong patterns, logos, text etc. Consider contrasting your subject’s wardrobe to the remaining elements in the shot. A brightly dressed subject would stand out against a muted background and vise versa.
Props
Props introduced on the set can become an integral part of a shoot, further enhancing the scene, setting the mood, and adding context. This is a great tool to help bring your concept to life, additionally they give your subject something to interact with, lessening their anxiety.
Hats, glasses, scarfs, books, tables, chairs, toys, flowers, musical instruments, tools, etc. make for great props.
Lighting the set
The word Photography has its origin in the Greek language, where “photo” stands for light and its suffix “graphy” stands for writing. As such being able to control the quality and quantity of light in your set, is akin to using a paint brush to paint the contours of the face. As well as allowing you to control the ambience/mood of your photo.
The quality of the final image is highly dependent on the quality of the light, if the light is mediocre, we can not expect anything more than a mediocre photo.
Having decided on the concept of your shoot, the next step would be to decide on the light setup best suited to reflect the mood of your shoot. Strong harsh lights with strong areas of light and shadows may imply power or drama. While a softly lit scene evokes a gentler calmer mood.
Natural light
- Using natural light when available is a great asset for on location shoots. To make the best of soft, warm directional light. Aim to shoot in the early hours after sun rise, or in the hours preceding sunset (The golden hours).
- Cloudy days act as a giant light diffuser, cutting out some of the harsh sun rays, and producing a soft beautiful light.
- Failing that look for shaded areas, at an entrance of a garage, under a bridge, light spilling into the space from the windows. You can opt to hang a white sheet or a frosted plastic curtain over the window for extra light diffusion.
- To obtain soft shadows on your subject’s face, and reduce the appearance of imperfections, consider using a “reflector” to light the darker side of your subject.
- If you are only shooting the subject’s upper body an additional reflector placed beneath your subject’s face will fill in the shadows further and create strong beautiful “catch lights” in his/her eyes.
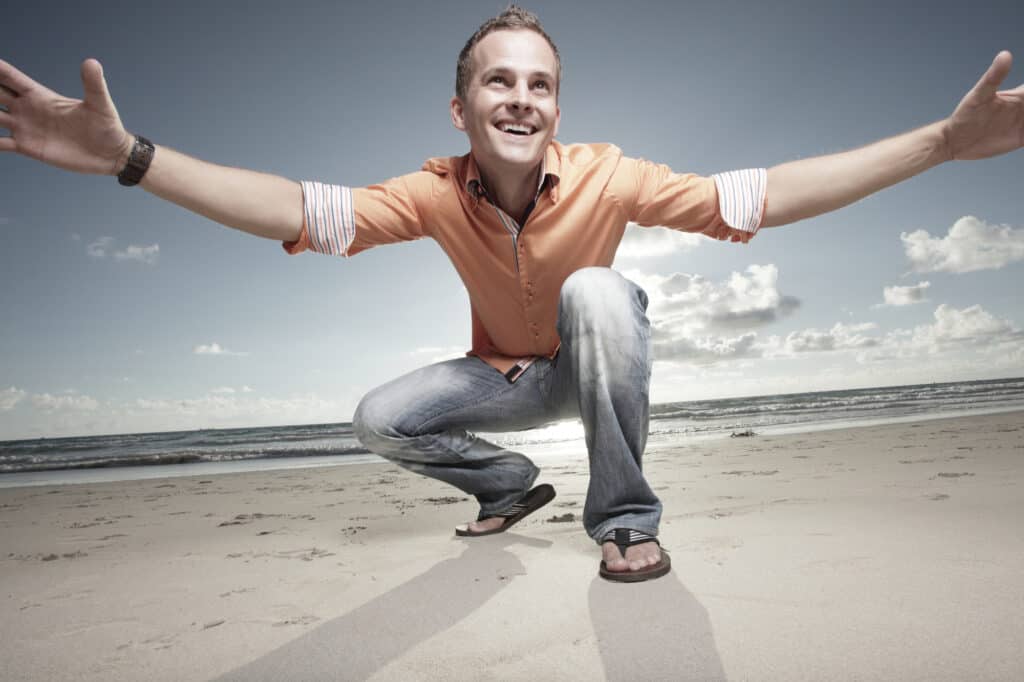
- Natural reflectors
When shooting outdoors lookout for objects that would naturally reflect the light, to incorporate in your set. For example when at the beach the white sand will act as a giant reflector if the model is sitting down and close to the sand. When shooting in the city, a white wall can act as a reflector. Similarly when shooting near water.
On camera flash/Fill light
Most midrange DSLR cameras come with an inbuilt flash. Take note that this flash is not intended for use as the only light source. Due to its placement right above the lens, the resulting images are unflattering.
On camera flash works well as a fill light. When shooting outdoors in the harsh sunlight, the resulting image would have high areas of contrast-light and shadow-, to overcome this you may enable your in camera flash, this will brighten up the shadows on the face, rendering the image slightly softer.
Alternatively you can have your model with their back to the sun, and light up the face with the on camera flash.
External flash
Whether you are shooting in a studio or on location, pay particular attention to the placement of your model in relation to the light. Having your subject face the lights straight at a 90 degree angle will give your subject’s face a rather flat uninteresting look.
- For a more natural look, set up your main light stand such that the light would fall at a 45 degrees angle and at a level slightly higher than your subject head. This is how the human eye is used to seeing sunlight beaming down.
- Alternatively lighting your subject from below will result in a dark mysterious and sinister look .
- For clean flawless skin, pose your model such that her face is directed towards the light, while her body faces away from the light will create nice shadows on the model’s body accentuating it’s curves.
- For an even softer look, use a second light or a white reflector on the opposite side of your main light, this is your fill light, it will work to reduce the shadows on the side of the face, not hit directly by the main light.
- Forgo the fill light to create drama and mystery with the strong areas of lights and shadows.
- If you wish to reduce the face lines, it is best to use frontal lighting. Use the largest light source available to you, positioning the light as close to your model as is possible
- There are a number of light modifiers, each of which produces a different quality of light. Try and experiment with a number of modifiers until you reach the look you are looking for.
- Softboxes
- beauty dishes
- Shoot-through umbrellas/Reflective umbrellas
- Reflectors/diffusers
- When using reflectors keep in mind that white is for use in bright light, silver for low-light or when you need a lot of light, while black subtracts light and causes shadows. When outdoors a black reflector can also be used to block the harsh light. Use gold when you need to cast warm light.
- Lighting the hair
- When shooting outdoors, standing your subject with their back to the sun , can create a beautiful hallo around your subject’s head, making the model pop off the background.
- Working in a studio you may need to use a hairlight, placing it behind the model, aiming it at the back of the head over the shoulder, this will create a separation of the model’s head from the backdrop, this is especially useful when the model’s hair is dark, against a dark backdrop.
High-key lighting.
A high key light setup aims to create an image that is brightly lit, where most of the harsh shadows have been eliminated. The mood here is a positive one, lighthearted, fun. This type of lighting setup is best suited for newborn and pregnancy, advertising etc.
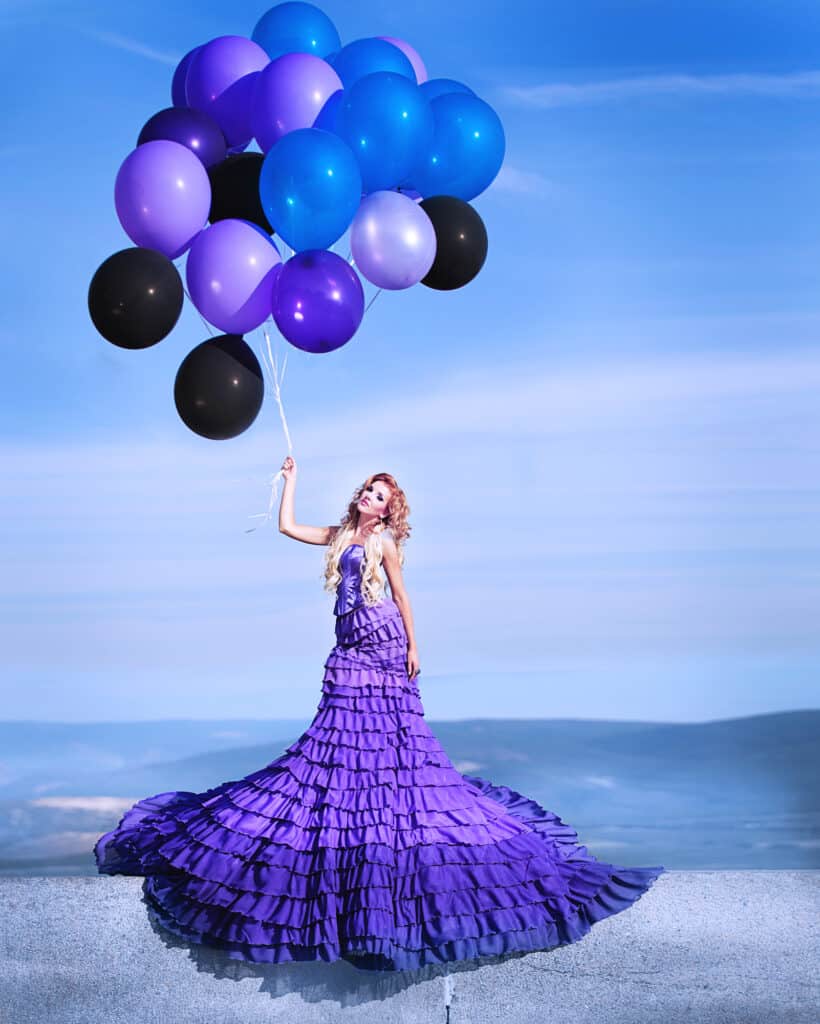
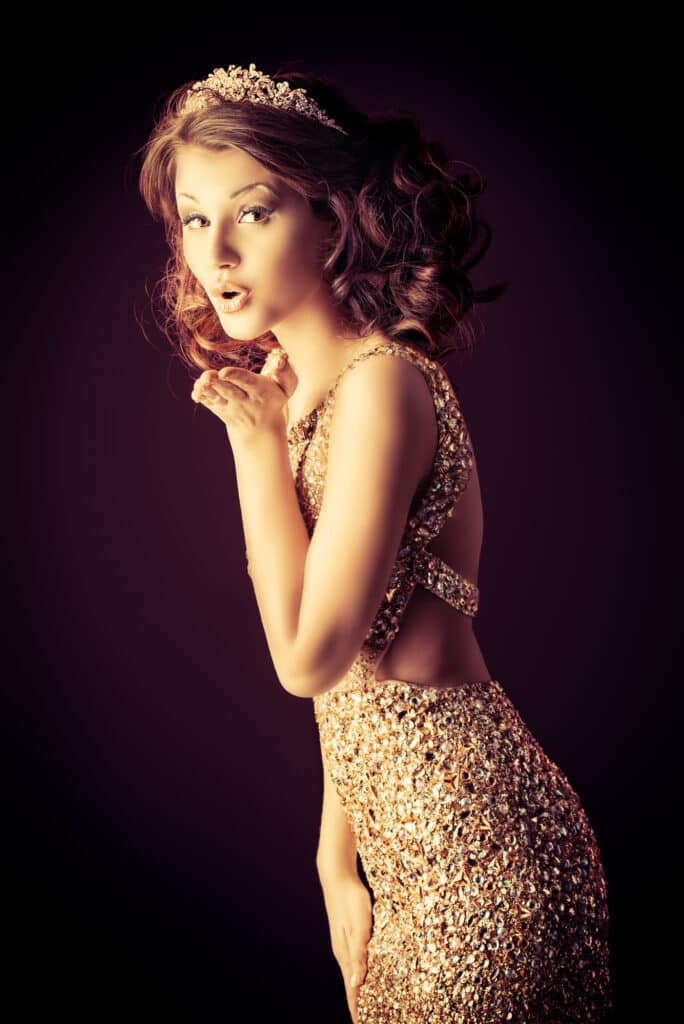
Low key lighting
A low key image is one that contains predominantly dark tones and colors. Like high key images, low key photography conveys atmosphere and mood. But where a high-key image feels airy and light, a low-key is usually dramatic and full of mystery. And where high-key lighting aims to reduce contrast, low key lighting creates striking contrasts through reduced lighting. Shadows are now the primary element of the composition.

In camera settings
Use the correct focus mode
Single Focus mode
The One-Shot/Single-Servo option is the best choice for stationary subjects. Once the autofocus system has achieved focus, it locks that setting in, you can take a picture, knowing that the subject will be sharply focused.
If your model is going to be mostly static it is best to use single focus mode/single shot modes. This requires you to refocus before taking the shot , ensuring a sharp in focus capture.
Use AI Servo mode
As the name suggests, AI Servo/Continuous-Servo focuses the lens continuously, making it a good choice for tracking a moving subject. By default, the camera will let you take a picture at any time, even if the subject isn’t in focus.
When working with moving subjects. Take several shots at once to capture as much of the action as possible.
Single shot drive/Continuous shoot drive
Where single shot drive mode allows you to capture one image at the time, shooting in continuous drive mode will allow you to take a number of photos in succession. When you press the shutter button down, the camera will continue to take shots until you release it. This is great for capturing action, sport or children playing.
In portrait photography, it will allow you to capture the varying expressions of your subject as they change. Capturing a number of photos in a row, you can select a few with varying expressions and combine to create a short film strip in Photoshop.
Metering modes /spot metering
To determine the correct exposure for your capture, your camera uses a number of methods to meter/measure the light in the scene. A measurement might be based on the overall light in the scene “evaluative metering” or the light falling specifically on your subject “spot metering”, plus a couple other options.
For portrait photography I find that spot metering works best. Such that if the scene is brightly lit while your subject stands in the shade, the camera would evaluate the light falling on your subject so as to return with correct exposure for the subject. The rest of the scene may be rendered slightly over expose, something you may be able to fix in post.
Exposure compensation
Setting exposure compensation in your camera, will allow you to slightly overexpose your image, that is to shoot at a higher exposure value than initially metered by your camera. This makes for beautiful brightly lit portraits.
Tethering
Standing behind the camera, at times at a far distance from your subject, can leave them feeling rather distracted and uneasy. One way to overcome this issue, is to tether your shoot. Installing an app such as “camera connect”, would allow you to control the shoot from your mobile phone, freeing you to walk about and interact with your model.
The shoot
Making the connection
More than any other type of photography, portrait photography requires a high level of empathy. You need to be able to relate to and connect with your subjects.
- We are all conscious of how others see us to a greater or lesser degree. Rather than asking your model to be relaxed, make it easy for them to feel relaxed.
- While interacting with your subjects be hyper aware that people have varying sensitivities to varying topics, keep the banter light and non personal.
- Before getting on the set/location, memorise your model/client name(s) and remember to use it when addressing them. People are more likely to be alert when their name is used.
Posing versus directing your models
When working on your own, you are the photographer and “DP” director of photography, keep track of the time and make sure you have executed all the shots as agreed with your client
- Unless you are working with professional models, you would find that your subject(s) is rather self conscious and uncertain on how to behave in front of the Camera. Start by discussing the concept of the shoot with your subject, be ready to take their ideas into account.
- I find that rather than dismissing ideas that seem unsuitable, it is best to try to and incorporate a couple of my subject’s suggestions in the session. This show of flexibility would encourage your subject to go along with your ideas, and establish an atmosphere of collaboration and teamwork.
- keep in mind that people express emotions in a variety of ways, should you wish to capture genuine expressions, rather than posing your subject and demanding a smile or a frown give them a scenario or better yet have them recall a memory to illicit the emotion you are going for, be it an expression of happiness, excitement, rage, anxiety or sadness.
- Stay alert watch out for the little mannerisms, subtle facial expressions and body language. Predicting what will happen next will go a long way in helping you to get great authentic expressions.
- Be generous with words of encouragement, keep the mood light and downplay the situation, to reduce the levels of anxiety..
- When shooting more than one person, after getting a couple of shots with everyone looking at the camera, direct your subjects to interact with each other and take a few more. When photographing couples, I find asking them to tell each other a joke works wonders in producing loving, fun moments.
- If you are looking to execute a particular concept, make a list of poses, positions, and expressions as well as scenarios in which the models interact with each other and within the environment to achieve them.
Composing the shots
The composition of an image refers to how the elements of an image are arranged in relation to the main subject. In addition to having a great location, model and light, a good composition, is vital to producing an impressive portrait.
Keep the background clean
- Whether shooting in a studio or on location, watch out for the environment surrounding your model, make sure that all elements included in your frame are intentional.
- Remove any distracting objects, failing that move to a different location, or move your model around until the undesirable object is no longer in view. When shooting on location – unless you are shooting an environmental portrait- aim to blur the background by selecting a wide/shallow aperture 1.2 to 4. This will result in a clean strong composition.
Focus on the eyes
- Unless your aim is to shoot a particular body part, when shooting a portrait, the focus must always be on the eye closest to the camera. It is imperative that the eyes be tack sharp, with a catch light reflecting the light source.
- To avoid having your subject blink while you are taking the shot, suggest that they close their eyes, and open on the count of 3, this is particularly useful when shooting in bright light, or shooting more than one person, it will ensure that everyone has their eyes open at the same time.
Posing groups
- When posing a group of friends or family members try to get the heads uneven. Having heads lined up in straight rows does not produce an appealing composition.
- For an intimate friendly look have them sit as close to each other as possible, as distances in photos appear much further.
- To get everyone in focus set your aperture to a high number F/8 or higher, while focusing on the person closest to the camera.

Posing Hands and feet
Hands and feet can be distracting in an image and can look disproportionately large if put forward, towards the camera. Unless the pose requires you to, try not to show the flat portion of the hand. Have the hands curved slightly away from the camera. Similarly if seated on the floor, avoid having the legs extended,have the person cross their legs or pull them over to the side.
Posing /Long noses
If your subject is conscious about a longer than average nose, you can minimise this by shooting the model head on, with the chin raised slightly up. This helps to mask the flaw so the viewer can see the person without distraction. Additionally shooting your subject with a telephoto can have the added advantage of compressing perspective, making the nose appear shorter still.
Cropping
Pay particular attention when deciding on where to crop your model’s image. Images cropped in the wrong place will leave the viewer feeling uneasy. As a rule avoid cropping along the joints, knees, elbows, wrists, etc. If cropping the head then crop all the way down to the forehead, you want the crop to appear intentional and not accidental.
Camera position/Shooting Perspective
When posing your models keep in mind that capturing the exact scene from a different point of view will change how we feel about the subject.
- For example if you wish to portray your subject as strong and powerful, have him/her pose facing the camera straight on. Place the camera at a lower angle and shoot up towards your subject. This will force the eyes upwards making the model appear larger.

- Similarly when we wish to portray femininity or a slender frame, the model should face the camera with the body turned away from the camera, get up to a platform higher than your model and shoot downwards.
- To avoid children looking dwarfed, come down to their level and shoot looking straight at them.

- Shooting diagonally for a dynamic image.
Framing
Framing your subject isolates it from its surroundings, bringing it to the viewer’s attention. Have your model look through a window or, lean against a door frame. When shooting outdoors tall grass and tree branches may also act as natural framing elements. Note that a frame need not enclose your subject completely.

Fill the frame
For a strong powerful composition, be sure to include some closeups of your model. Zoom in to fill the frame with your subject’s face, while setting the focus point on the eye closest to the camera. This technique is also useful in eliminating the background when shooting a portrait in a poor environment that does not support the subject.
Use the rule of thirds
The rule of thirds states that a scene is to be virtually divided using two equally spaced parallel horizontal lines, intersected by two equally spaced parallel vertical lines. Some cameras might allow you to superimpose the grid lines on the display, to assist you with your composition.
Rather than placing your subject/model at the center, consider placing your model at one of the four points of intersection. If your subject is looking down,up or sideways, to keep your viewers’ eyes within the frame, place your model such that there is enough space within the frame for them to gaze/walk into.
An exercise in perception
It is said that a photograph says more about the photographer than it does about the subject.
Arrange a photo session with a fellow photographer or two, taking turns photographing the same subject, this should prove to be a very interesting exercise in perception. Compare your frames, note how each of you saw the model and how you chose to portray her/his character.