

One of the main challenges of landscape photography is to produce a representation of a three-dimensional scene, in a flat two-dimensional medium. There are some technical and artistic choices to consider.
Setting the scene
1. Select your focal point
Spend time examining your location for a clear, strong focal point. This will be your frame’s main point of interest, where you wish to direct the viewer’s attention. Look for other elements within the scene to support your composition and convey the scene’s mood.
2. Simplify the scene
Your aim here is to exaggerate your focal point and simplify its surroundings. This will further emphasize its importance. Try to ensure that each element included in your frame/shot, serves in telling your viewer something about the scene.
Pay particular attention to potentially distracting elements at the edges of your frame. If needed change your camera position and recompose the scene to exclude all unnecessary information.
3. Experiment with vantage points
- Take a few shots at eye level.
- Explore photographing the same scene from higher or lower vantage points and diagonally.
Notice how the scene changes from one perspective to the next in each of these instances. Pay particular attention to elements that would now be included or excluded from your frame.
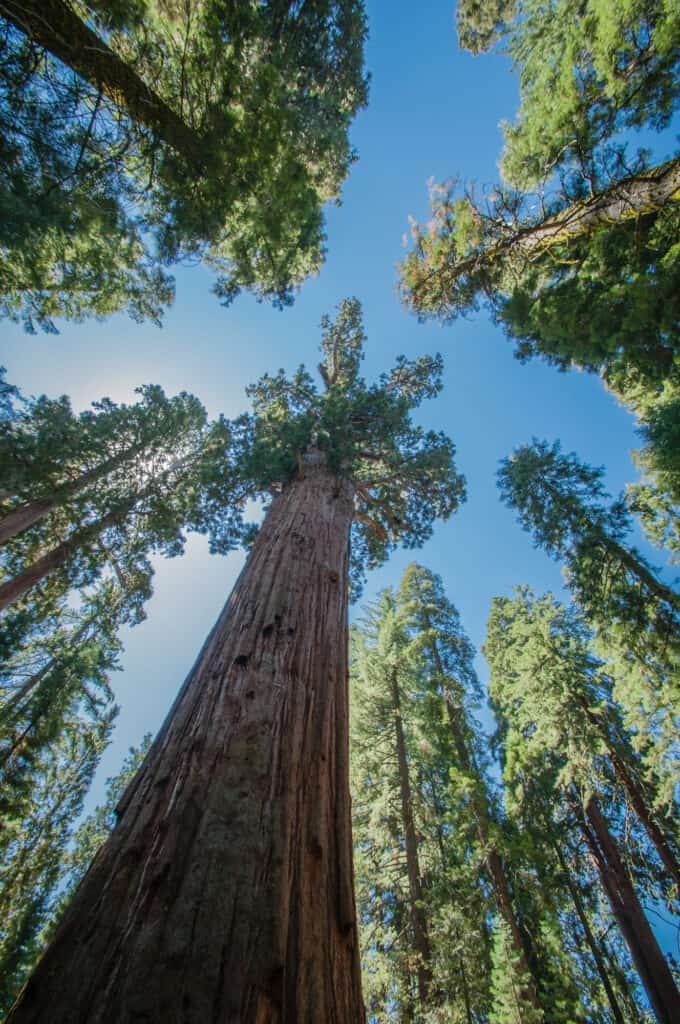
4. Shoot vertically
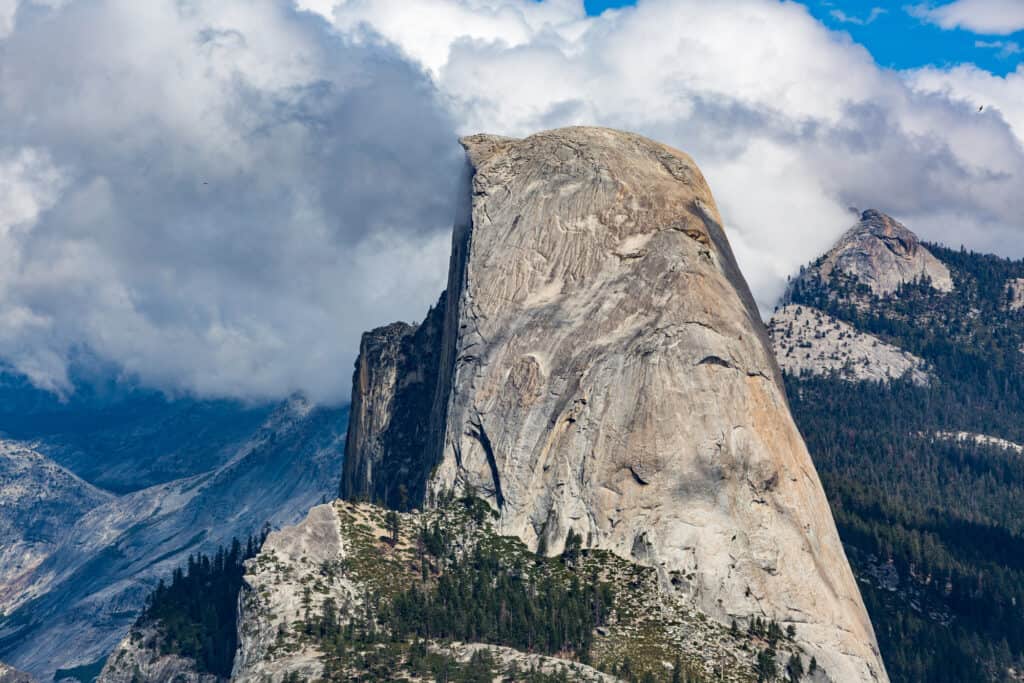
Landscape photography is primarily shot in the horizontal/landscape format. However, in some instances, shooting vertically can better improve your composition. For example when shooting tall trees or an exceptionally tall mountain.
5. Use leading lines
Leading lines connect the elements within your frame, leading your viewer’s attention to the focal point.
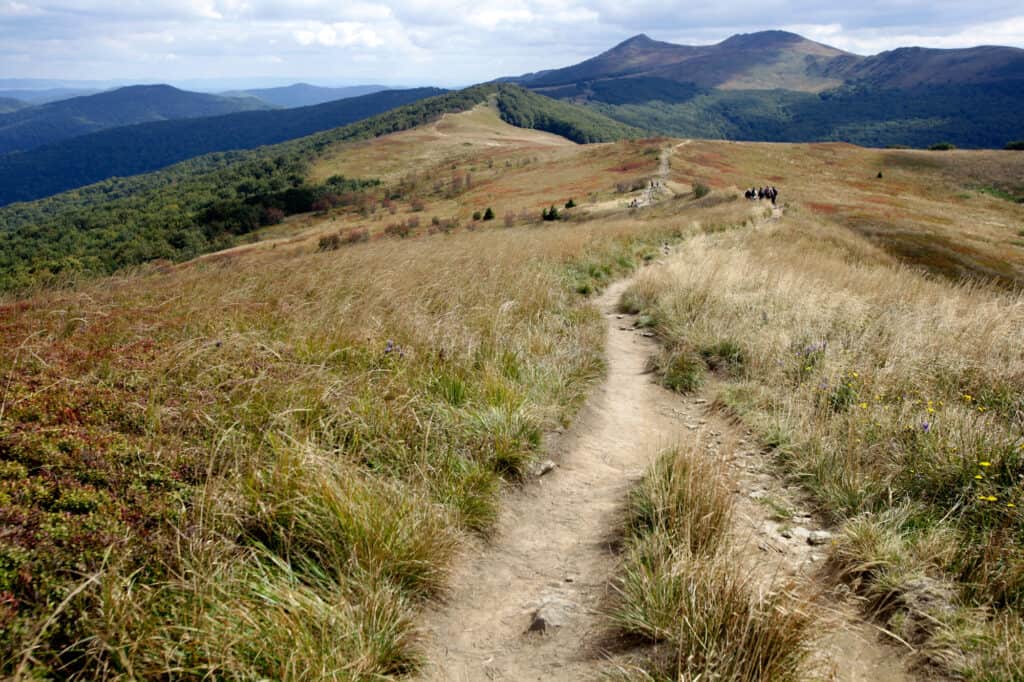
Examine the scene for elements that may aid in creating a structured visual path within your frame. Such a path would typically start at the bottom of the frame, guiding the eye upwards and inwards from the image’s foreground to the background.
Winding streams, roads as well as fence lines, coastlines, S curves, and sun rays, can serve as strong leading lines. Your aim is to grab the viewer’s attention and keep it lingering longer. To achieve this avoid leading lines that lead the viewer out of the frame. Use diagonal lines when available to create an added sense of depth and dimensionality.
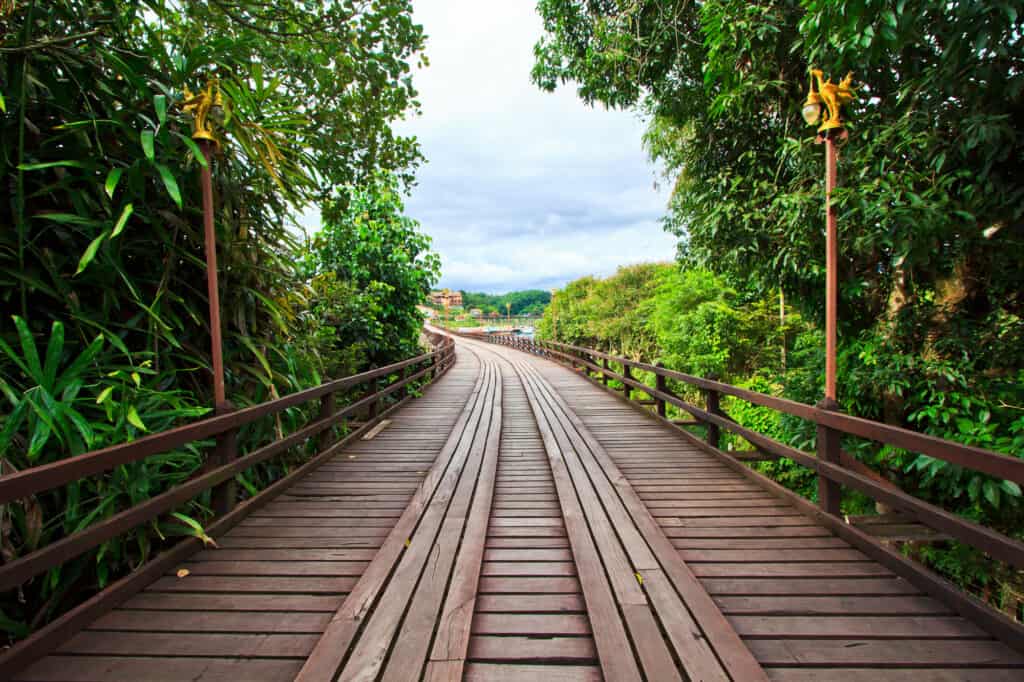
Leading lines, creating a visual path toward the tree in the distance.
6. Use the Rule of thirds
The rule of thirds states that a scene should be divided using 2 horizontal lines intercepted by 2 vertical lines at 90 degrees.
Based on this rule you would aim to place our focal point on one of the points of intersection rather than placing it in the middle of the frame. Placing your focal point slightly off-center will give it more visual weight.
When photographing a moving subject, such as a river or a stream, aim to place your subject so there is enough space for movement within the frame.
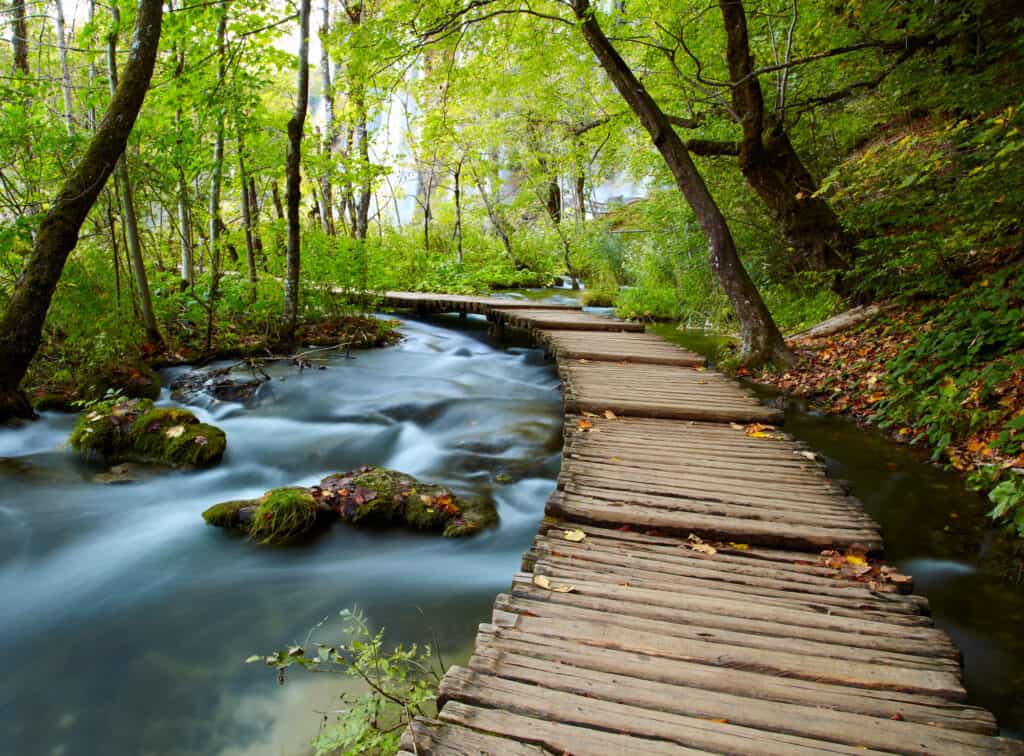
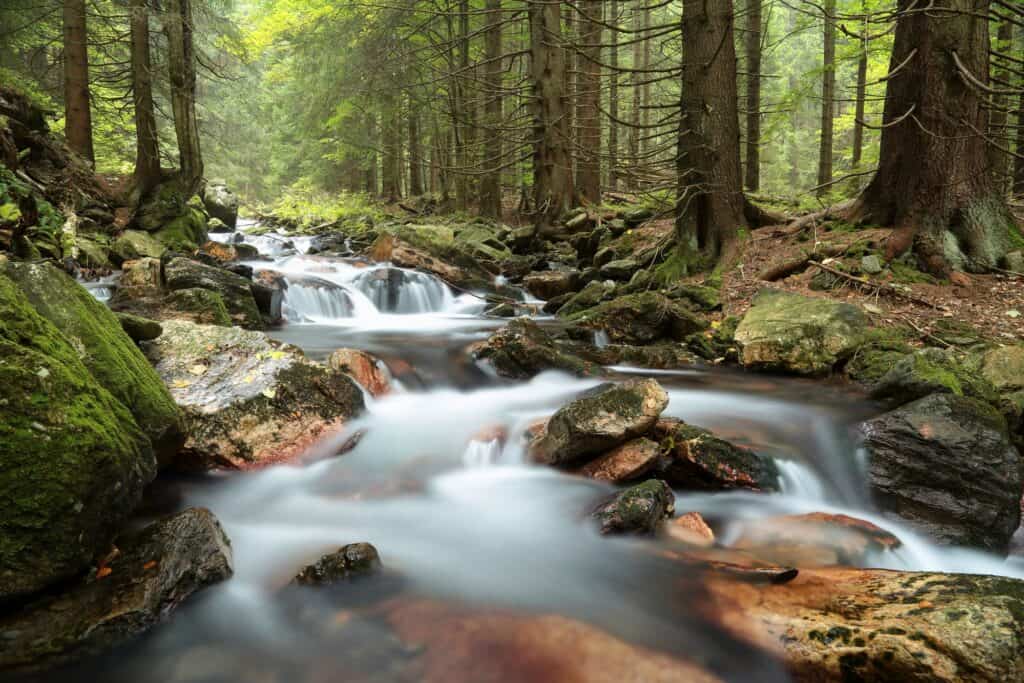
The stream starts at the bottom left, moving inward and upward.
7. Adjust your virtual horizon
Keep your horizon straight. A crooked horizon leaves the viewer with an uneasy feeling. Some tripods come with a bubble level to indicate when your camera is level. This, in turn, will ensure that your horizon is straight.
Alternatively, you can realign your horizon in post. However, you risk eliminating some of the elements of your composition that fall on the edges of the frame.
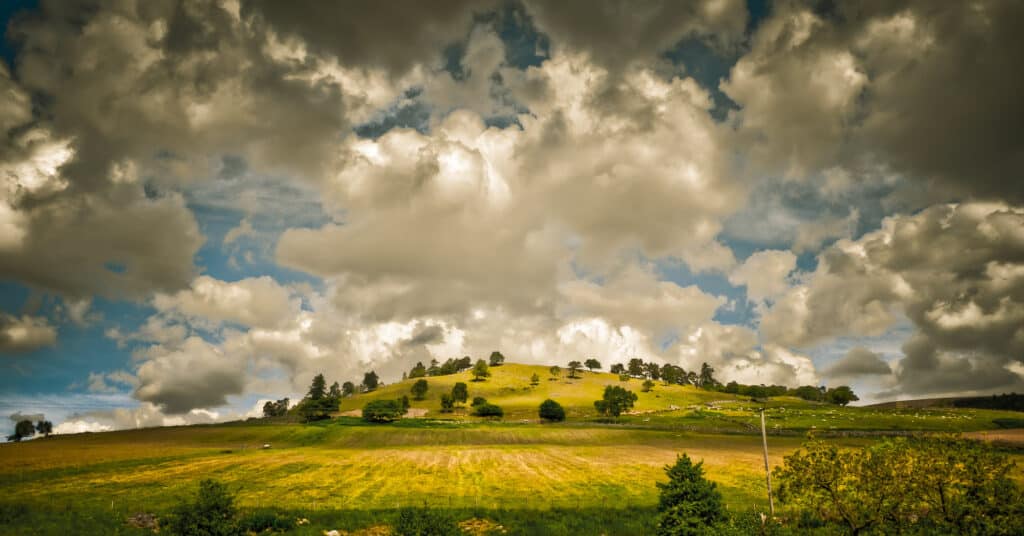
Placing the horizon in the middle of the image implies that land and sky are equally interesting. While placing it at the lower third gives the sky more visual weight, pulling your viewer’s attention to the sky. Alternatively, you may move the horizon to the upper third of the frame to emphasize the ground.
8. Break the rule of thirds
If the sky in your scene is not particularly interesting, you may compose your shot such that the sky would only occupy the top eighth of the frame.
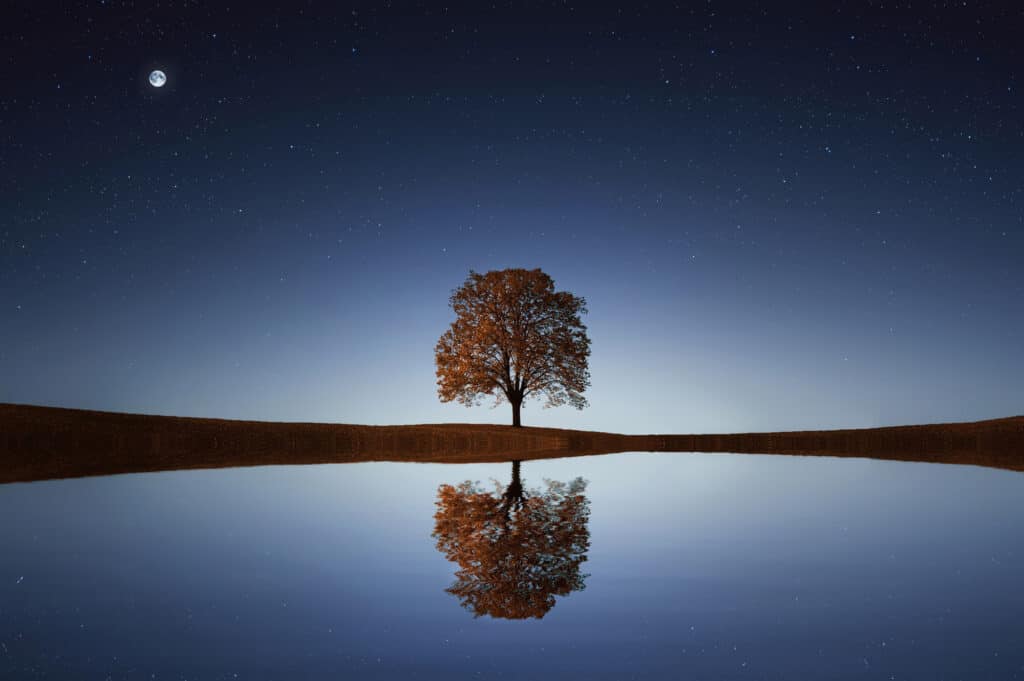
Another exception to the rule of thirds is symmetry and reflections. In this case, the scene should be divided into two sections top and bottom or left and right.
Creating depth through layers
9. Include the foreground
To create a convincing illusion of a three-dimensional space on a flat surface, you will need to include three layers within your frame: a foreground, a middle ground, and a background. The foreground is defined as the elements between you and your subject. Your subject is the middle ground. While all that falls behind your subject, serves as the background.
Lower your camera’s angle to incorporate rocks, flowers, or anything else on the ground into your image. This will add depth and interest and serve as an entry point into your image.
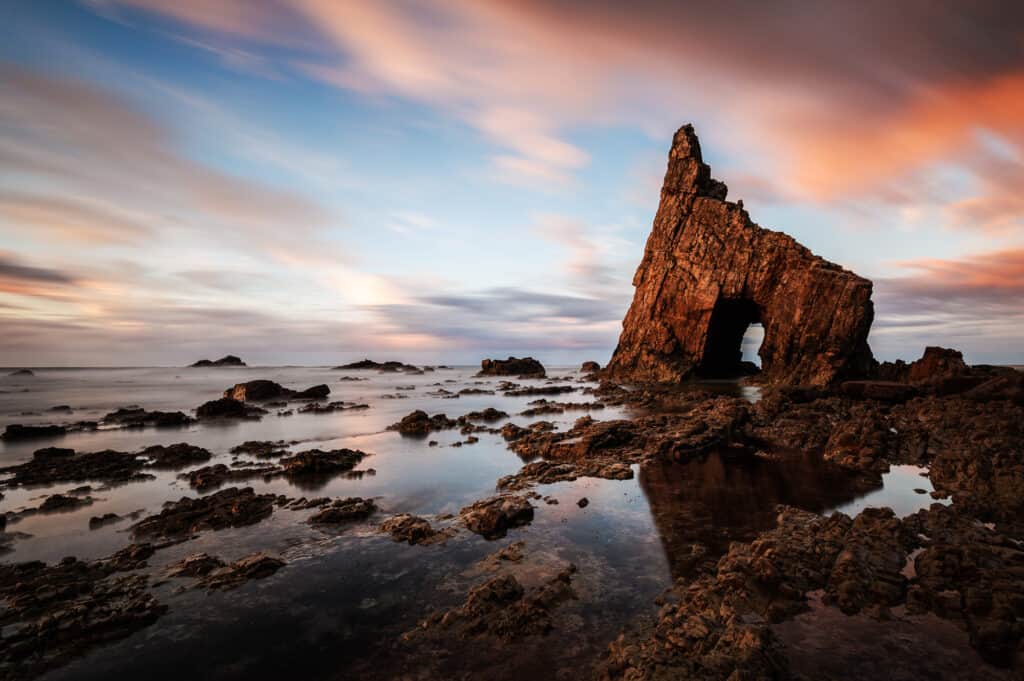
The rocks in the foreground act as the first layer, a point of entry into the frame.
10. Use Framing
A frame can refer to the external border of the image itself. However, within a particular scene, framing refers to drawing attention to your focal point; by isolating it from its surroundings.
To achieve this effect, you may shoot through overhanging branches, a window, a tunnel, an arch, or a doorway. A frame need not enclose the focal point entirely; it might be sufficient to frame one or two sides. Adding this extra – slightly out of focus – layer in your shot’s foreground increases the sense of depth and dimensionality.
As with any additional element, consider if it truly enhances your focal point or distracts from it.
Framing can also add a sense of originality to what might be an over-photographed scene or landmark. Additionally, you can use framing to add context. Some foliage in the foreground of a shot can convey a sense of being out in nature.
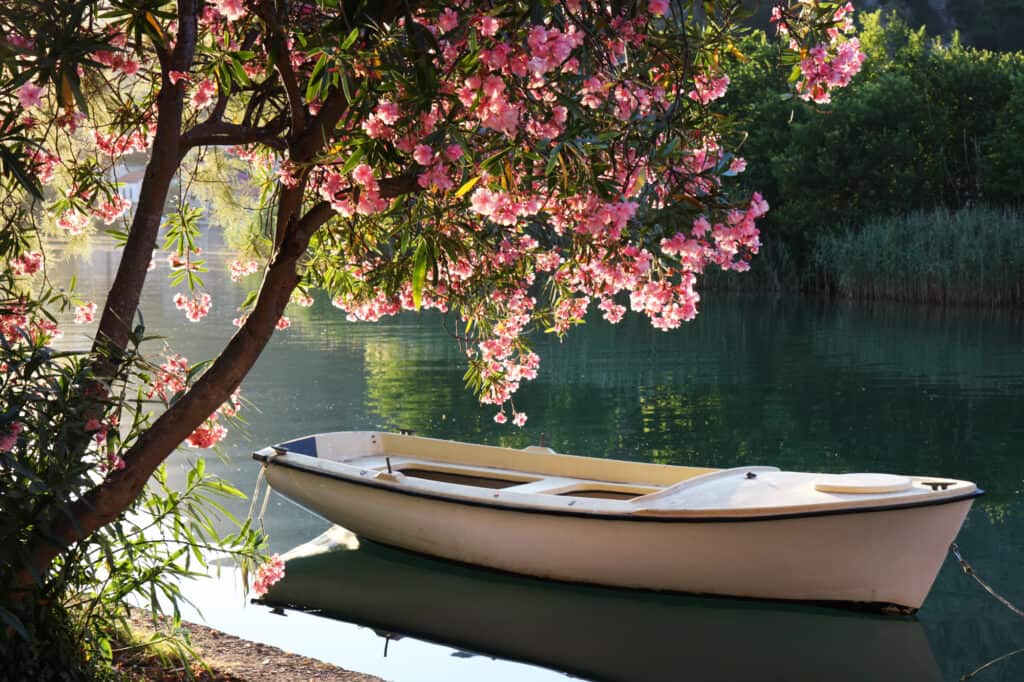
The tree foliage frames the scene
11. Use Vertical layering
Alternatively, the vertical layering of elements can also enhance the illusion of depth. With the lower elements in the image appearing closer. While those higher up appear further away. Move your camera higher, lower, or to one side to incorporate those elements inside your frame.
12. Create Visual Balance
Visual balance refers to the distribution of the perceived visual weight of the elements within an image. The visual weight of an element is measured by its ability to attract attention.
Some factors influencing the object’s visual weight are size, texture, color, tone, depth of field, and light.
For example, larger objects are perceived as heavier than smaller objects. The color red is perceived to be heavier than blue. Dark objects are perceived to be heavier than bright objects, and objects in focus as heavier than those out of focus. In comparison, a human figure will outweigh all other elements.

In this scene, the range of mountains to the right of the frame is offset by the palm trees on the left.
13. Emphasise Scale
When photographing a tree trunk. Or an impressively high mountain range. You might find that your image does not reflect the true greatness of your subject. Having someone stand at the bottom of the hill or next to that gigantic tree trunk. Will give your viewer an instant sense of scale.
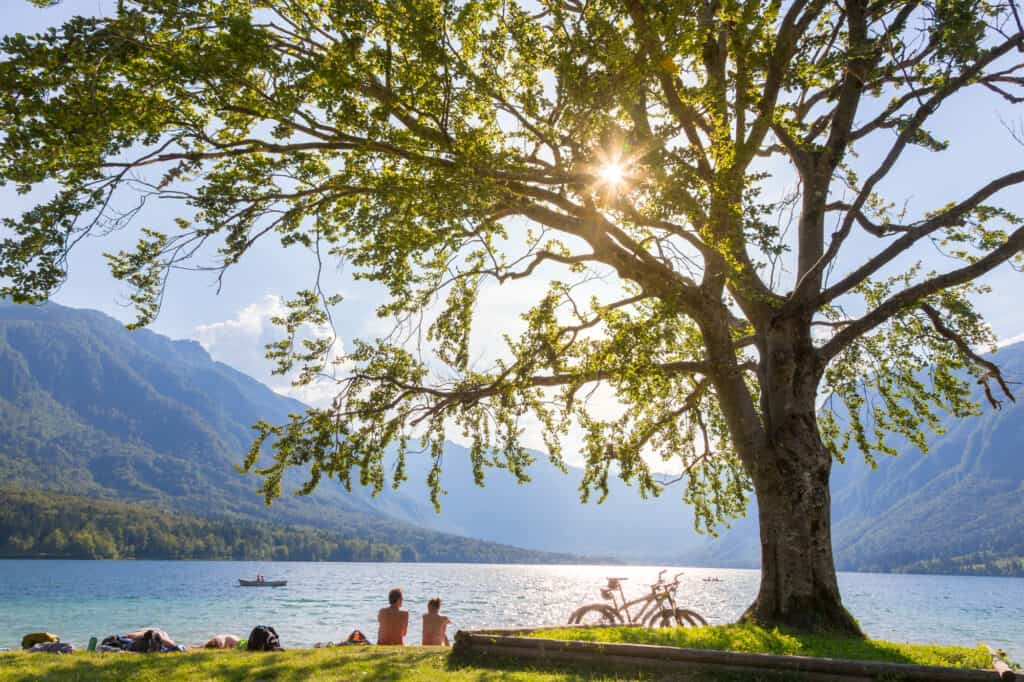
In this scene, the human figures under the tree give the viewer a sense of scale.
14. Use a vertical hierarchy
Playing with the position of your focal point can also add to its weight/importance. By placing your focal point higher in the frame, you can increase its perceived importance versus the elements placed lower.
15. Time your shoot
Your shot’s quality and impact will greatly depend on the scene’s dynamic range. This is reflected by the ratio of light, shadows, and highlights within a scene. A brightly lit scene with low levels of light-to-dark contrast may convey a sense of calm and harmony between the elements in the image.
Alternatively, a dramatic mood can be achieved at large through high contrast. Shooting at High noon, on a bright sunny day, creates a relatively flat scene lacking depth and dimension.
Ideally, you should plan to start shooting a couple of hours before sunset or the first couple of hours after sunrise. These are known as the golden hours. The light at these hours is directional, creating clear areas of light, highlights, and shadows. As well as casting that beautiful warm glow typical of landscape scenes.
An overcast, foggy, or misty day can also provide excellent opportunities for capturing sun rays streaming through. Start your shoot at dawn while the water is still to get the mirror-like reflective waters in ponds or lakes.
16. Use bracketing
A scene with a wide contrast in tonal ranges can prove difficult to capture accurately. You might end up with overblown highlights while the rest of the photo remains underexposed.
Adjusting such a scene in post-processing has its drawbacks. Removing details from overblown (solid white with no details) areas is impossible. Additionally, retrieving details from dark areas will exaggerate any digital noise.
To overcome this issue, use the bracketing – exposure compensation – option in your camera settings. This will allow you to take three consecutive shots.
The camera will use your current settings for the first shot, and the second will be overexposed by 1/3 to 1 f stops, while the third will be underexposed by -1/3 to -1 f stops. The three shots can also be stacked in post to create one HD image with the correct exposure in all areas.
17. Adjust your white balance
Setting your camera’s white balance to auto will allow the camera to set the color tones in your image according to the time of day. Should you wish to have bright blue skies, you can set your white balance to “fluorescent.” Alternatively, set your white balance to “shade” to achieve a warm orange overall tone to your image.
18. Embrace all types of weather
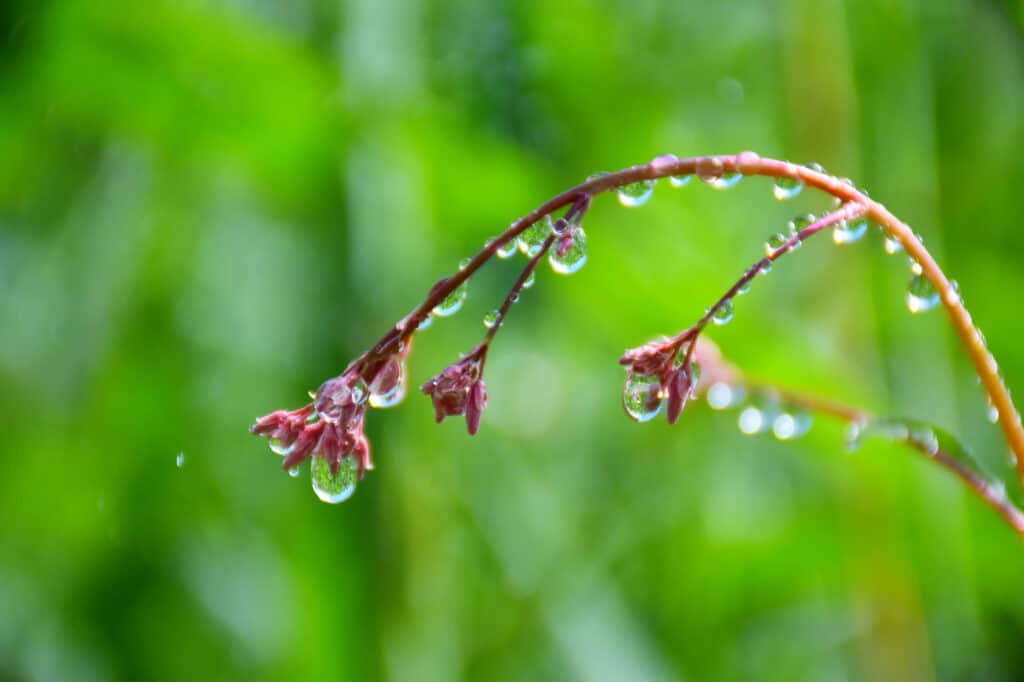
After the rain stops while the sky is overcast, take out your macro lens and take some close shots of the foliage on trees or the ground. The rain makes the colors appear rich and saturated, and the water droplets hanging off leaves and flowers make for beautiful shots.
Right after, or just before the rain starts, is also an excellent time to capture the beautiful colors of the clouds in shades of white, blue, and grey. Look out for sun rays peeking through the clouds, giving you a wonderful chance to capture a dramatic scene.
Foggy days and low cloud days give a soft, diffused light. To get that soft dreamy look, get up to a high vantage point above the fog and clouds and shoot downwards.
19. Shoot details
When shooting flowers, get low to the level of the flower or even lower for an interesting perspective. Shoot so that the flowers are backlit, with the sun shining thru the translucent petals.
20. Get tack-sharp images
Shooting a large landscape scene poses the question of where to focus to achieve back-to-front sharpness.
- Avoid camera shake by setting up your camera on a tripod.
- Set your aperture to F16 or higher to ensure a maximum field depth.
- Point the active focus point at 1/3 of the distance in your frame, giving you the highest possible sharpness from that point out to infinity.
- Press the shutter halfway through to set focus, then change the focus switch on your lens from auto to manual.
- Recompose and press the shutter all the way down to take the shot.
21. Shoot beautiful sunsets
To capture a beautiful sunset at the beach:
- Compose your image to include the sand or rocks at the water’s edge. This is your foreground, with the setting sun as your middle ground and the sky and clouds as the background.
- Exclude the sun from your frame before focusing to avoid underexposing the scene.
- Set your focal point a third way into the frame.
- Press your shutter halfway, then set the lens to manual focus
- Recompose the shot with the sun in the frame and proceed to take the shot.

22. Shoot silky smooth waterfalls
One way to capture the effect of silky smooth water is by setting up your camera for a long exposure.
- To avoid camera shake during the long exposure, set up your camera on a tripod.
- Leaving the shutter open for a long time will let in a great deal of light, resulting in your image being blown out/overexposed. To avoid this, schedule your shoot at sunrise, sunset, or an overcast day.
- Set your ISO to the lowest possible on your camera model for a noise-free image, between 50 and 200.
- Set your exposure time/shutter speed between 1 to 6 seconds long.
- Set your aperture to F16 to 32, depending on your lens. This will ensure sharpness throughout the image.
Lens choices
23. Use a wide-angle lens
Here are some of the advantages of using a Wide-angle lens:
- Shooting expansive landscape scenes from a close distance.
- Having a greater depth of field than can be achieved with a zoom lens. That is to say, more of the scene will be sharp and in focus.
- Covering a broader view, therefore conveying a sense of wide open space.
- A wide-angle lens is also great for when you want to include some interesting elements in the foreground.
24. Use a Telephoto lens
While a Wide-angle lens can give the impression of increased distance between elements in the foreground and distant elements, a telephoto lens appears to compress perspective. Consider using a telephoto when you’re framing a shot of an object in the far distance. A Telephoto will allow you to simplify the scene by isolating your main subject and removing clutter.