
Sunsets are some of the greatest wonders of the world. From beautiful skies painted in color to a warm glow across the horizon, sunsets have inspired photographers for decades. However, capturing the glory of the color ray is a bit more difficult than one would expect because you have to contend with limited light.
Here are our tips to make sunset photography as easy as watching one!
Best Settings for Sunset Photography
The difficulty of sunsets is that although they make them look bright and vibrant to your eye, the camera’s sensor sees this differently. Sunsets are a bit complex to properly expose in the camera because the light is bright in one spot and incredibly dark in another.
Before even getting into the tips, tuning your settings just right is key for great sunset photography.
General Settings
Firstly, switch your recording settings to RAW format instead of JPEG format. JPEG is great when you won’t be doing a lot of editing. Unfortunately, some editing magic is involved in capturing a sunset’s ‘WOW’ factor. This is where the RAW format comes into play.
RAW format is the most natural state of a photograph. Every detail is recorded uncompress and uncompromised. As such, the lack of file alteration allows significantly more control over large editing adjustments such as overblown highlights or an underexposed image. This is really key for sunset photography as some spots of your frame will be too dark and others potentially too bright.
Next, you will want to adjust your metering setting for sunsets. Metering tells the camera how to express the exposure meter to you accurately. Photographers rely on a guide that we see at the bottom of our viewfinder called the Exposure Meter. This measures the intensity of light and tells us if our exposure settings are good or bad.
The best metering mode for sunsets is (depending on what is available in your camera) Highlight-Weighted Metering. Highlight-Weighted Metering looks at the entire image when considering exposure but focuses its consideration on the highlights of your image rather than the shadows and midtones. This mode is intended to save the highlights of your image from being overexposed! If you want to capture the sky best, you must ensure your highlights are perfect.
Your camera shooting mode by default is set to One Shot, and this works great for sunsets because you really only need to be perfectly set for one solid capture. The autofocus and burst mode settings you can leave on the camera’s default mode as well.
As for White Balance, it is best to create a custom one for sunsets. Click on your custom white balance option (this name may change between camera brands). Next, aim your camera at the reference point. Press the shutter button like you would take a picture. The camera will scan the color temperature of the light that hits the sensor and store this information, adjusting the white balance based on whatever you used for reference.
Landscape
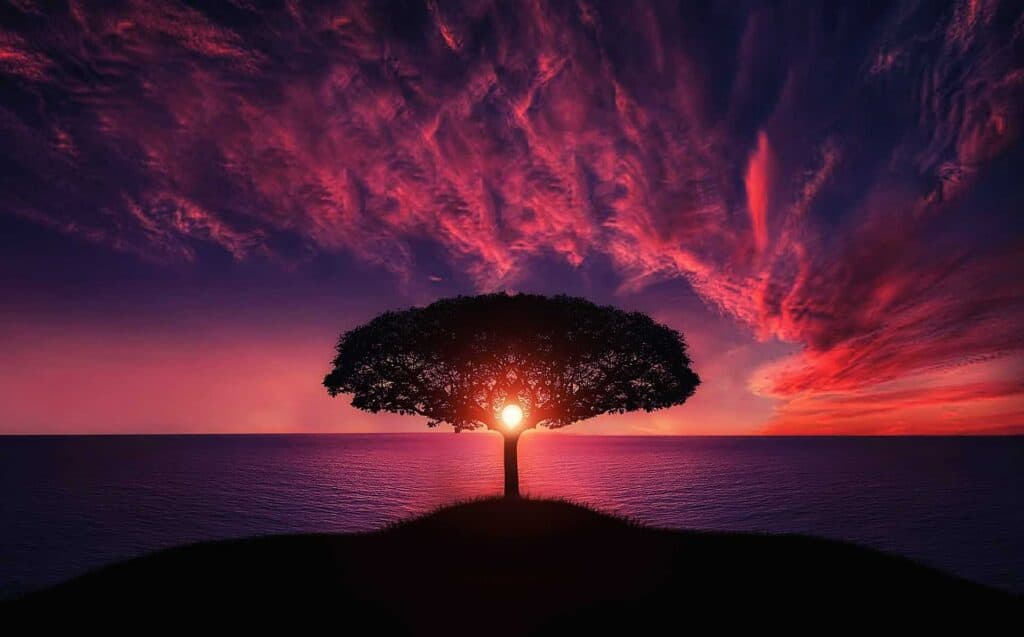
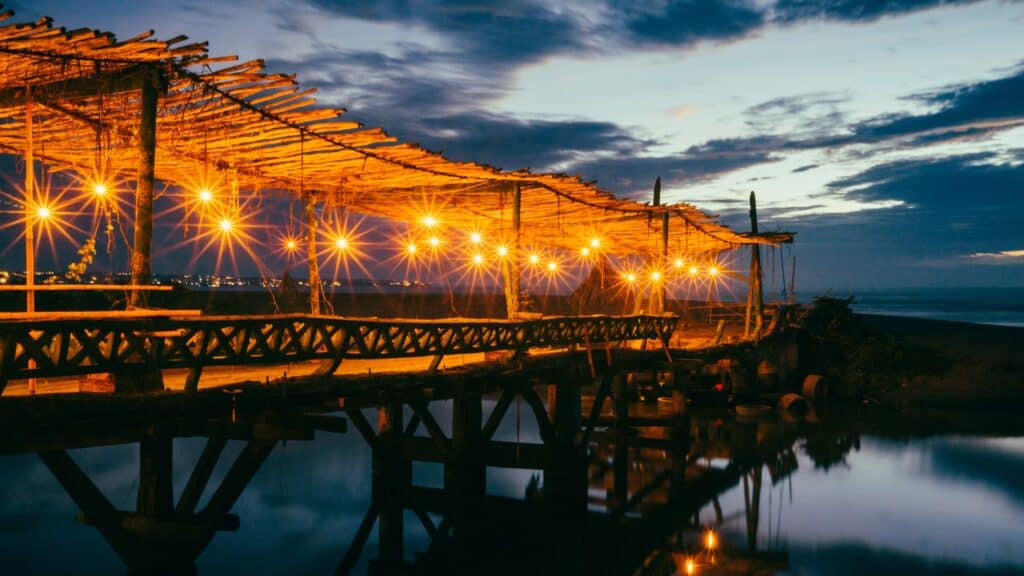
There are specific aperture requirements for landscape photography to capture a truly stunning sunset. Landscape sunset photography looks best when an aperture of F/11 all the way to F/16. This helps get a deep depth of field and the whole frame in focus, so the entire sunset is sharp and lovely.
If the sun or bright lights are in the frame, you can get a cool ‘starburst’ effect (shown below) with narrow apertures.
That being said, remember that the aperture is just one component in the exposure equation. The equation is ISO + shutter speed + aperture = exposure. When one variable changes, the others must change to accommodate. The narrower you make your aperture to create a deeper depth of field, the darker your photograph will be. You will then adjust the shutter speed to quite slow, and the ISO gets bumped a bit to ensure your shot isn’t very dark.
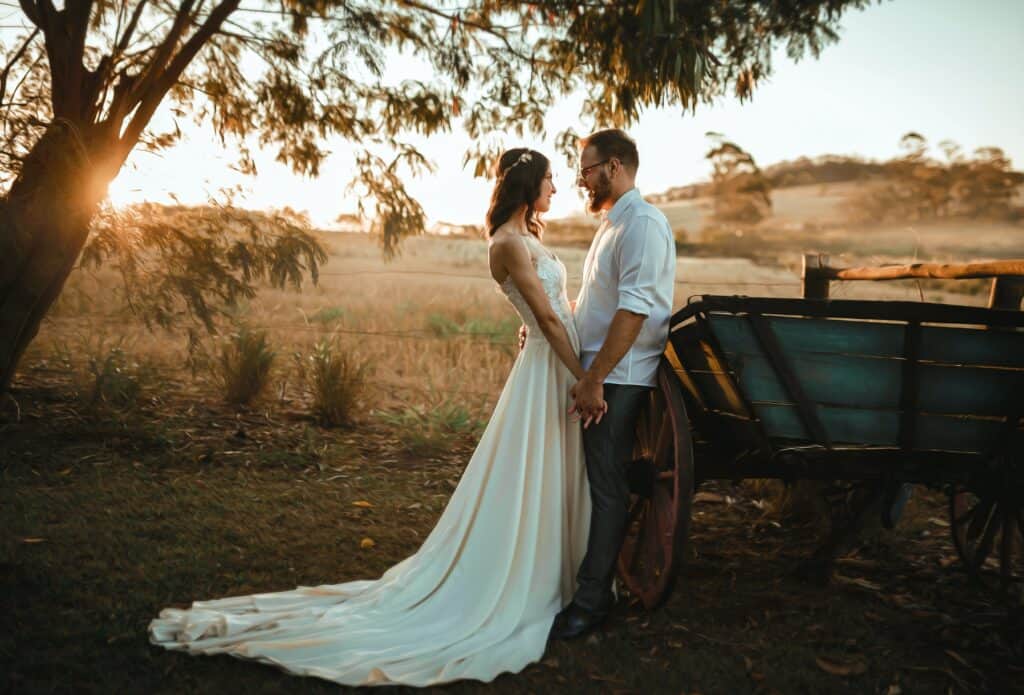
Portrait
Unlike landscapes, deep depths of field don’t work great for portraits. For portraits during sunset time, you’ll ideally want to use wide apertures and shallow depth of field. Great apertures for sunset portraits are F/2.8 and F/1.8. Both blur the background just enough to separate the subject but are not so blurry that you can’t make out the beautiful sunset in the background.
Shallow depths of field also allow the ‘golden hour’ to be taken advantage of, as the whole frame will wash over in a beautiful gold (as seen below).
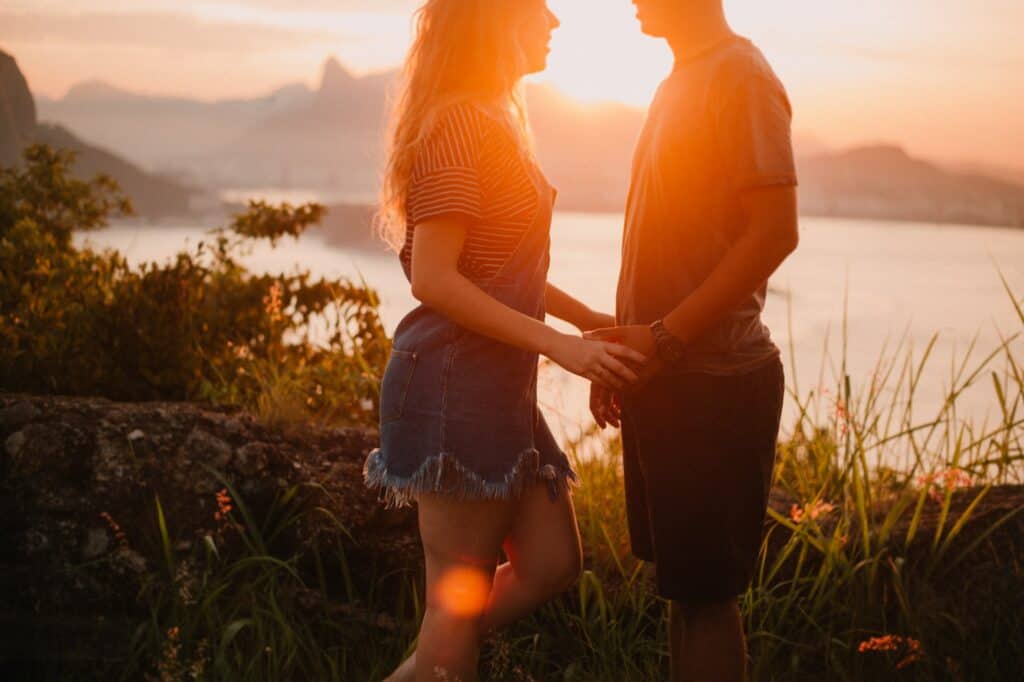
With the wider aperture, more light can hit the sensor. As such, your sunset may become overexposed. Remedy this by raising up your shutter speed and lowering your ISO.
Tips for Photographing Sunsets
Now that the settings are all done, here are some useful tips.
1. Plan Ahead
Sunsets vanish just as quickly as they appear – so planning ahead is key to make sure you don’t lose your light!
Research sunset times and how the sun sets at your chosen location, and decide on composition so that you don’t lose the light while figuring this out.
2. The Magic Hours: Golden Hour and Blue Hour
On the topic of planning ahead, it’s good to know what the Magic Hours are. The two key magic hours for sunset photography are the golden and blue hours.
The Golden Hour occurs when the sun is 6 degrees above the horizon and ends when it falls to -4 degrees below the horizon. In layman’s terms, the golden hour includes the first hour after sunrise and the last hour of light before sunset. It is named as such because the sun parallel to the camera creates a glow of gold light that washes over the image.
The Blue Hour happens right after the Golden Hour. As you can guess by its name, the Blue Hour features lovely cool tones instead of the golden glow in the Golden Hour. The sky is much darker but very textured and rich.
3. When Capturing Subjects Against a Sunset, Use Flash
Did you know that flash and strobes are not just for the studio? Many of these artificial lights can actually be brighter than the sun – especially during sunset time!
How many portrait and fashion photographers manage to capture their subjects against the sun, is with the use of a flash. If you’ve ever tried to shoot a subject against the light, you’ll have noticed that they become a silhouette when exposing for the sky, or the sky becomes a beam of white overexposed light when exposing the subject. This is remedied by using a flash that illuminates your subject to the same exposure as your sky.
Just remember to use a diffuser, a ‘naked’ flash is very harsh on the skin!
4. Use High Dynamic Range for Landscapes

High Dynamic Range, commonly denoted as HDR, is a landscape photography technique.
Dynamic Range refers to the difference between the darkest parts of your photography and the lightest parts of your photograph. HDR is a composite image in which your darks are exposed perfectly, your lights are exposed perfectly, and your midtones are also (you guessed it) perfect.
To do an HDR, you have to put your camera on a tripod and take three photographs of the same scene: one in which your highlights are exposed well, one for your shadows exposing well, and one neutral shot in which your exposure meter says you are ‘perfect’ (even if it isn’t correct). Then in the editing room, you merge these three photographs together and create a high dynamic range.
This is how skilled landscape photographers capture those brilliant colors and details.
5. Easier to Save Underexposure – Expose for the Sky
When the image is too dark, the shadows look very black, meaning they are underexposed. When your image is too light, the whites look very white and lack details, which means your photograph is overexposed. This is a very common problem with sunsets because when you expose for the sky, everything that isn’t the sky will look dark.
In the editing room, it is much easier to bring back shadows and lighten them because oftentimes, there is still information in the blacks that you can bring forward by adjusting the exposure slider in an editing program. Overexposed highlights, however, have lost information and cannot be brought back.
Conclusion
Sunsets aren’t all that difficult; they require specific shooting techniques. Remember to never stare directly at the sun, even through your camera, as this can cause retinal damage!