
Photography has a grand way of expressing the world we live in very uniquely- such as documenting its changes. Time lapse photography is one such way to explore how nature alters in a period of time! But how do you do time lapses?
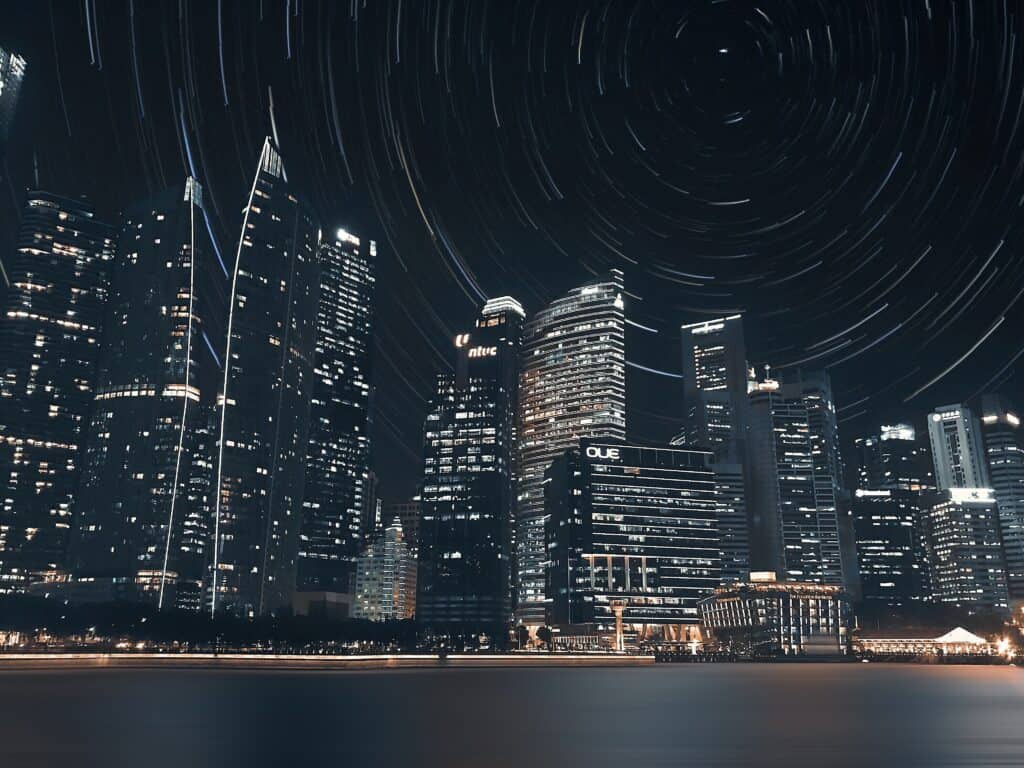
Before we get into the ‘how’, let’s talk about the definition. Time lapse is when a photographer takes a sequence of images to show something changing over time. Usually the photographer places the camera on a tripod and takes several hundred images over a duration of, say, 30 minutes. Then, the pictures are replayed in fast forward so time is compressed. You’ve seen time lapse photography when watching moving pictures or a series of images of, say, the night sky changing in an hour and the stars moving!
Time lapse photography is really fascinating to the layperson, especially an audience member who is mystified as to how this is achieved. But time lapse is really not as complicated as it appears on the surface- all you need is the right equipment, the right settings, and the right subject!
What Do You Need For Time Lapse Photography?
There are several products you’ll need for time lapse photography. The first, of course, being the camera and the lens!
The camera you choose will affect how you capture time lapses. If you’re looking at brand new models, then there will very likely be a time lapse setting on the camera that helps you take the images automatically (without too much manual effort on your part). However, if you’re working with or looking to purchase camera bodies from several years ago, you’ll find a different tune sung there. Brands such as Nikon and Sony have had time lapse options in their camera bodies, but Canon did not and required manual effort.
Depending on the type of time lapse you’re looking to do, additional camera body features come into play, such as low light capability and megapixels. Cameras with low light capability are able to photograph in dark conditions with minimal noise (the obnoxious color dot fragments in images taken at night at high ISO levels). Cameras with high megapixel counts capture a lot of detail!
It is suggested to look at camera bodies with a full frame sensor, although that is not absolute. Because so much of your scene changes over a period of time, a full frame sensor can help capture all of the changes in a full image, versus a crop sensor (denoted as APS-C) which will only capture a portion of your frame. A full-frame camera uses a sensor that’s the same size as a single frame of traditional 35mm film, measuring 36 x 24mm. An APS-C sensor size measures 22 x 15mm. This means a full-frame sensor has more than 2.5 times the surface area of an APS-C sensor, which means it can capture the entire frame.
To go back to the time lapse feature on cameras, if your camera does not have a time lapse option, you can buy a nifty tool called an intervalometer. An intervalometer allows you to take a certain amount of photos spaced evenly in exposure. This takes away the manual need of sitting with a remote or cable release and taking an specific amount of photos every second. The intervalometer does all of this for you.
Next, the lens. The lens doesn’t actually factor in as much as one would think when it comes to time lapse photography. Really, it’s most recommended to use a wider angle lens (a lens that has a wider frame of view, such as a 24mm) for aesthetic purposes. Otherwise, you’ll likely be shooting at a narrower aperture which equals a deeper depth of field in order to show all of the changes to a scene. Depth of field refers to how much of an image is in focus. When a depth of field is deep, both the subject, the foreground, and the background are in focus.
You’ll need a tripod to steadily secure your camera to the same spot so that it definitely won’t move. You can’t do time lapse handheld! Make sure you have a very sturdy tripod as you will need to shoot continuously for a few hours sometimes.
If you’re capturing time lapses at difficult times of day or with water that causes reflections, it’s a good idea to look into buying a polarizing filter or a neutral density (ND) filter. Polarising filters reduce glare from reflected surfaces. They work by being made up of specially adapted glass that when turned at an angle to a light source will reduce glare. Neutral density filters limit the amount of light that hit the lens which allows you to shoot in super bright conditions with camera settings that are not necessarily conducive to such lighting.
Finally, a cable release will be your best friend. Cable releases or remotes allow you to take a photograph without touching the camera. Use a cable release along with mirror lock up feature if using a DSLR to avoid any blur due to camera movements.
Best Camera Settings for Time Lapse Photography
Time lapse does require specific camera settings in order to be effective, but remember that the exposure equation values are dependent upon the available light in the scene you are shooting.
Ideally, you’re going to want to shoot in manual mode where you are able to adjust the aperture, ISO, and shutter speed accordingly. It is suggested to set your aperture fairly narrow to ensure the majority of the frame is in focus and then alter the other values accordingly to set the right exposure (how light, dark, or just right your photograph is).
Use Manual Focus to make sure your focus point doesn’t move during the time lapse. manual focus is when you lock on to a subject by hand. You find focus by turning the focus barrel ring until the subject is nice and clear in your viewfinder.
Use the mirror lock up feature to avoid blur due to camera shake if you have a DSLR and turn off image stabilization on the lens and camera body if they have that feature. Both of these cause camera blur and you want to ensure your images are as sharp as possible. Besides, your camera is secured to a tripod so you don’t need either of those features anyway.
Turn off live view and the LCD screen to save battery life! This is something most photographers forget and then regret it when their camera dies midway through a time lapse.
What Subject Should I Do?
The best subjects for time lapses are those that are static! Avoid living subjects such as people or animals because they move too much. Capturing nature, inanimate objects, the night sky, are all great subjects for time lapse photography.
How To Do Time Lapse Photography
Here is the step-by-step guide to doing time lapse photography.
Step 1: Compose the Shot
Your first step is to compose the shot. Figure out where and how you want to capture what you are seeing in front of you! Then, set up the tripod and attach the camera securely to it. Make sure that when you set up your camera and tripod, the height is adjusted by the tripod’s legs, not the height of the center column. For maximum camera stability, keep the center column as low as you can.
Step 2: Set the Settings (and Adjust Your Interval Time)
Next, go ahead and do your camera settings. As well as doing your ISO, Shutter Speed, and Aperture- you’re also going to need to figure out your interval settings. The interval refers to how many shots are taken during your time lapse.
Interval is where a little bit of mathematics comes into play. You see, setting the wrong interval time can cause your time lapse to look choppy and not have that smooth quality everyone drools over. The right one will look fluid. In order to calculate the interval, keep in mind that interval is always greater than exposure time, so that you give the camera time between each shot for the read/write process and buffer clear up. For example, if your exposure time is 5 seconds, choose the time interval between shots as at least 7 to 8 seconds, so the camera has about 2 to 3 seconds to get itself ready for the next shot. Shooting interval = exposure time + time given to the camera in between two shots.
For some general times, here are shooting intervals that most time lapse photographers adhere to (location dependent):
- Sun across the sky: 15 to 30 seconds
- Sunsets / Sunrises or Moonrise / Moonset: 1 to 3 seconds
- Slow moving clouds: 5 to 10 seconds
- Fast moving clouds: 1 to 3 seconds
- Normal movement of clouds: 3 to 5 seconds
You’ll also need to consider how long you have to shoot for your time lapse, which is generally calculated based on observation and common sense.
Step 3: Start the Time Lapse
Once you have the above sorted, it is time to put the time lapse into play. If you’re using a camera that has the time lapse feature on it (such as Nikon), go ahead and activate it by inputting the interval shooting time and releasing the shutter! If you do not, input your interval shooting time into the intervalometer and activate it.
Step 4: Process the Images
Once your images have been taken, load them up into your computer and move them into a post processing or photo editing software! Industry standard is Adobe Photoshop and Lightroom, both of which have the ability to batch process images and create a smooth animation with all of your images. Time lapse is usually done in animation style where the images appear very quickly to create a moving picture. Refer to your editing program to find the best way to do this!
In conclusion, diversify your portfolio by adding some time lapses to it- showing that your skillset far succeeds the average photographer!