
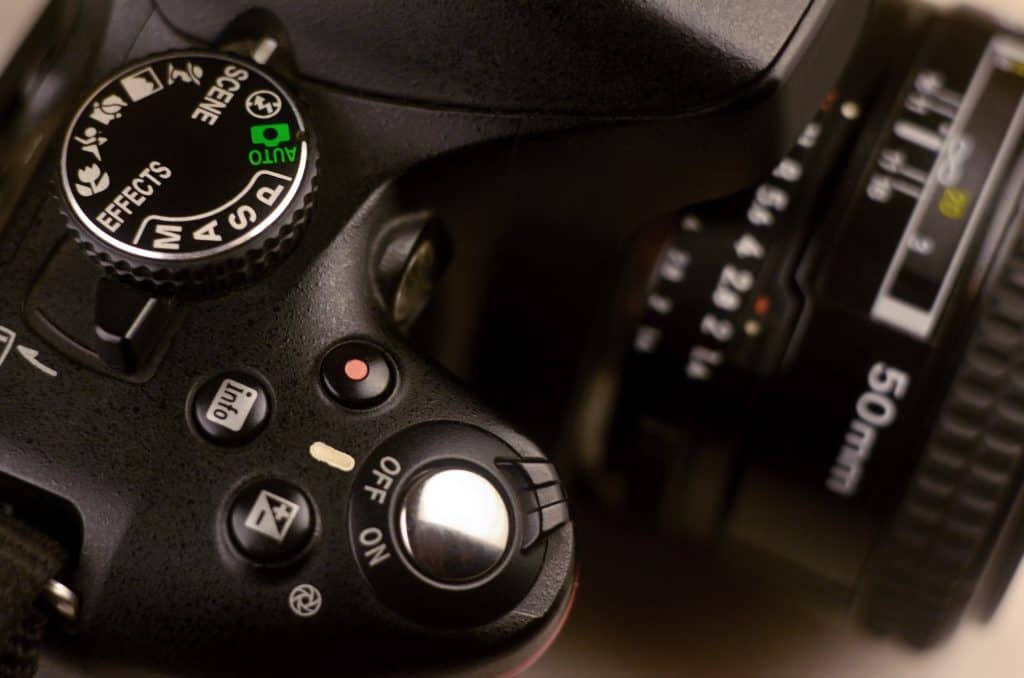
The camera is an advanced box with many controls, buttons, and features. This can quickly become overwhelming to someone who has never seen it before! Luckily, modern-day DSLRs and Mirrorless cameras have a nifty dial at the top of the camera to remedy this. This dial switches between different camera modes to help you figure out what setting works best for what you’re trying to capture.
Camera modes are different preset features or options that tell the camera how you want to take a picture. These modes dictate whether or not the camera makes the decisions for you or if you control the camera settings. Here are the universal modes available for photographers:
Featured in this article is a basic photography mode dial sitting at the top of DSLR and Mirrorless cameras. Please remember that modes may be named differently or marked differently depending on the camera brand, so refer to your user manual for help.
Automatic Mode

This mode is exactly what it sounds like- automatic. The camera makes all of the decisions for you – it selects the ISO, Shutter Speed, Aperture, and White Balance based on its sensor and how it interprets where you are photographing. ISO, Shutter Speed, and Aperture make up the Exposure Equation, and their combination can make your image either too light, too dark, or just right.
Cameras have pre-built programming to tell them how to set the exposure variables based on how much light it is sensing throughout its various ports, but this may not always be the most accurate. New cameras tend to have artificial intelligence dictating the exposure settings so that they may be better equipped than older models. Even so, cameras do not have brains and are not always right.
As such, automatic mode is generally frowned upon because you lack control over your actions. Relying solely on the automatic mode will not allow your camera to utilize its maximum potential. However, this mode is excellent for learning photography, taking a quick spontaneous snap, or using leisurely when photography is not your primary concern.
Sport Mode

This is also an automatic mode, but instead of relying on the camera to figure out whether or not you’re capturing action photography, you can set it to capture movement immediately. This ensures that your shutter speed is as high as it can go given the present shooting conditions (how much light is available, what lens you are using, and other factors). This mode intends to freeze action.
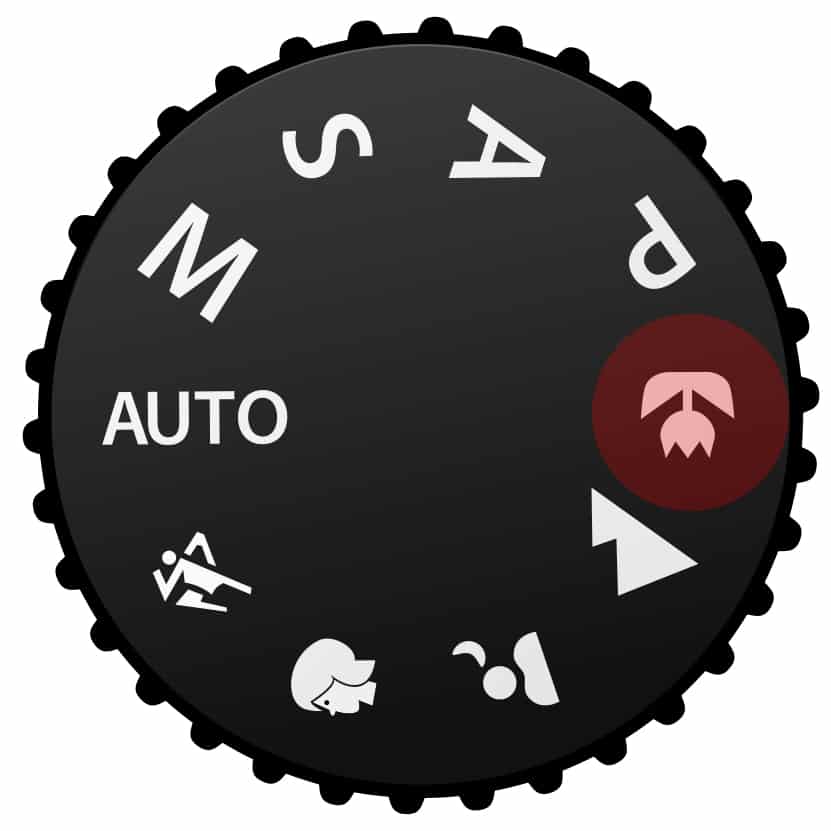
Portrait Mode
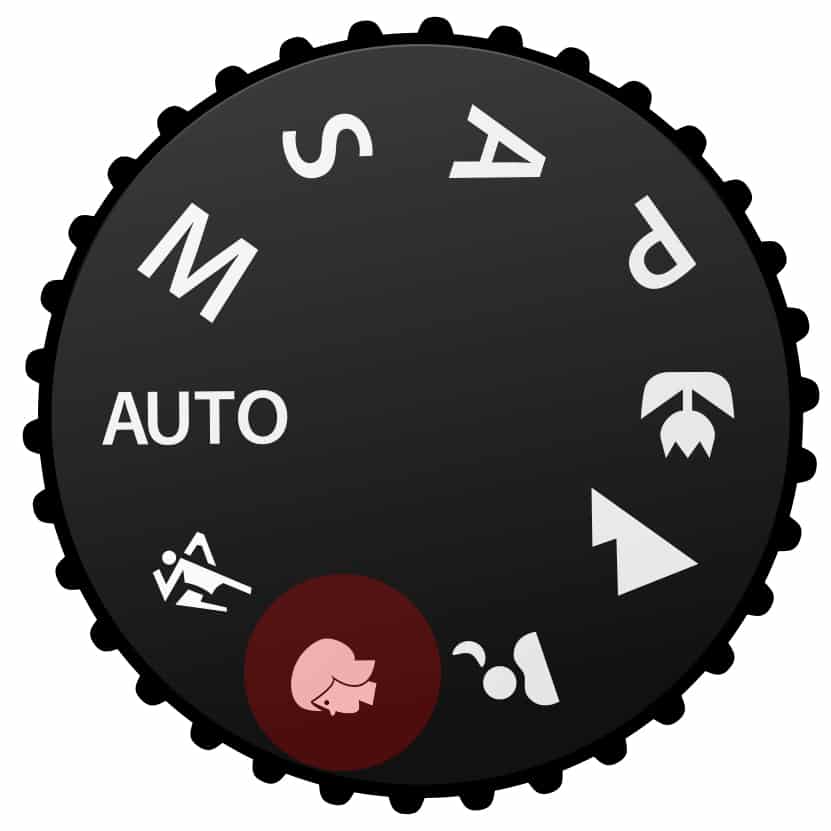
Another automatic mode that finds the best settings (according to the camera) to capture a portrait. This mode is intended to optimize capture for people exclusively, so portrait mode for pets may or may not work! Depending on your camera, if it has a built-in flash, this mode may trigger the flash if it senses insufficient light.
Night Mode
Night mode is an automatic setting to capture photographs in low light. Remember that cameras rely on light hitting their sensor to operate correctly. When there is minimal light, the settings must be highly adjusted to maximize whatever light it has to work with.
Night modes in cameras range from being set to capture night portraits of people to be able to capture nighttime scenes. Night mode requires slow shutter speeds, so hold the camera steady so there is no motion blur!
Landscape Mode
This automatic mode is ideal for the nature photographer. The landscape mode is meant to perfectly capture a landscape scene with great detail and vivid colors. Often this mode will set your camera to a deep depth of field to make sure everything is in focus. This mode may require a tripod as the shutter speed can be slowed down significantly to maintain the deep depth of field.
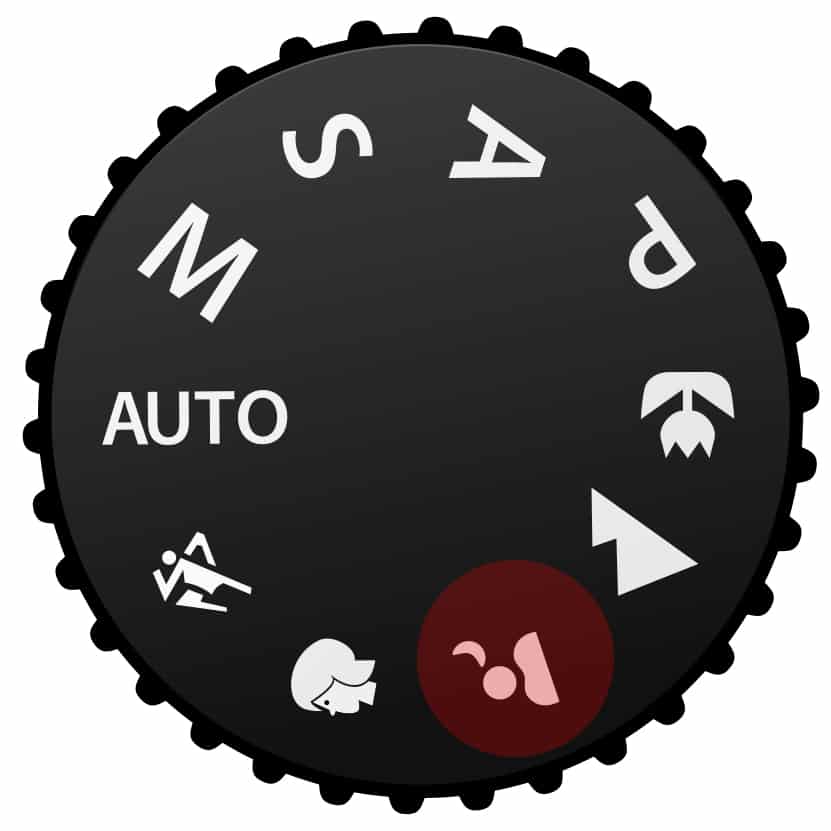
Close-Up / Macro Mode
This mode is excellent for detailed close-up portraits of small objects and details, such as flowers or insects. Macro is a photography term that means extreme close-up. This mode differs significantly between camera brands because each has a philosophy on what settings work best for close-ups! Some, like Nikon, will use the flash, while others, like Canon, will use wide apertures and a shallow depth of field.
Program Mode
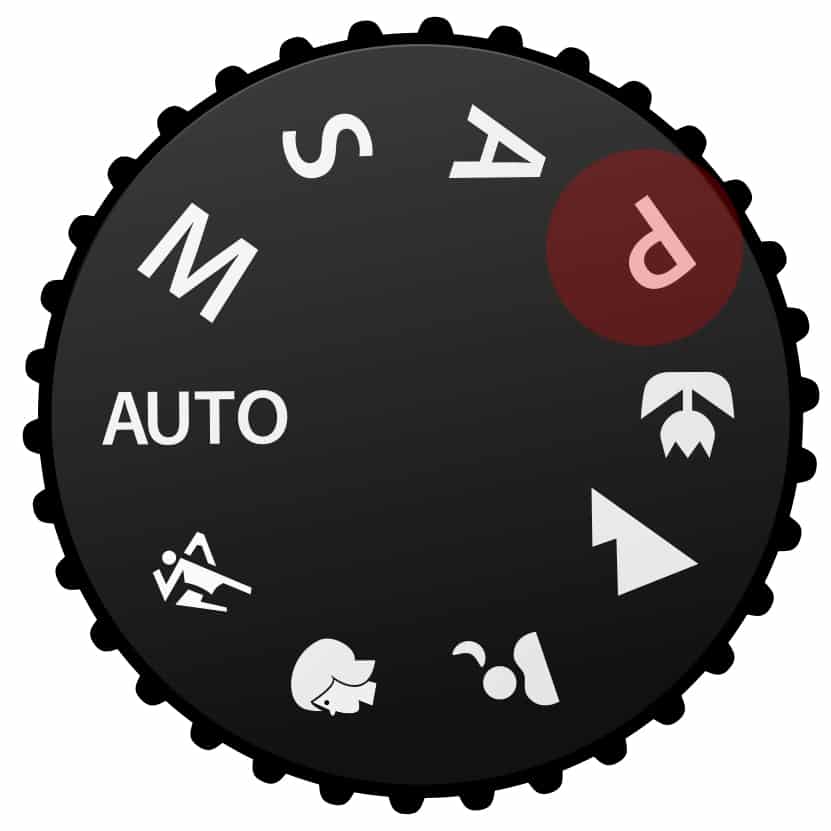
This mode is a bit more confusing to explain than the rest. This is the Automatic mode on steroids, as I call it. The camera still selects your ISO, Shutter Speed, and Aperture to expose the frame, but you can select the White Balance and Picture Style. You can change any exposure equation variable, and the rest will adjust accordingly.
For example, say your camera sets the variable to ISO 100, Shutter Speed to 1/400, and Aperture to F/4. What if you need a Shutter Speed of 1/800? You switch the shutter to 1/800, and then the ISO and Aperture will change to accommodate your new shutter speed. The aperture might drop to F/2.8, and the ISO may rise to 200!
This is nifty and a great feature if your subject spontaneously changes from action to portrait to something else.
Aperture Priority Mode
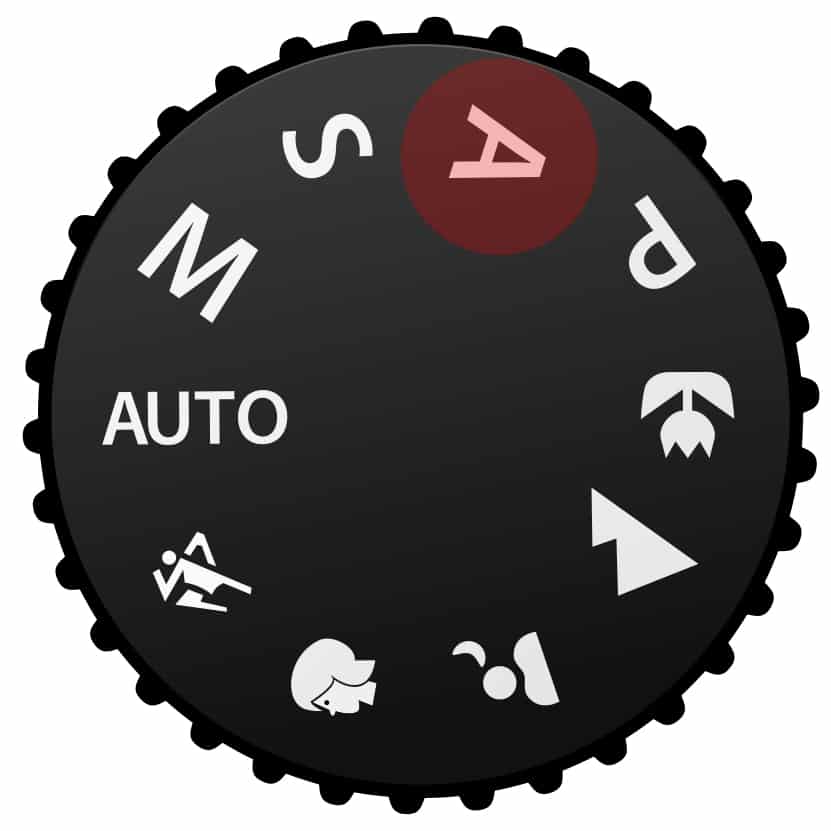
Now we are beginning to step into what I call ‘semi-manual’ modes. In these modes, you can control one variable of the exposure equation. The camera will adjust the other variables to expose the image properly (once more, according to the camera’s sensor and programming).
Aperture Priority Mode allows you to select the Aperture, and the rest of the settings will alter to ensure you can keep proper exposure with the aperture you set. This is great to use when you feel that the depth of field in your shot is more important than anything else. This isn’t recommended for action photography because it may slow your shutter speed, but it is fantastic for portraits and still life.
Shutter Priority Mode

Similar to Aperture Priority, you select the shutter speed here, and the rest of the settings change with it. This is ideal for capturing action; the shutter speed will make or break your shot.
Manual Mode
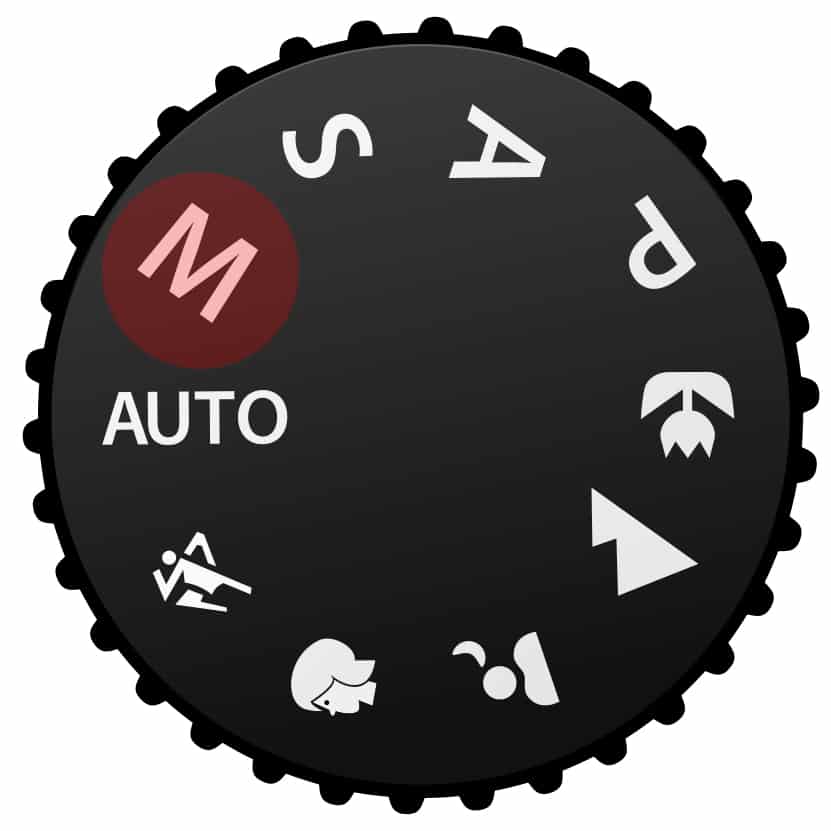
Manual Mode turns off the camera’s automatic settings – you control it all! This is the ideal mode for professional photography and one that all photographers strive to be able to use easily. You adjust the exposure equation and minor configurations, such as the Auto Focus Settings and White Balance.
Manual mode gives you the ultimate freedom to capture the exact image you want and ensure you make the decisions – not your camera! This mode also prevents the camera from glitching during an automatic mode and causing you to miss your shot.
Conclusion
Now that you know the different modes you can set your camera to, the dial at the top should be more familiar! You can set your camera to whichever mode suits what you’re capturing and need to get done.