

You would think you could just grab a camera right out of the box and use it, but that’s not always the case! With so many cameras and lenses being large, bulky, and heavy – how you hold them makes a big difference.
The proper technique for handheld photography helps distribute the weight of the equipment and aids you in your picture-taking endeavors.
Here is our guide on how to hold a camera properly!
Why Does Your Camera Grip and Posture Matter?
How you hold your camera can make or break your shot!
Holding a camera correctly aids in ensuring that your photographs are sharp, clear, and free of camera shake. You don’t want to miss the right shot because you held your camera wrong. Camera shake describes the blurriness or shakiness you may see in your photograph. Most of it is due to how you handle your equipment. This happens because of the vibration caused by your natural hand shake paired with clicking on the camera’s shutter button to capture an image. Longer focal lengths, such as telephoto lenses, are prone to this problem.
Having a good grip also aids in preventing back, neck, and shoulder problems (as we all know, your camera equipment isn’t always very lightweight!). Your chiropractor may be thrilled with the visits, but your wallet won’t be.
How To Hold a Camera Properly
Before we get to the different postures, let’s start with the basics: a camera and a lens. Unless you purchase an adapter, cameras are right-handed. You are meant to hold the camera grip with your right hand and the lens with your left hand.
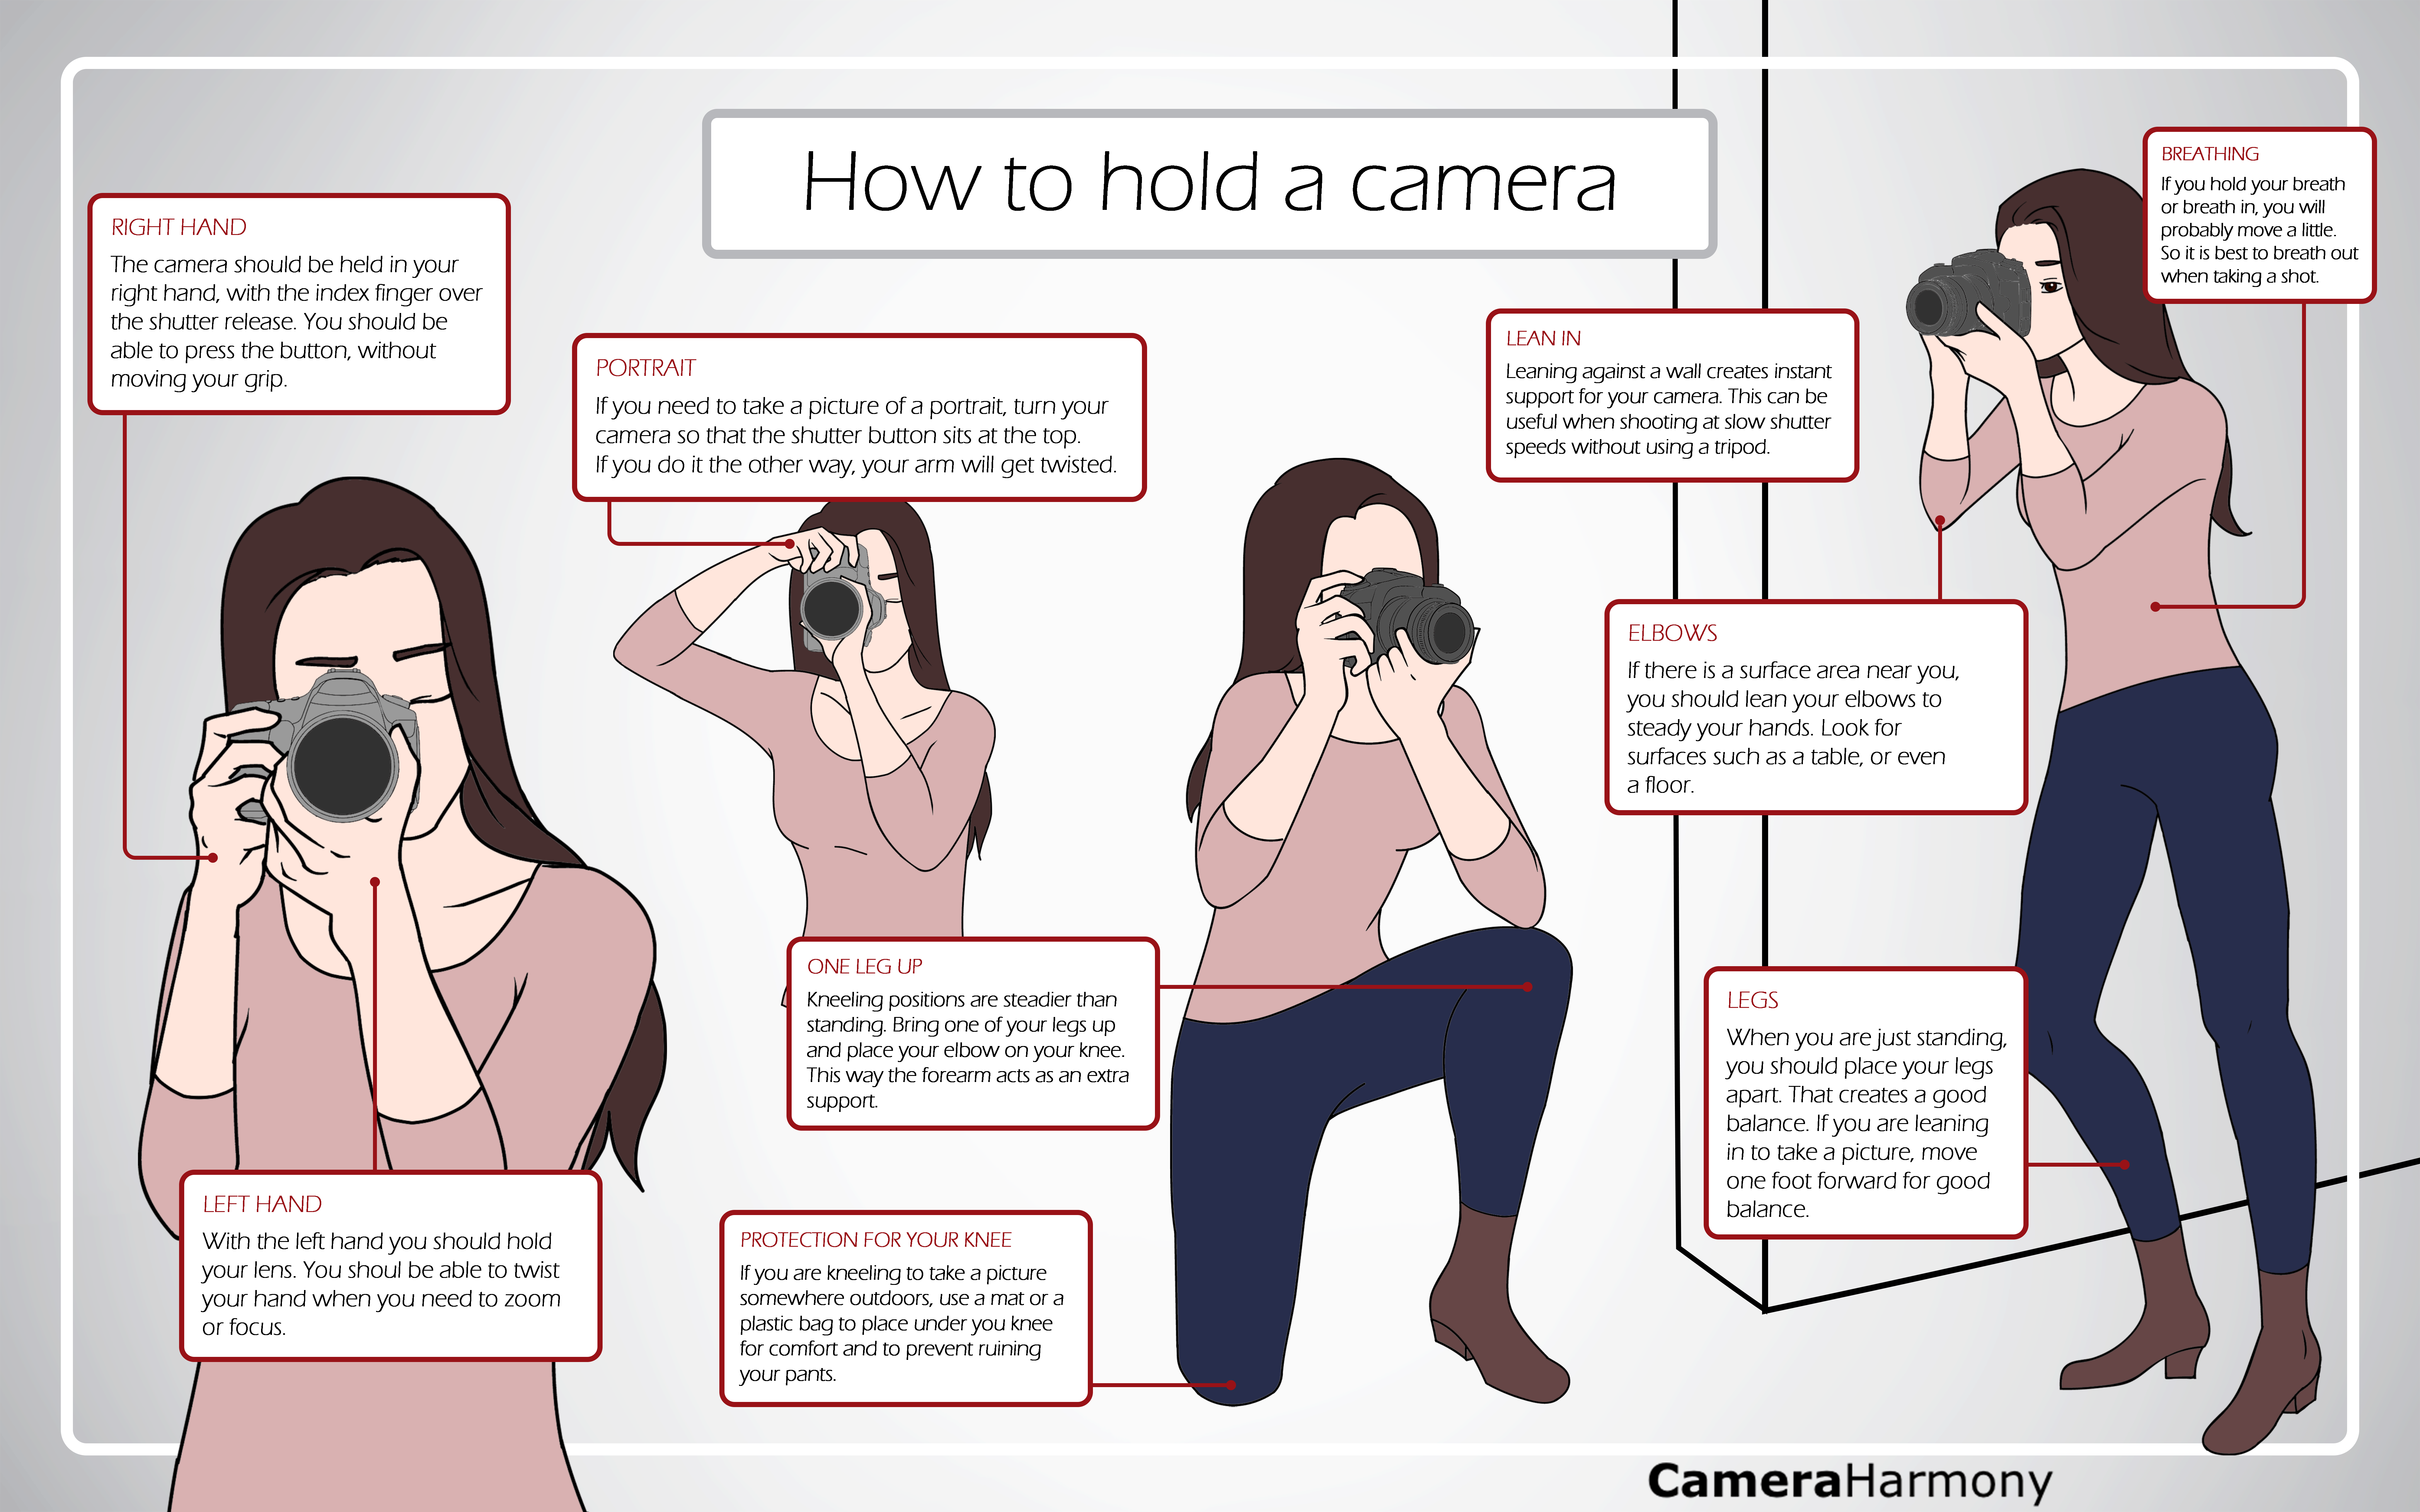
With your hand on the grip, use your index finger to press the shutter button (you won’t need to remove your hold on the grip). When holding the lens, rest the lens on your left hand and cup the lens from the bottom. You can twist the lens barrel (the focus ring and/or zoom ring, depending on the lens) with your fingers without loosening your hold on the lens. Make sure to tuck your elbows into your body to keep the camera sturdy. You can turn your body into a tripod, essentially!
If you want to photograph in a vertical orientation, turn the camera until the shutter button is at the top and rest the camera’s viewfinder on your eyebrow.
With telephoto or physically long lenses, you’ll need to account for the weight distribution of the long lens. Just move your hands further down the lens to hold it evenly.
The key is to keep your elbows closer together and towards your body, no matter how you grip the equipment. This stabilizes you!
Standing Up
Most photography is done standing up. Make sure that your feet are perpendicular to the subject you are photographing. Widen your stance a bit to find your greatest balance. Hold the camera to your face and press on your face a bit, creating an additional balancing point for your gear.
Keep your back straight! It may be tempting to lean forward or back, but this isn’t very good for your posture and doesn’t aid in your photography. Keep your back straight. Better to back up or move forward than lean.
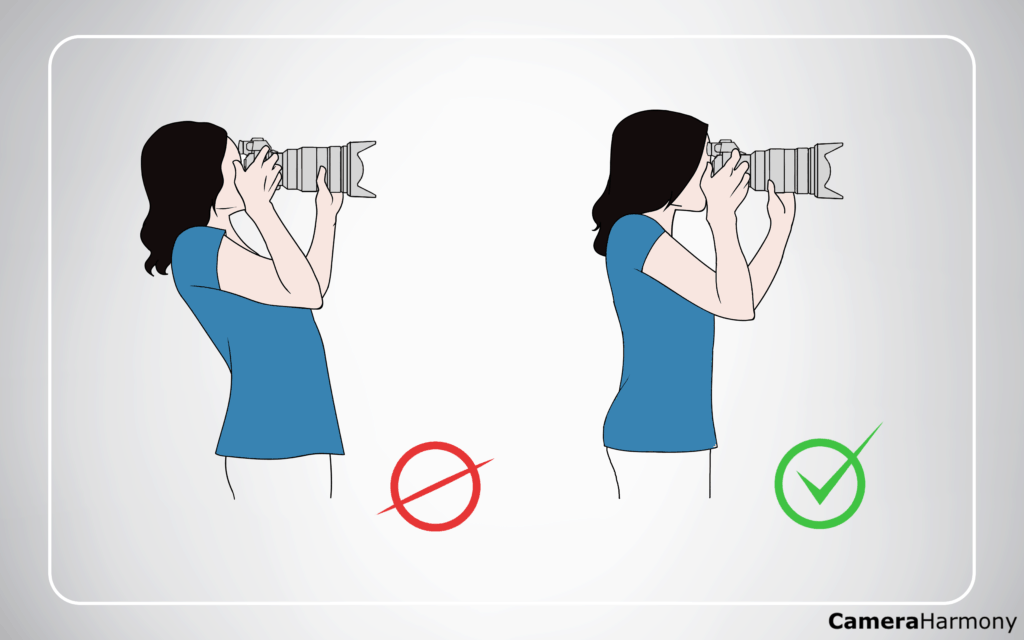
If you can, lean on something or push on something that can bear your weight to limit your movements.
A big secret that photographers keep close is to breathe out right before clicking the shutter to take a picture! When you breathe out right before, you lessen the chance of camera shake because your body performs fewer movements.
Sitting Down and Laying Down
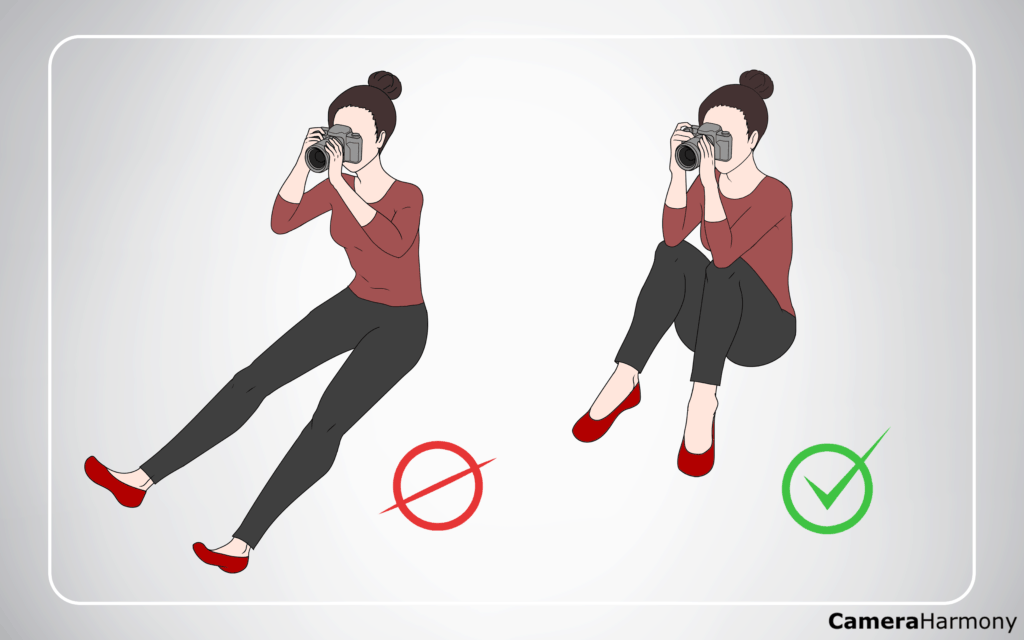
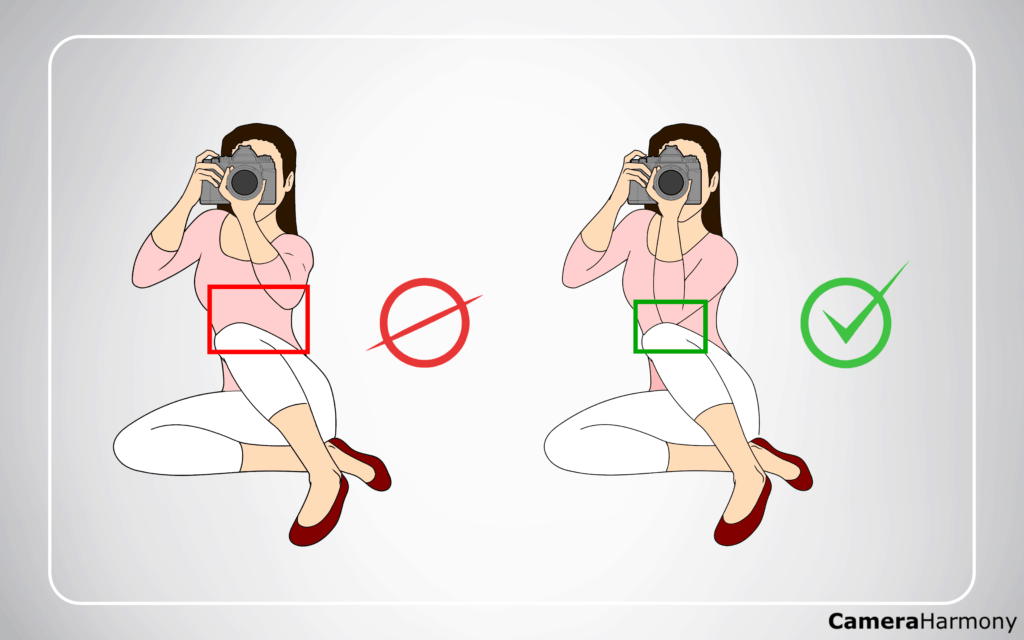
If you sit down for pictures, you must find another way to stabilize the camera. Use your knee as a tripod by resting your elbow on your knee while holding the camera! Don’t try to handhold the camera with your legs stretched out flat; you’re losing support. Bend your knees and rest on your knees.
If you’re lucky enough to be at a table, rest both elbows on the table for balance.
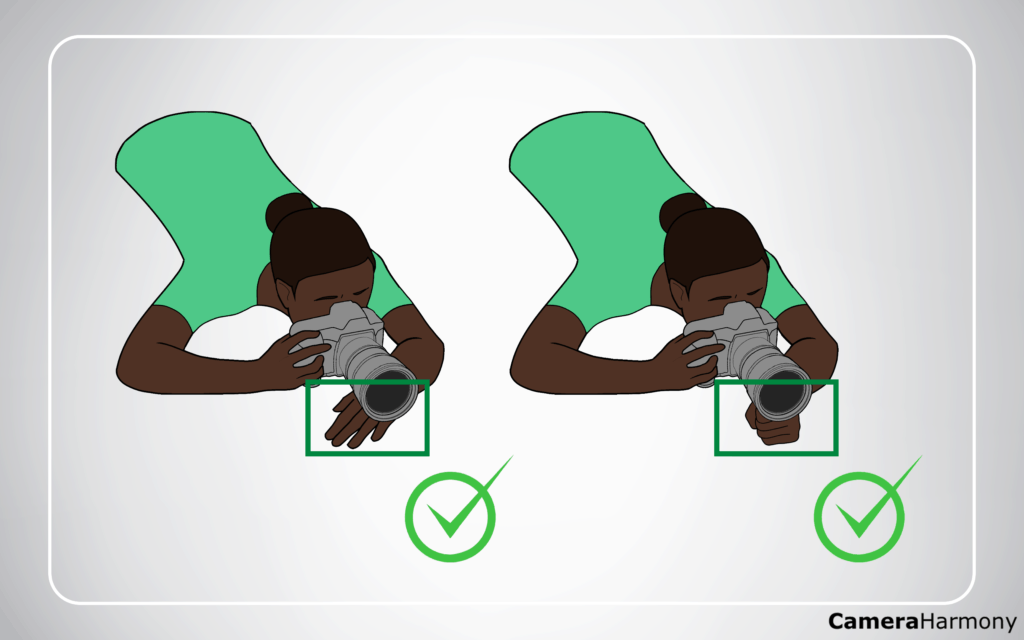
If you’re a pet photographer, you’ll likely be lying on the ground a lot to catch those great angles. Let the camera and lens sit directly on the ground while lying flat on your stomach. Some lenses may cause a downward tilt as there is a discrepancy between camera height and lens height- this is easily remedied by placing your left hand flat on the ground underneath your lens.
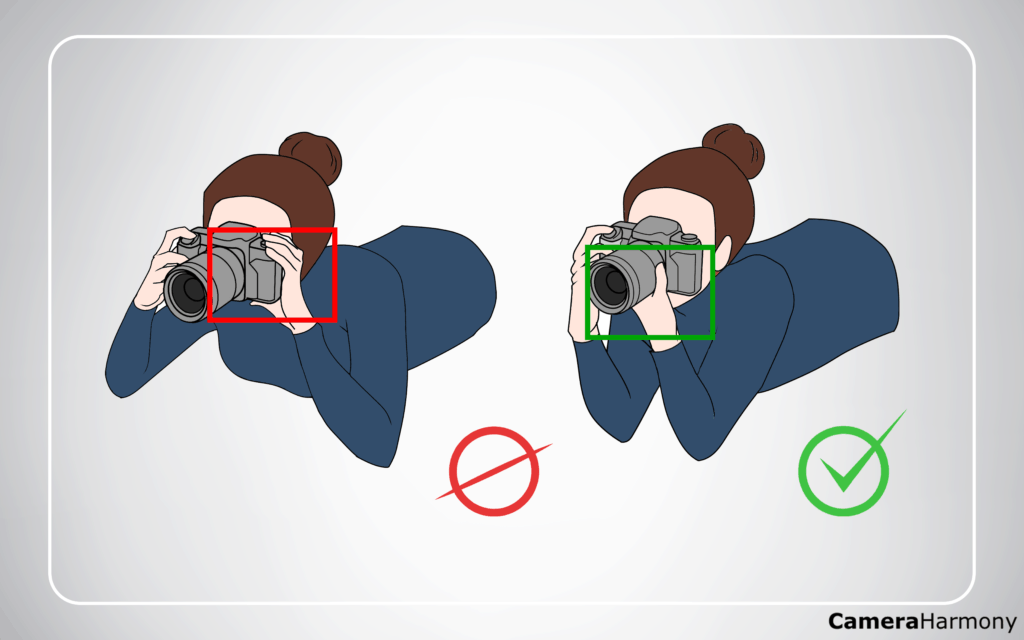
If you need more height, keep lying on your stomach, but raise your elbows and lean on your elbows. Make sure your elbows are straight and close together for more stability.
Now, take these tips with you to your next shoot, and have a good time!