
One of the many beauties of photography is allowing the viewer to see ordinary life in an extraordinary way. One means of doing just this is utilizing a type of photography called Macro photography. Macro photography breathes new life into the smallest parts of our world, making them larger than life!
Here is our ultimate guide to macro photography!
What is Macro Photography?
Macro is a unique type of photography in which small objects are photographed so close up that they are made to look life-sized or larger than they are in a photograph. The term “Macro” itself means “large scale”.
Macro photography is fascinating in the sense that it allows one to see small objects or details in a whole new way, exploring the details of the world around you.
Macro Mode is universal in photography, excluding some camera brands in which the term is “Micro” photography. One such brand is Nikon.
Difference Between Close Up Photography and Macro Photography
Where things get a bit trickier is that Macro photography is Close Up photography, but not all Close Up photography is Macro photography. Close Up photography is done by photographing objects at a very close range with a standard, non-macro lens.
How this differs from true Macro photography is that true Macro photography features a more significant degree of magnification and a lot more fine detail. Macro photography can even make the most miniscule details seen.
Close Up Photography
Macro Photography
What Does Magnification Mean for Macro Photography?
Magnification is an important concept in Macro photography. Magnification refers to how enlarged a subject is.
Magnification in photography is a ratio. 1:1 is considered to be at “life size” magnification. Half size ratio is 1:2. An example of how this works is this: Let say that you shot a subject that is 3 centimeters long, such as an insect. If the insect roughly filled your 35mm frame you shot a 1:1 ratio. If it only filled half the frame you shot 1:2 ratio, and if you only got its head, it is 2:1 ratio.
Typical sensors in DSLRs and mirrorless cameras range from about 17 millimeters to 36 millimeters across. This is why a 1 centimeter subject is pretty big by comparison, taking up a significant portion of your photo.
Good macro lenses let you shoot at 1:1 magnification, and some can even shoot up to a ratio of 5:1, (which is 5 times magnification!).
Common Types of Macro Photography
Macro photography is often used for the following subjects:
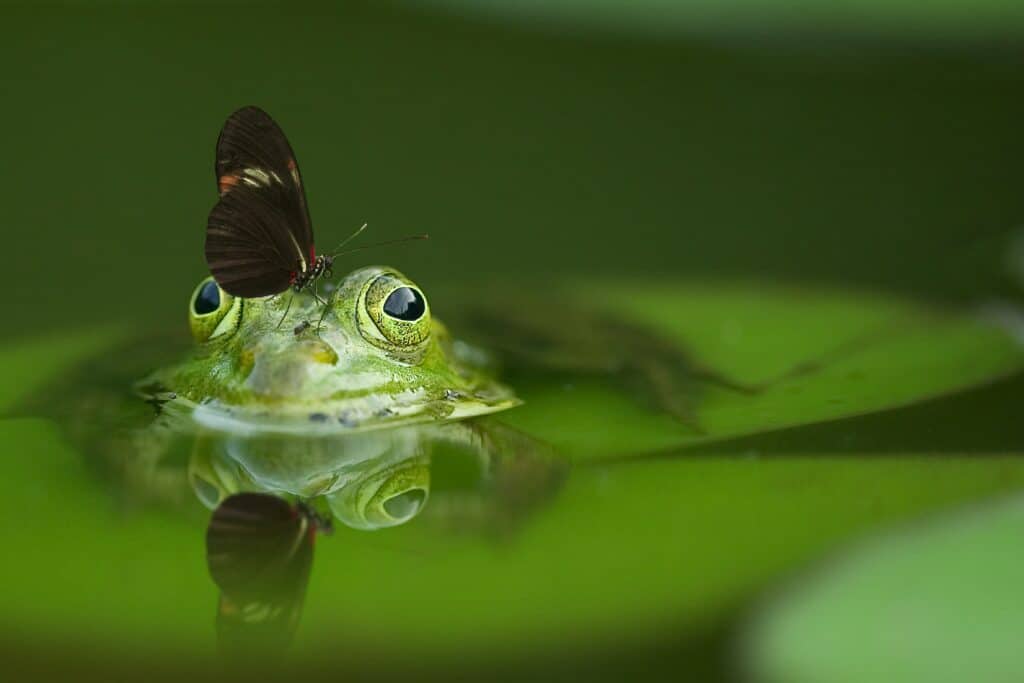
Wildlife Photography
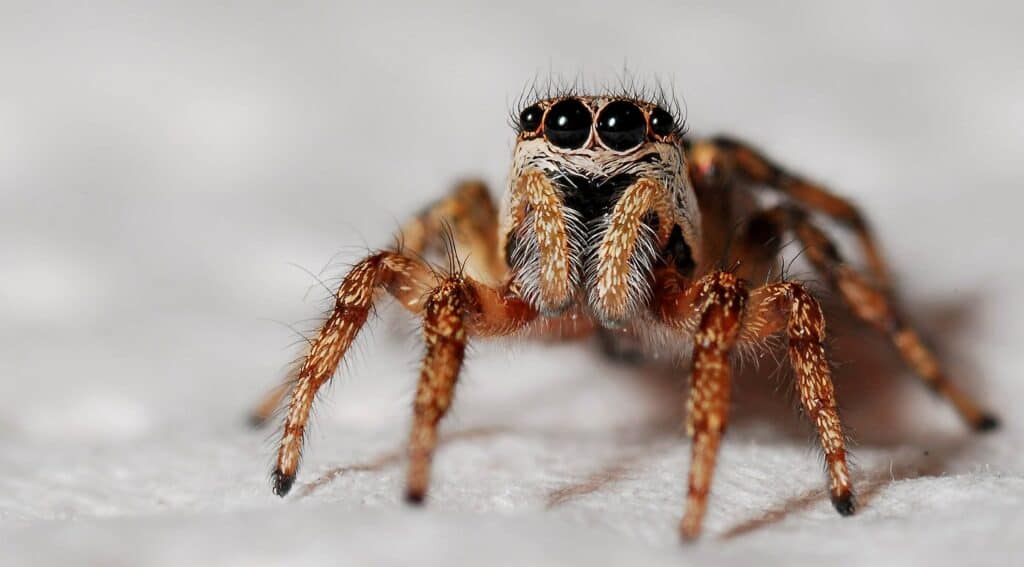
Insect / Bug Photography

Product Photography

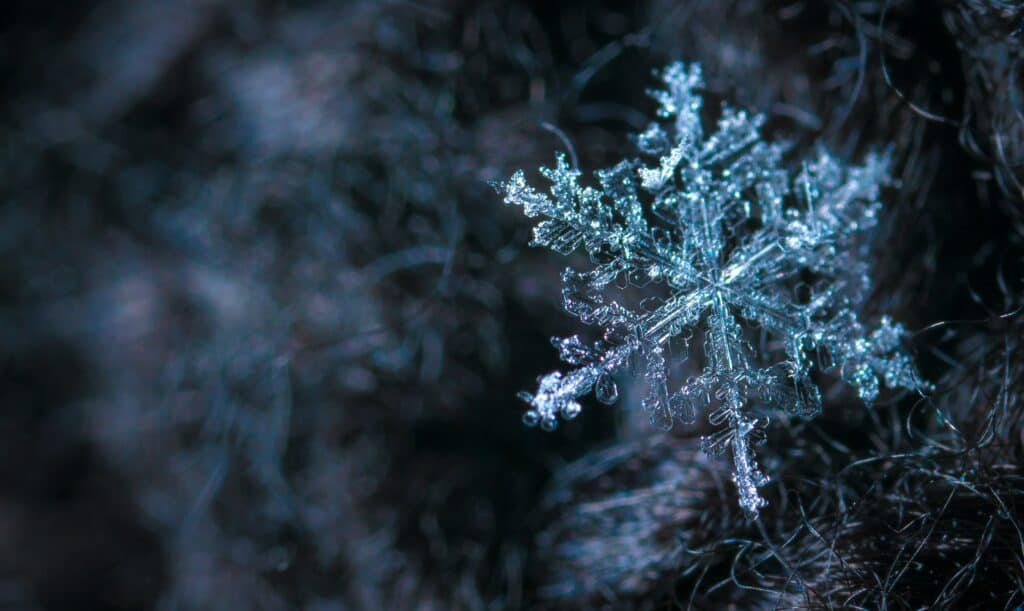
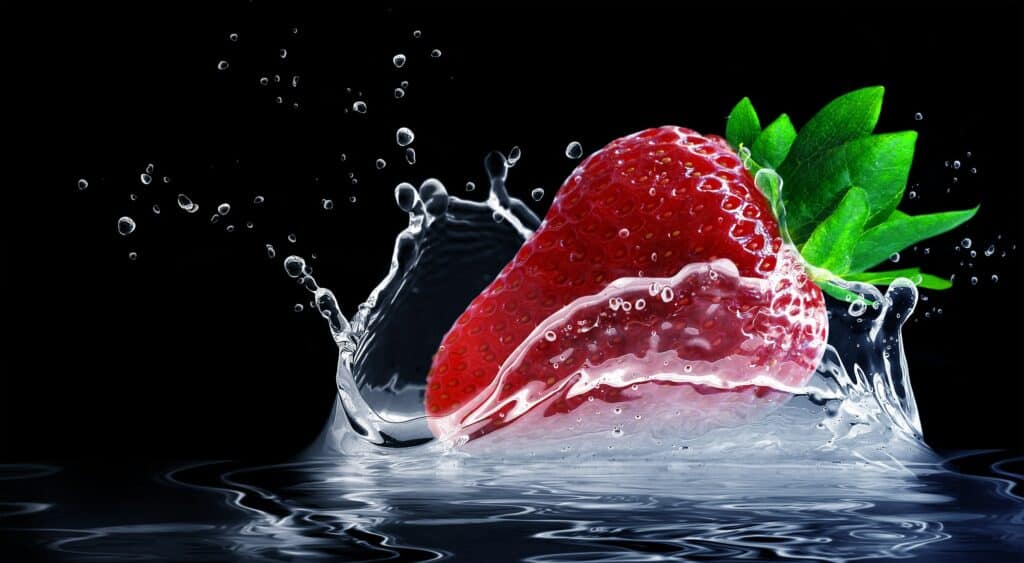
Water Droplet Photography
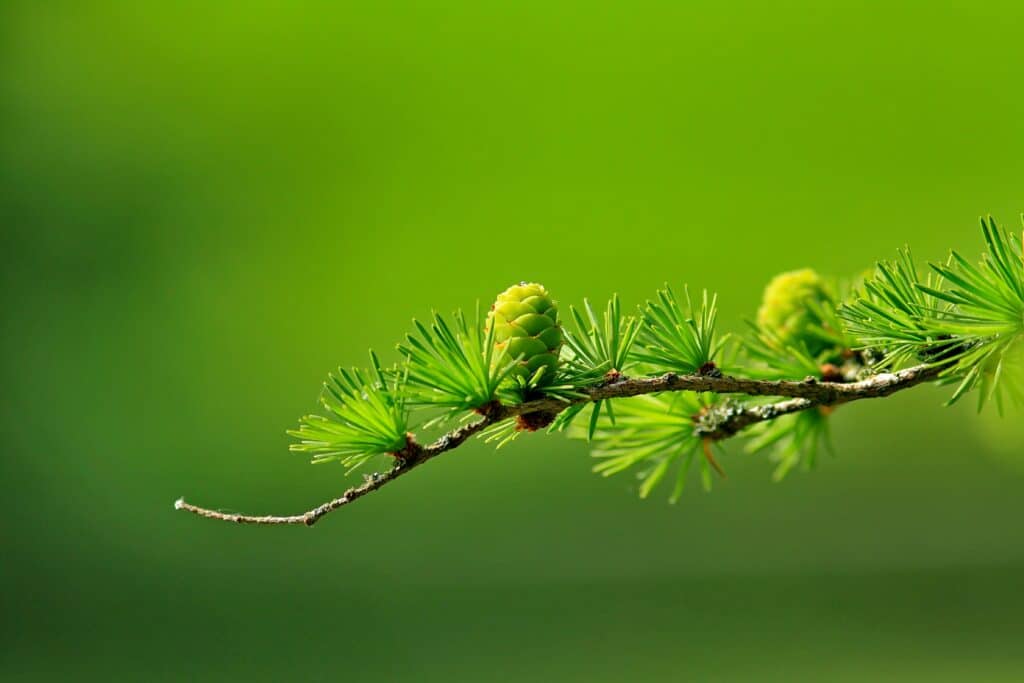
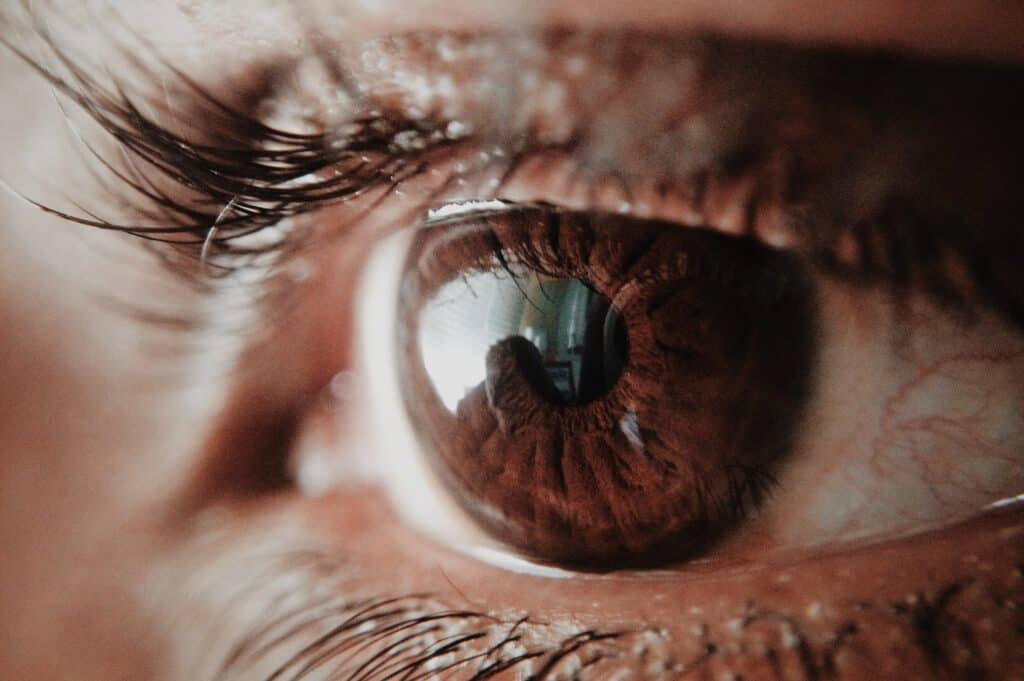
Detail Photography
What Do You Need for Macro Photography?
A camera with a high megapixel count, a dedicated macro lens, some extension tubes and filters, and a few other accessories are all a good idea if you want to get into macro photography.
Camera for Macro Photography
When considering a very detail-oriented camera, a camera with a large megapixel count becomes important. As you may deduce, the more megapixels, the higher quality the image because there will be more details.
Megapixels impact the editing room, in which the more pixels there are the more details you have to work with when viewing, printing, or retouching a photograph. If you need to crop an image, if the photograph has a lot of megapixels you can crop and still enlarge really big with no trouble.
Cameras also have different sensor sizes. Sensors can be full-frame (large sensors that capture an entire scene) or APS-C / Crop sensors (sensors that are smaller than full frame and only photograph a portion of the image).
For Macro photography, you’re really going to want to use a full frame camera. Not only are you going to be capturing the entire frame, but full frame cameras also have higher megapixel counts than crop sensors and that matters with this type of photography.
Lens(es) for Macro Photography
True Macro photography is done with dedicated macro lenses. These lenses will be expressed not just with a focal length but also with a magnification ratio.
There are three types of Macro lenses: short, intermediate, and long.
Short macro lenses range from 35mm-60mm. These lenses are less expensive than the other two, but require you to be fairly close to your subject due to the generally wider angle.
Intermediate macro lenses are 90mm-105mm. These allow you to be further from your subject but are still a light enough weight to not be over encumbered.
Long macro lenses are 150mm-200mm. These are very high quality lenses that shoot at a long distance, making them the best for insects and such small critters. However, these lenses are heavy and tend to be quite expensive.
Alongside this, you also need to take a look at the lenses for their quality. You want to use a lens that is very sharp and high quality, as details are important. The high end or luxury line of lenses at each camera brand tend to have great glass, which aids in the images being sharp.
Next is looking at macro lenses that are fixed, or a lens that does not zoom. Because fixed lenses do not move, their design revolves around getting the most out of the static focal length. Fixed lenses are extremely sharp and tend to be quick to focus. As well as this, fixed lenses have much wider apertures than zoom lenses because there is more room to make the lens wide. This allows you a tremendous amount of control over your depth of field, allowing it to go from shallow to deep.
Extension Tubes and Close Up Filters
If you don’t have it in your budget to buy a designated Macro lens, you can turn your lens into a Macro with extension tubes or close up filters.
Extension tubes are hollow cylindrical spacers that are attached between the lens and the camera mount to increase the extension of your lens.
Extension tubes do have drawbacks that are important to consider. Extension tubes place more distance between the lens and camera sensor and reduce the amount of light that hits the sensor as a result. As such, your images are darker so you will have to adjust your exposure equation in order to lighten the image. Keep in mind as well that extension tubes are only as good as the lens they are attached to.
Another alternative are close up filters. A close up filter screws onto the front of your lens and essentially acts as a magnifying glass. This can reduce the quality of images as the glass doesn’t tend to be very high quality, but is an easy alternative to buying an expensive Macro lens!
Camera Settings for Macro Photography
The camera settings for Macro photography refer mostly to exposure, as the lens does most of the Macro work.
Exposure is the amount of light that reaches your camera. Too much light and your image will be too bright. Too little, and it’ll be too dark.
Exposure is a formula: ISO + shutter speed + aperture = exposure.
Like a mathematical formula, if one variable is changed, the rest are affected by the change.
The ISO is your camera’s sensitivity to light. The lower the ISO number, the less sensitive the camera is to light (but the less noise the photograph has). Even the smallest amount of noise is very noticeable in Macro photography, so you want to keep your settings at around ISO 100 – 500, and not much more than that.
The aperture controls how much light does (or doesn’t) hit your sensor. The lower the aperture number, the more light the camera lets in. The higher the aperture number, the less light the camera lets in. Lower aperture is a shallower depth of field and higher aperture is a deeper depth of field.
The shutter speed is how fast your camera takes the photograph. The higher the shutter speed number, the more frozen the action will be (but the photograph will be darker). The lower the shutter speed number, the more motion blur your photograph will have (but the photograph will be lighter). This depends very much on your subject, but generally, the subjects don’t move- so feel welcome to adjust this setting to whatever is necessary to accommodate the ISO and Aperture selections.
An important setting to adjust for Macro photography if you are using a DSLR camera is the Mirror Lock-up Function. DSLRs have mirrors inside of them that flip up out of the way when you press the shutter button. This action itself can cause your image to be blurry if you are using slow shutter speeds. On most cameras that means you will press the button once and it will flip up the mirror, pressing it again takes the exposure.
For metering, it is fine to leave the camera on the default metering mode of Matrix Metering, which considers the entire frame when setting the exposure. White Balance gets adjusted based on what lighting is available.
Achieving Precise Focus
Focus is where things can get tricky with Macro photography due to the small subjects.
Here is the basic concept of how focus works in a camera. When you focus your camera on a subject, it establishes a focal plane. To get your subject in focus, it has to be on the focal plane. Focal planes happen on an x (horizontal) and y (vertical) axis. This means anything along either of those axes will be in focus, and anything not on them will be out of focus.
Modern day Macro photography really enjoys shallow depth of field. Depth of field refers to how much of an image is in focus. When a depth of field is shallow, that tends to mean that just the subject is in focus and the rest of the image blurs away. Shallow depth of field is created with a wide open aperture, such as F/1.4.
The concern with a wide open aperture is that your focal plane is quite small. As you decrease your aperture number and make the opening wider, the invisible area in front and behind the plane of focus will get smaller and smaller, leaving you with much less wiggle-room.
If the subject you are capturing is exceptionally small or you want the whole subject in focus, increase your depth of field. Make your aperture narrower, such as F/16. Remember that this makes your image darker, so adjust the rest of your exposure variables accordingly.
A trick to help make sure that what you want in focus is indeed sharp, is to use single point autofocus. By default, your camera will probably select either the object that’s closest to the camera or what’s in the center of the frame. By using single point autofocus, you tell the camera exactly where to focus, which is extremely helpful.
But sometimes, autofocus still isn’t able to find your subject and the camera begins to ‘hunt’ (focus in and out looking for the subject). That is when it is a good idea to switch to Manual focus. Manual focus is when you lock on to a subject by hand. You find focus by turning the focus barrel ring until the subject is nice and clear in your viewfinder.
This is the most accurate way to lock on to your subject, but does have a learning curve. You usually have to adjust focus in smaller movements and increments to ensure it is just right, as a big spin to the focus ring can cause you to lose your subject entirely. Because of these small movements, it can be a bit difficult to see if your focus is locked sharply at first. This is something you learn to see over time!
Focus Stacking
A popular technique that many Macro photographers use for their work is focus stacking. Focus stacking is when you photograph the same scene with different focus points and then use post processing to layer the images together.
For example, say you have a picture of an engagement ring. You take one photograph of the diamond in focus. One photograph of the band in focus. One photograph of the stand the ring is sitting on in focus. Then you take these three images, put them together in an editing program, and create an image in which the entire ring and the stand is in focus.
This is a great way to preserve the exposure settings and sharpness while creating a depth of field that may be otherwise impossible.
You do focus stacking by taking images of the subject at different focus points and then layering these images together in a post processing software, such as Photoshop.
Conclusion
In conclusion, with this nifty guide saved in your bookmarks, you can tackle Macro photography like a pro!