
If you’ve tried to capture photographs with a shallow depth of field, you may wonder if there is a way to keep the soft background but get more of the subject in focus… other photographers seem able to do that. How can you?
Let me tell you a little secret – they use focus stacking! Focus stacking is a post-processing technique that allows you to create ‘impossible’ images. Let’s explore!
What is Focus Stacking, and what does it do?
Focus stacking is a post-processing technique that layers multiple photos taken at different focal distances. Focus stacking gives an extended depth of field and allows for sharp focus throughout the whole image.
For example, say you have a picture of an engagement ring. You take one photograph of the diamond in focus. One photograph of the band in focus. One photograph of the stand the ring is sitting on is in focus. Then you take these three images, put them together in an editing program, and create an image in which the entire ring and the stand are in focus.

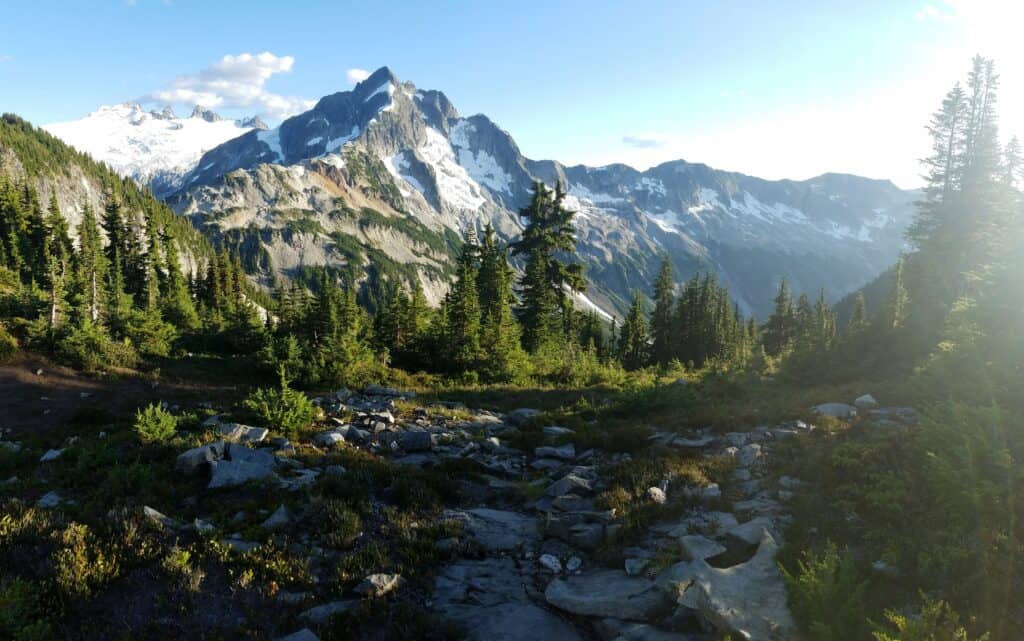
Landscape photographers use this trick all the time to capture impossibly sharp images. They will focus on the front of the landscape, the middle section, and the furthest point away from you. “Stack” them together and create a super sharp image.

Why Do People Do Focus Stacking?
To explain why people do focus stacking, let us refresh on the depth of field and aperture.
Depth of field refers to how much of an image is in focus. When a depth of field is shallow, that tends to mean that just the subject is in focus, and the rest of the image blurs away. When depth of field is deep, the subject, the foreground, and the background are in focus. This background blur is called a “bokeh.”
The aperture controls the depth of field. Aperture (also denoted as F-Stop or F/insert-number-here) are the numbers on your camera that can range from f/1.2 to f/64. The smaller the number, the wider your aperture. The larger the number, the narrower your aperture. The wider the aperture, the shallower the depth of field. The smaller the aperture, the deeper the depth of field.
The reason people do focus stacking is that the depth of field is limited. It is impossible to create certain images due to limitations. Here are two examples of such problems:

Shallow depth of field is the quintessential ‘professional photograph’ look. But if you’ve ever tried shooting with an F/1.2, you know that only one little part of the image is in focus. However, if you’ve tried to shoot with F/4.0 to get more of the subject in focus, you lose your creamy depth of field. The solution is to use focus stacking to keep the entire subject sharp and clear but retain the creamy bokeh.

Deep depth of field has problems too. Extremely narrow apertures with a very deep depth of field suffer from a problem known as diffraction, which can make your photographs look very soft. Diffraction is when the light that hits your sensor disperses and is no longer clear- which will cause your image to lose a tremendous amount of quality no matter how many megapixels or how high resolution the camera is. Your sharpness is gone.
You can use focus stacking to ensure the whole image is focused and enjoys the highest level of sharpness. No diffraction problems!
How Do You Do Focus Stacking?
First, you have to get your photographs.
Set the camera on something sturdy, such as a tripod. You have to make sure each image is identical in composition to make combining the shots easier.
Next, set all your exposure settings – the ISO, shutter speed, and aperture.
Then, set your camera to Single Point Autofocus (name may differ with brands). This allows you to use the dial on your camera to select what part of the frame you will focus on.
Proceed to focus on the closest point of your image that you want in focus and take a shot. Then select the middle point you want in focus and take a shot until you have all your images.
Once you have your photographs, it is time to put them in an editing program. Adobe Photoshop is the industry standard, so we’ll discuss this. Photoshop makes this easy as it can align the images automatically for you! At the top of your menu, go to File > Scripts > Load Files Into Stacks and choose your files in the pop-up window. Be sure to select the box that says “Auto Align”!
You should see all of your images as layers now. Then at the top of your screen, go to Edit > Auto-Blend Layers. Check the box for seamless tones and colors and select the “stack images” option. The end, that’s it!
If the images aren’t perfectly blended, you can use Masks to erase the parts that aren’t perfect. Just click on the layer causing trouble, click “mask” at the bottom of your layers palette, and take the eraser tool to erase the part that is a problem.
What is Focus Stacking Best Used For?

Because you have to take photographs of the same subject in the same position and composition, focus stacking is best used for still life, landscape, architecture – any non-moving subject.
Although it can be possible to use focus stacking for portraits, you must ensure your subject understands that they cannot even breathe! They must be perfectly still, or aligning the layers will become a nightmare.
Conclusion
Now you know the secret to seemingly impossible shots – not everything is right off the camera! Use focus stacking to enhance your photography, wow your audience, and leave everyone else guessing!