
Eyes are truly the windows to the soul- you can tell so much about someone by their eyes. That being said, we never really stop to look at all of the delicate details in the eye, nor the intensity of the various colors. Eye photography has become increasingly popular in recent times, especially with equipment advances that really highlight each and every detail. Here are the tips and secrets to make your eye photography look stunning.
Firstly, being set up with the right equipment impacts the final output of the image. Good equipment equals more clarity! Next, great lighting really brings out the most in eyes, as does the right aperture to capture the focus. Finally, making sure your shot is sharp and clear is the final piece of the puzzle.
Let’s Talk Equipment
As always, the final result boils down to the equipment that you use. For eyes, most equipment works just fine, but there are some ideals you’re going to want to look for if you want to recreate some of the most stunning eye photographs in the world.
Cameras (With High Megapixel Counts)
As eyes are still, generally, (even if they are on a living subject)- so the majority of cameras work well. However, for the really eye whopping shots, you’re going to want to use a DSLR or Mirrorless camera that has a lot of megapixels.
Megapixels aren’t a gimmick to increase the price of a camera. Alongside prints, the megapixels do impact the details and quality of an image. As you may deduce, the more pixels, the higher quality the image because there will be more details. Megapixels is a unit of measurement for the amount of pixels in a photo.
For photographs of eyes, the most compelling aspect are the unique and stunning details. We usually don’t stare into someone’s eye that clearly or closely, so photography takes the ‘creepy’ factor out of it and simply introduces a gorgeous, detailed, eye. This could not be effectively possible without large megapixel counts.
At a limited level, a minimum of 25 megapixels is alright. Ideally, you’d want over 40.
Macro Lenses
If you want to capture all of the incredible detail, you’ll probably be interested in investing in a macro lens.
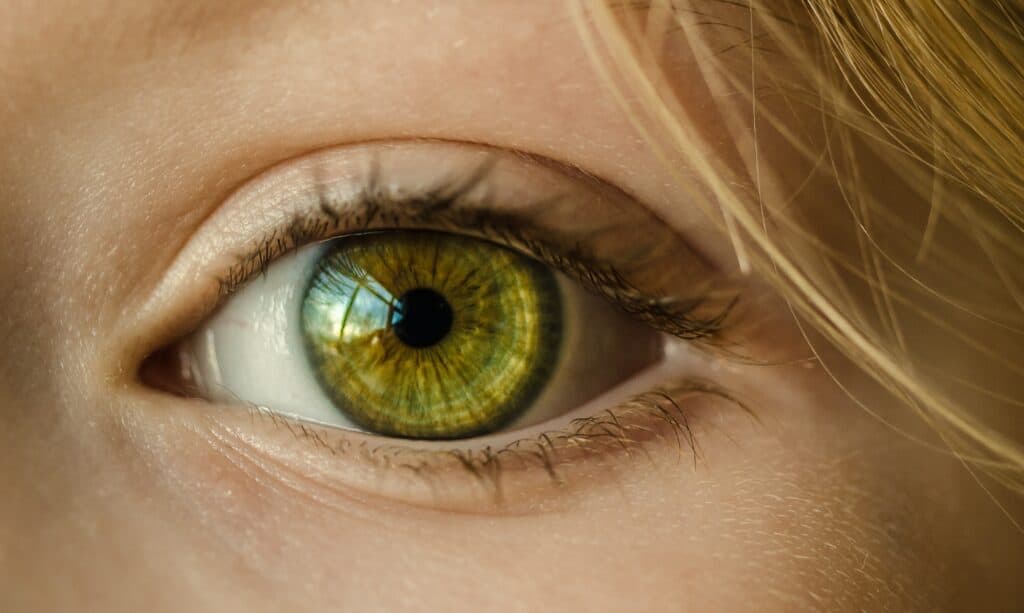
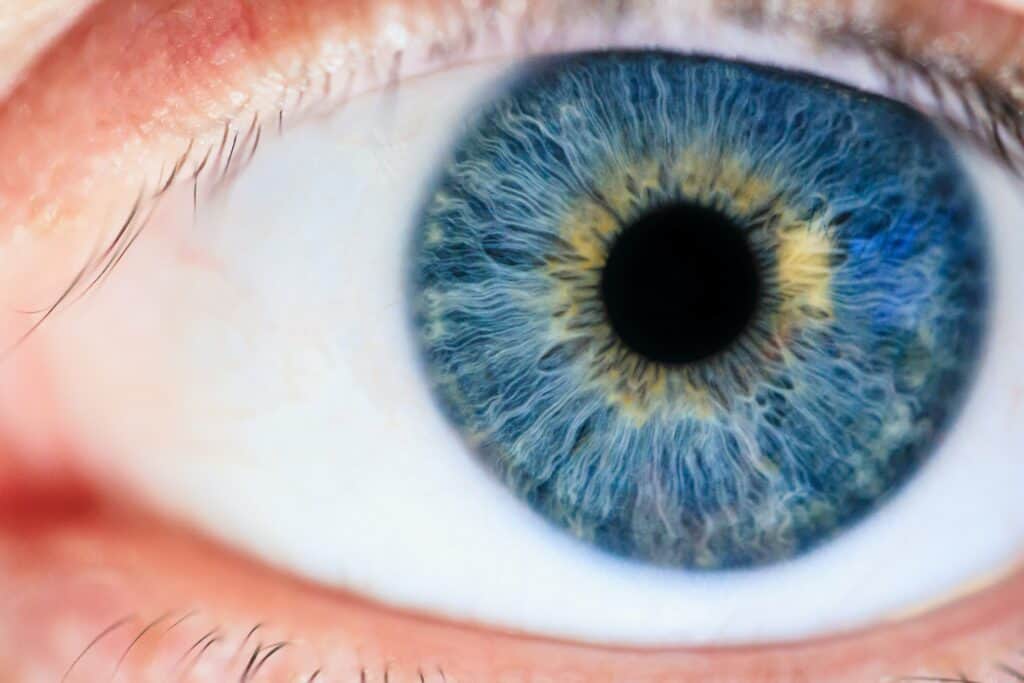
Macro is a unique type of photography in which small objects are photographed so close up that they are made to look life-sized or larger than they are in a photograph. The term “Macro” itself means “large scale”. Macro photography is fascinating in the sense that it allows one to see small objects or details in a whole new way, exploring the details of the world around you. This is especially prevalent when photographing an eye, you can sometimes even see every teeny blood vessel!
Awesome Macro lenses for eye photography include the 70mm and the 100mm.
Can You Photograph Eyes with a Non-Macro Lens?
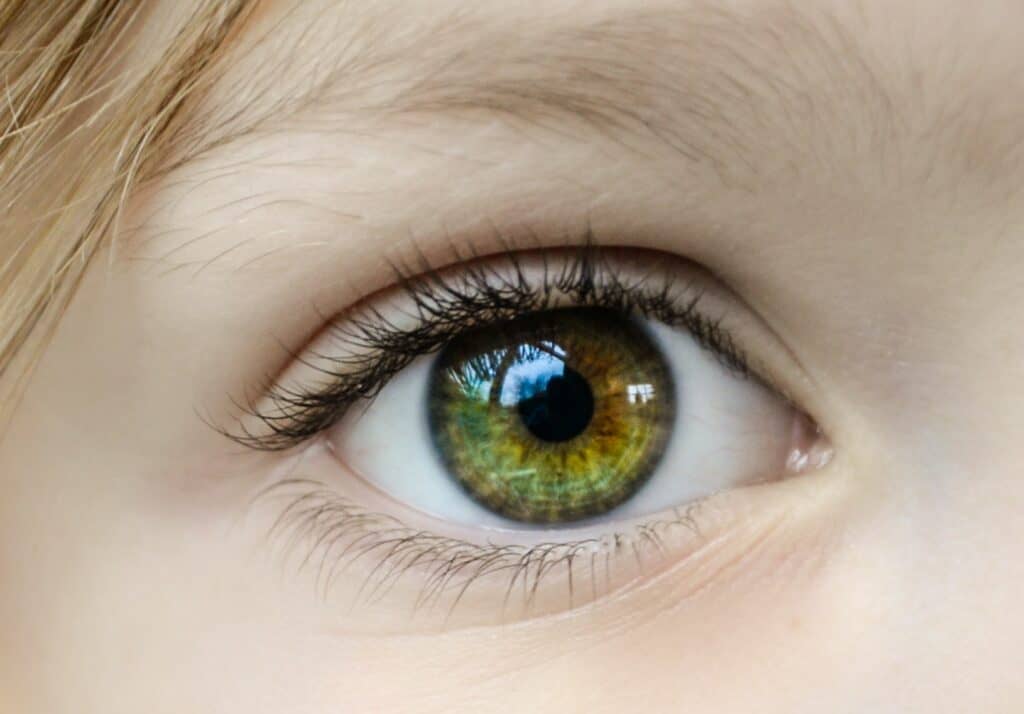
That being said, if you have standard, zoom, or telephoto lenses in your possession, you can still capture stunning images of eyes. Just make note that what you’re doing with these lenses is close-up photography, not macro photography.
Close Up photography is done by photographing objects at a very close range with a standard, non-macro lens. How this differs from true Macro photography is that true Macro photography features a more significant degree of magnification and a lot more fine detail. Macro photography can even make the most miniscule details seen.
Macro Eye:
Close-Up Eye:
Lighting is Everything
Once you have your gear selected, you need to figure out the lighting situation. Lighting can make or break your eye photography.
Natural Light
Natural, outdoor light tends to be the prettiest light for eyes. If you’ve ever gazed into someone’s eyes outdoors and commented on how they sparkle and shine, you can capture this in photographs! Just make sure not to photograph your subject in direct sunlight to prevent squinting or vision loss.
Studio Light
For studio light, you have to factor in that eyes are reflective. Catchlights become important. Catchlights refer to the reflection of a light source in the eye. The best place to put a light source, both for beautiful shots and for the catchlight, is directly above the subject at an angle. This ensures that the catchlights are not too low in the eyes because this looks awkward. Natural light sources, like the sun, are typically at an angle from above.
The shape also matters- which is why round or octagon shaped softboxes are recommended!
What Aperture Do I Need?
For eye photography, you want the whole eye in focus, so you need a deep depth of field. Depth of field refers to how much of an image is in focus. Deep depth of field is when most of the image is in focus, while a shallow depth of field is when just the subject is in focus.
The aperture is basically the window in the lens that controls how much light does (or doesn’t) hit your sensor. Aperture are the numbers on your camera that can range from f/1.2 to f/64. The smaller the number, the wider your aperture. The larger the number, the narrower your aperture
Avoid using a wide aperture such as f/1.8. Its shallow depth of field will make it even more difficult for you to capture a sharp image even when you’re up close. Instead, use a narrow aperture such as f/8 or f/11 to increase your depth of field. You want the entire eye in focus, not just a smidgen of it.
Now, remember that the aperture is a part of the exposure equation (ISO + Shutter Speed + Aperture = Exposure). By changing the aperture, you have effectively altered the formula and affected the other variables. Narrower apertures, deeper depths of field, make images darker because the aperture open is so narrow. The more narrow it is, the less light is able to hit the sensor so as such, you may be in need of bumping your ISO level a bit higher and your shutter speed a bit lower.
ISO is how sensitive the sensor is to the light that hits it. If less light is able to hit, you want to make the sensor a bit more sensitive. However, if you make it too sensitive, noise comes out. Noise are the little obnoxious specks or “ants” that appear in your image. It makes everything look murky.
The shutter speed is how fast your camera is able to take a picture. The faster it is, the darker the image because the shutter is a door that opens and closes, and with a fast shutter, it opens and closes fast (limiting light). The slower the shutter, the longer the door is held open, the more light it lets in. However, if your camera captures images slowly, then the slightest motion can cause a blur (whether it be by your hand or due to the subject).
A suggestion would be to place the lens on a tripod. You don’t want to push your ISO level too high because then noise will start to appear. It’s better to lower the shutter speed to keep the ISO at a reasonable level. However, depending on how much you lower the shutter speed, you may have made it too slow for handheld shooting.
Ensuring Focus is Perfect Every Time
The biggest key to eye photography is sharpness, sharpness, sharpness! Although the concept of sharpness is a bit of an illusion, in photography, sharpness has to do with the technical ability to achieve perfect focus.
Focus refers to the parts of an image that you can see well. When something in a photograph is in focus, it’s the sharpest and clearest part of your entire image. When you focus your camera on a subject, it establishes a focal plane. To get your subject in focus, it has to be on the focus plane. Focus planes are imaginary horizontal or vertical lines. Anything that stands on the imaginary line will be in focus, and anything not on the line will be out of focus. This is how focusing works!
Now, to make sure your image is in focus every time, the trick is knowing what kind of focusing mode to use and understanding how the focal plane works.
Now, first and foremost, the easiest way to nail focus is to be aware of when you should let the camera do the work and when you should take control. Autofocus is great for a large variety of situations, but works best when the lighting is even and well lit. If it’s dark, the lens may ‘hunt’, or move in and out searching for focus and not finding it. As such, switching to Manual Focus is the way to go here! Manual focus allotts the user full control over the focus, which puts photography right into your hands rather than the hands of a computer program. With eyes being static and your aperture is narrow, manual focus isn’t too difficult.
Next is using focus Points (every camera has them). These points tell you (and the camera) where to focus. Each point refers to an area the camera is able to focus on. By switching to a mode such as AF Selection, you can tell the camera exactly what points you need it to use to focus on your subject!
Finally, if you’re not using a macro lens, check your proximity to the subject. Macro lenses allow you to focus up close, but non-macro lenses do have a minimum focusing distance. This means that you have to be, at minimum, a certain distance from the subject in order to get focus. Sometimes your focusing issues may stem from something as simple as standing too close or too far away from your subject.
In conclusion, a combination of the above should result in absolutely incredible eye photography.