
Long exposure photography is just as eye-catching as capturing frozen moments in time. Long exposure photography shows a beautiful sense of movement, painting with the beauty of motion. Light trails are one such result of this endeavor, showcasing movement by creating a trail of light left in the path of a moving vehicle!
Here is our guide on how to do light trails in photographs!
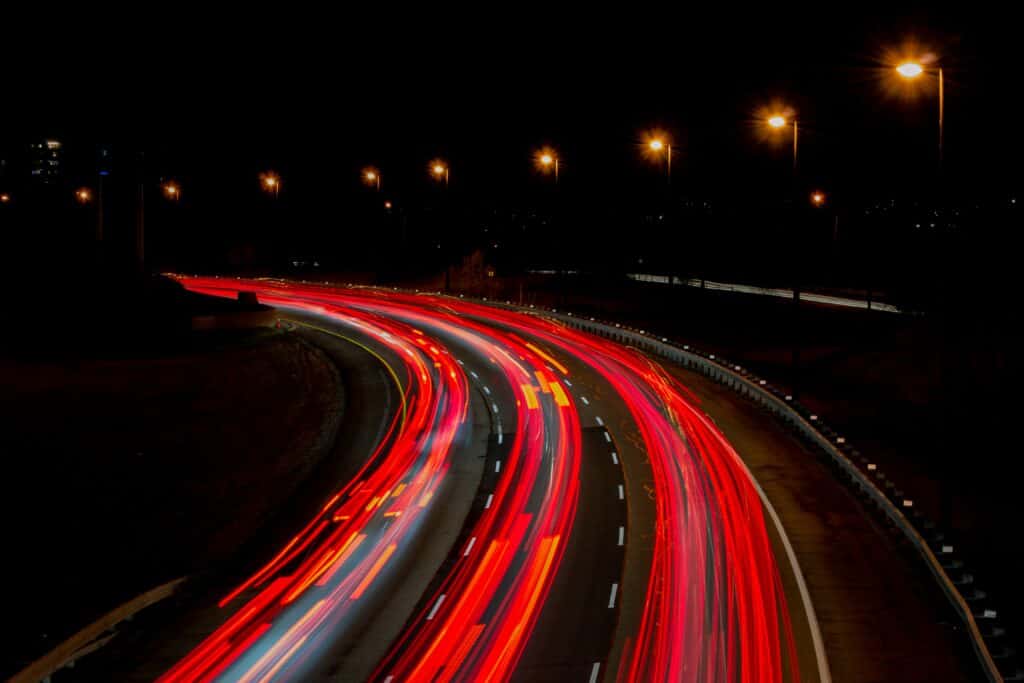
What Are Light Trails?
Light trails are when you do a long exposure photography of cars or other moving vehicles at night- but instead of seeing the car, you see the trail of light that they leave in their wake!
Long exposures are when the shutter is open for a long period of time. This is used to blur movement or obscure elements and create a more artistic-looking image.
Settings for Light Trails
The settings for light trails are generally the same as those for most long exposures. In the case of long exposures, you want a slow shutter! The longer that the shutter is open, the smoother and more motion blurred the image becomes.
Because the shutter is like a door, it has an unintentional purpose of controlling how much light hits the sensor. The shutter is located right between the lens and the aperture, which is the hole that leads to the sensor. The slower the shutter moves, the more light hits the sensor, and the brighter your image will be.
Long exposures for speed light trails are around 1/10” – 1/15”.
With slow shutter speeds, your exposure equation will need to be filled out a specific way to compensate for the amount of light coming in to the sensor.
Exposure is a formula: ISO + shutter speed + aperture = exposure.
Like a mathematical formula, if one variable is changed, the rest are affected by the change.
In the case of light trails which happen at night, your slow shutter speed will allow the sensor to have a lot of light reach it.
As a result, you’ll be able to keep your ISO level much lower than before and prevent a lot of noise. Most keep it at ISO 100.
As for the aperture, most light trail photographers set their aperture to their lens’s sweet spot (the aperture at which the lens is sharpest). Many images feature an aperture of F/4 – F/8.
How To Do Light Trails Photography
Here are the steps to capturing great images of light trails.
1. Find a Good Location
Although it’s absolutely possible to shoot light trails anywhere that there is a road, finding a great location will separate your photography from something experimental to something amazing. Look for spots that have winding roads or a lot of activity to add interest to the image. Equally, look for a location that allows you a very steady footing to place a tripod.
2. Mount Your Camera Onto a Tripod
Because you’re going to be working with slower shutter speeds and other unstable camera settings, having a stable force to keep the camera steady is key. Invest in a good tripod that is sturdy and durable!
Go ahead and mount your camera to the tripod. Make sure that your camera’s brought up to eye level by the height of the tripod’s legs, not the height of the center column. For maximum camera stability, keep the center column as low as you can.
3. Enable Image Stabilization
If you are set up on a bridge or very close to the road, then you can leave the image stabilization feature on as the vibrations of the road can cause camera shake. Image stabilization is a system in a lens that reduces motion blur in images caused by camera shake.
Although you want motion blur in light trail photography, you only want it from the vehicles- not your camera shaking!
Each camera brand has its own version of an image stabilization system, and as such, their lenses are denoted differently. Canon adds “IS” to the end of the lens names to specify that this system exists in the lens, Nikon adds “VR”, Sony adds “OSS”, and so forth.
Although each brand has its own patented stabilization technology, generally speaking, how this system works is that the components are set on a gimbal inside the lens that counteracts any movement- keeping all of the elements level.
4. Set Up Your Camera Settings
Play with various setting combinations and see which exposure you like the best. Then get ready for the perfect moment!
5. Take the Shot with a Remote, Cable, or Shutter Release
It’s best when there are several cars on the road, so wait until you see quite a few vehicles moving. When shooting, don’t just settle on one image- keep taking shots! You never know which one you will like. You can even stack (layer) them in photo editing programs such as Photoshop for an extra ‘wow’ factor.
A shutter release or remote will help you prevent unnecessary movement from clicking the shutter button to take a picture. Just press on the remote or release when you’re ready to capture an image.
Many new cameras such as Canon, Sony, and Nikon have corresponding cell phone applications that turn your smartphone into a remote and shutter release for your camera! This is a great solution that doesn’t cost any money.
Conclusion
Light trails are a fun way to turn what would once appear to be a boring freeway into something beautiful. Take these tips with you to your next night time adventure!