
There are many different kinds of photography techniques. Some are pretty well known, such as panning to capture action or using a long exposure for night time. Others are a little bit more complicated, such as creating starbursts or lighting a model in a studio.
Well, one very fun but lesser known technique is utilizing Slow Sync Flash. This creates very unique images in darker situations, combining a long exposure and a flash unit all in one! Impress your friends with this unusual setting in our guide on how to use and understand Slow Sync Flash!
What is Slow Sync Flash?
In layman terms, Slow Sync Flash is a technique in which you achieve long exposure photographs with the use of a flash unit.
Long exposures are when the shutter is open for a long period of time. This is used to blur movement or obscure elements and create a more artistic-looking image. If you’ve ever seen a photograph of a freeway with light trails or a waterfall with water that looks silky smooth, those are achieved with long exposures!
A flash is a device used in photography that bursts a powerful bright light. This is a form of artificial light. Good control on lighting is what separates the professional photographer from the amateur one- and using flashes helps illuminate otherwise dark or shadowed areas.
The flashes we are referring to are external flashes, not the one built into some cameras. External flashes attach to the hot shoe (the little bracket at the very top of your camera) and synchronize with your shutter. They output light when you press down to take a photograph.
Slow Sync Flash takes these two and puts them together. The benefit of merging these two techniques is that you can both freeze the motion or illuminate the frame well while catching motion blur at the same time.
Rear Curtain Sync and Front Curtain Sync
Slow Sync Flash has two options: Rear Curtain Sync and Front Curtain Sync. These two options tell the camera when to fire the flash, either at the beginning of your long exposure or at the end of your long exposure.
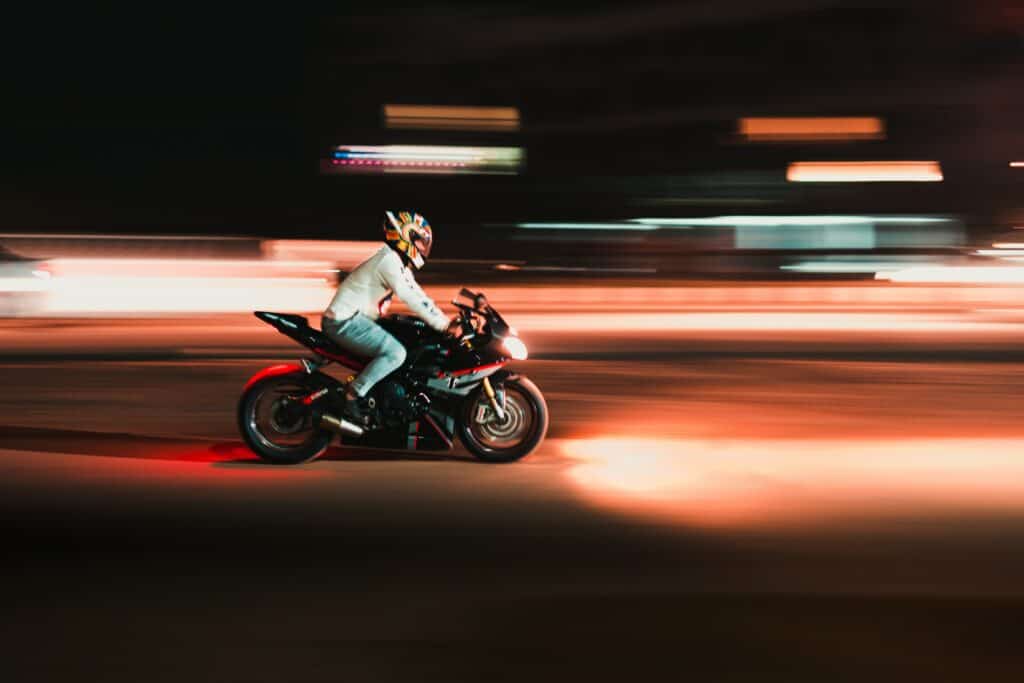
If you choose to use Rear Curtain Sync, this tells your camera to fire the flash at the end of the exposure. When you press down on your shutter in order to begin your long exposure, your lens opens up and starts collecting light and just before it closes the flash will fire. This is used often to light up and freeze your main subject.
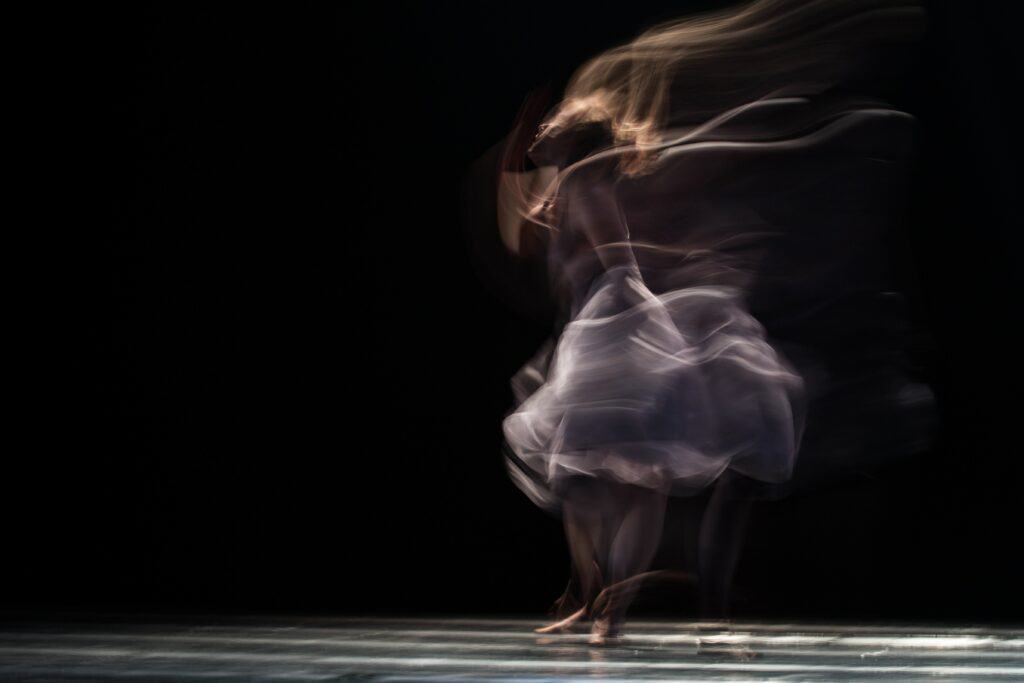
If you go with Front Curtain Sync, this tells your camera to fire the flash at the start of the exposure. When you press the shutter, the flash will fire immediately and the shutter will remain open afterwards, capturing all of the light that the flash added to the ambient (or available) light.
Which one you use depends on the look that you want to achieve.
Rear Curtain Sync tends to look like this:

Front Curtain Sync produces this result:
Tripod or Handheld?
The beauty of slow sync flash is that you’re actually able to use it both handheld or stabilized with a tripod. This, like Rear or Front Curtain Sync, depends on the look you are wanting to achieve.
If you are using Slow Sync Flash as a way to properly illuminate a frame but want to prevent motion blur, then using a tripod will be your best bet. Tripods are three-legged stands for supporting and holding a camera. They naturally stabilize a camera because it’s on an inanimate object!
Next, a shutter release or remote will help you prevent unnecessary movement from clicking the shutter button to take a picture. Just press on the remote or release when you’re ready to capture an image. Many new cameras such as Canon, Sony, and Nikon have corresponding cell phone applications that turn your smartphone into a remote and shutter release for your camera! This is a great solution that doesn’t cost any money.
If you want to capture motion blur, then going handheld with your camera will be the desired move. That being said, you should still hold the camera pretty sturdy. With your hand on the grip, use your index finger to press the shutter button (you won’t even need to remove your hold on the grip). When holding the lens, rest the lens on your left hand and cup the lens from the bottom. If you want to photograph in vertical orientation, turn the camera until the shutter button is at the top and rest the camera’s viewfinder to your eyebrow.
How To Do Slow Sync Flash
Doing Slow Sync Flash is very simple. Here are the steps!
1. Pick the Shutter Speed
The first step is to pick out the shutter speed you wish to use.
In layman terms, shutter speed is how fast your camera can take a picture. The shutter is like a door, it opens and shuts (hence the name). Every time it opens and closes, a picture is taken. The larger the number after the 1/—, such as 1/1000, the faster the shutter moves. The smaller the number, the longer the shutter remains open because it is moving slower.
In the case of long exposures, you want a slow shutter! The longer that the shutter is open, the smoother and more motion blurred the image becomes.
Long exposures start from around 1/60 and get slower and slower (all the way 1/20”). Remember that the addition of the flash will add a significant amount of light, so take this into consideration.
2. Select Rear Curtain Sync or Front Curtain Sync
Depending on the look you want, pick one of these curtain syncs.
3. Select Flash Settings
Next you need to select your flash settings.
If you are using a Manual flash, go ahead and manually input the distance between yourself and the subject as well as the intensity (brightness or power) of the light output.
If you are using a TTL flash (“Through The Lens”), then you don’t need to do very much. In this mode or unit, the flash is controlled by the camera, the amount of light coming through the camera’s lens is what is being measured to determine the light output.
Before taking a picture, the flash will emit a quick burst of light to measure what the light power should be set to.
4. (Optional) Secure the Camera on a Tripod
If you’re wanting to use a tripod, go ahead and set this up now. Make sure that when you set up your camera and tripod, the height is adjusted by the tripod’s legs, not the height of the center column. For maximum camera stability, keep the center column as low as you can.
5. Take the Shot
Go ahead and take the shot when you’re all ready!
Conclusion
In conclusion, you can use Slow Sync Flash to create very artistic and unique images! Impress your friends and clients by utilizing this technique at your next low light shoot.