

As kids, we likely played with chalk on the sidewalk. After creating masterpieces with these small colorful sticks, small amounts of chalk would remain on our hands in a bright and vibrant manner. Did you know that you can use sidewalk chalk in your photography to create colorful and fun captures?
Sidewalk chalk is typically large and thick sticks of chalk (calcium sulfate (gypsum) that come in multiple colors and powder very easily. The powder produced is lightweight and has a great movement to it when made to express action. This can then be captured with a fast shutter speed as a fantastic accessory to any photo shoot.
Why Chalk Dust?
Chalk dust is cheap, easy to acquire, and vibrant! The powder is easy to produce and lightweight enough to have a beautiful movement when activated. Chalk is also generally safe, although you do not want to purposefully inhale a lot of it. Some use flour and food dye to mimic the chalk dust effect, but it really depends on your needs as to which one works best. Flour works well for requiring large amounts of dust, while chalk works brilliantly for everything else.
For the most part, all you need to do with chalk dust is sprinkle a generous amount of it on your subject and then have them move around- it’s that simple! Chalk also temporarily stains (in a non-toxic way), so you can create beautiful skin artwork with it as well.
Ideas for Chalk Dust Use
There are so many different ways that you can use chalk dust in photography! All of them are unique and interesting in their own way.
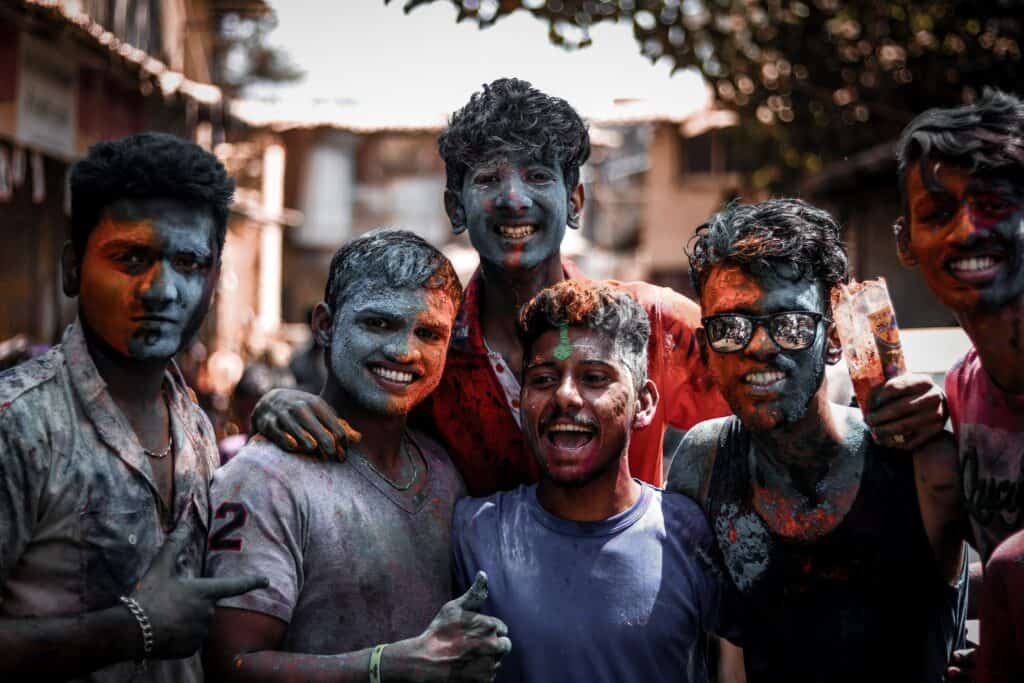
Chalk as a subject:

Chalk as body paint:
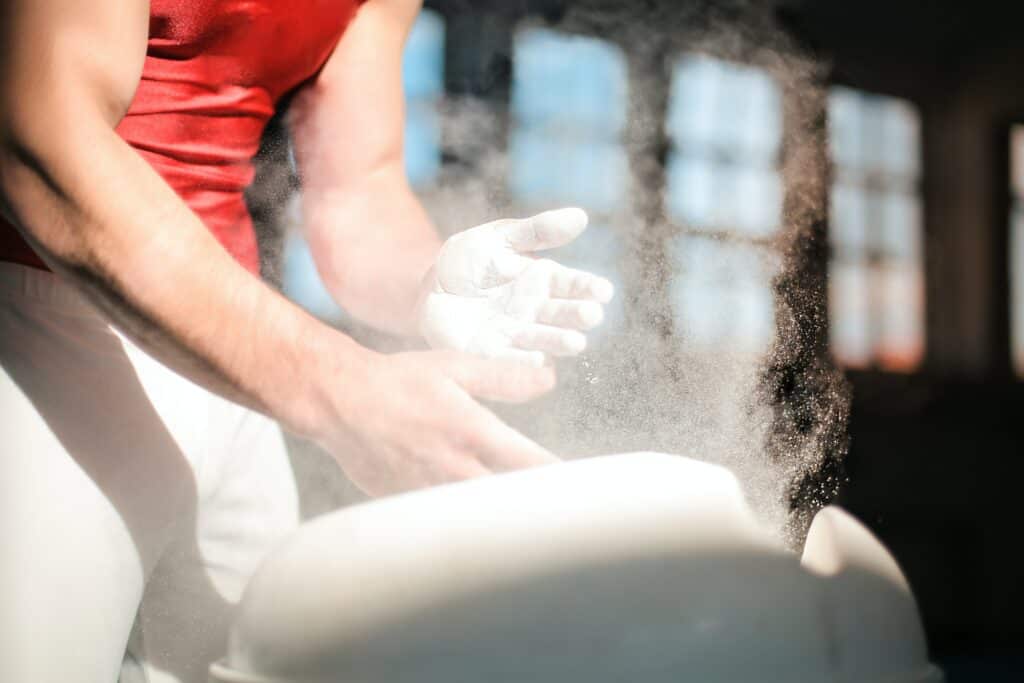
Chalk as texture:
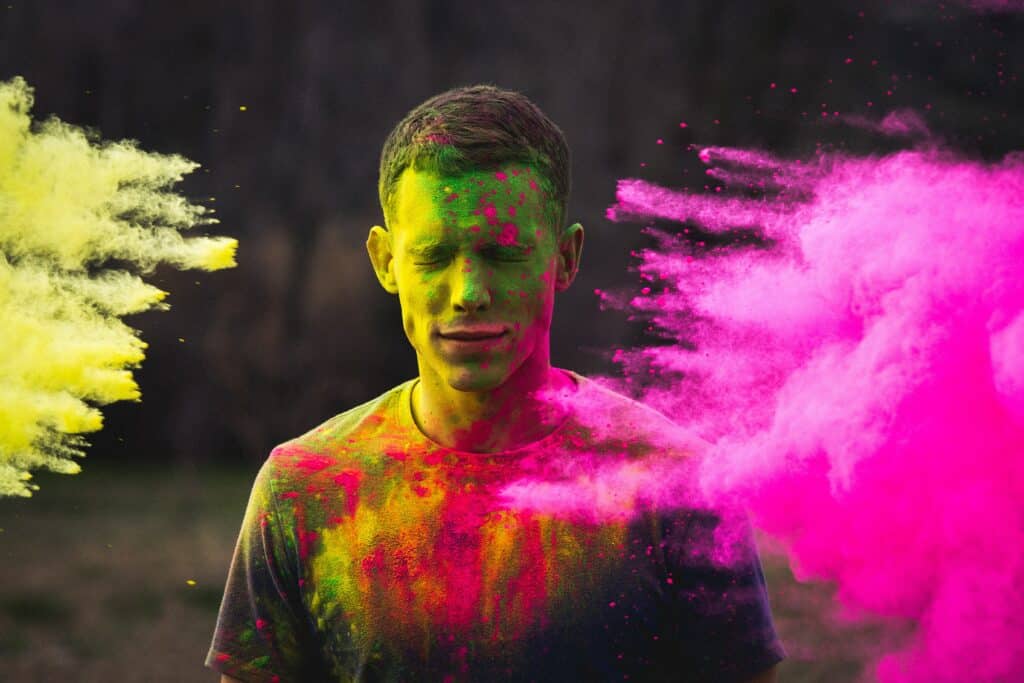
Chalk as explosions:
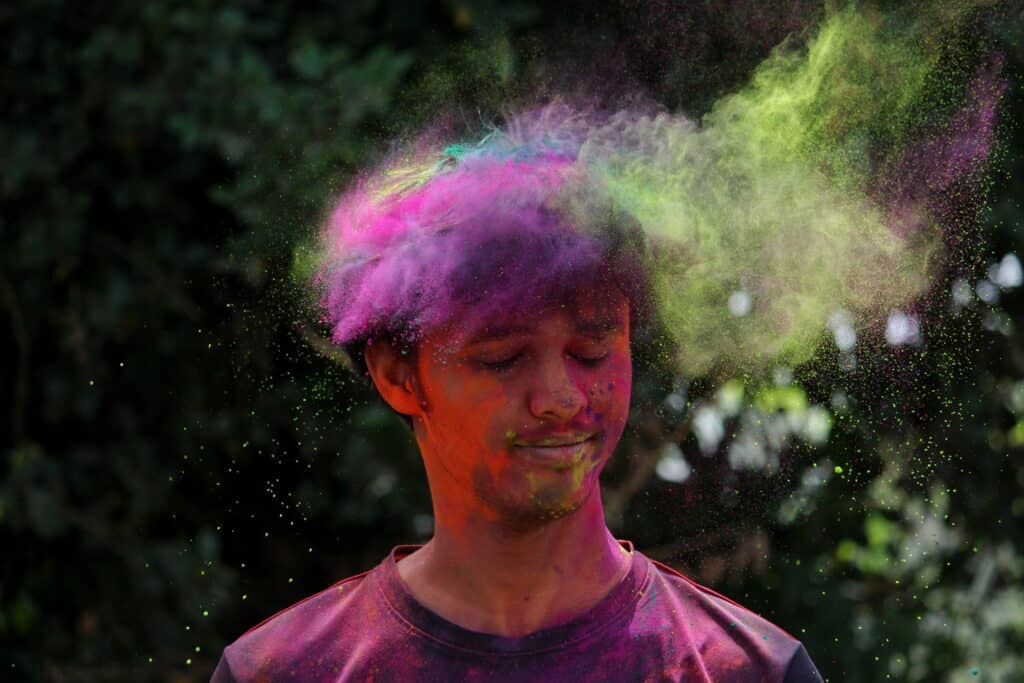
Chalk to express movement:
Best Camera Settings
In order to capture those bursts of powder, you need a fast shutter speed. In layman terms, shutter speed is how fast your camera can take a picture. In your settings or on the camera screen, this is denoted by 1/-insert number here-. This simply refers to how long the shutter in your camera is open. Shutter speed ranges from 1/8 all the way to 1/8000. For the chalk dust explosions, you’ll want a shutter speed of approximately 1/250 or higher! The faster it is, the more frozen the particles will be in movement.
But, remember that shutter speed is just one variable in exposure. Exposure is the amount of light that reaches your camera. Too much light and your image will be too bright. Too little, and it’ll be too dark. By setting the shutter speed, you now need to adjust the other components of exposure (ISO and aperture) to achieve a good exposure. The faster the shutter speed, the darker the image will become, so you have to set your ISO (your camera’s sensitivity to light) and Aperture (how much light does (or doesn’t) hit your sensor) accordingly.
The higher the ISO number, the more noise the image has- so if possible, try to keep this on the lower end as too much noise can make chalk dust harder to differentiate and see.
Aperture is very much a stylistic choice, as the wider the aperture (the lower the aperture number) the shallower the depth of field (the subject is in focus and the rest falls off) and the narrower the aperture (the higher the aperture number) the deeper the depth of field (more is in focus). If you want more of the chalk to reign through, have a narrower aperture. If you want the subject to be the centerpiece and not the chalk movement, have a shallower depth of field. Just keep in mind that how wide you can make your aperture depends upon the lens and the lens’s construction, each lens has a widest point (and cannot go wider than that).
Another setting you’re going to want to implement is Continuous Shooting, or Burst Mode. In order to take full advantage of a fast shutter, you have to activate high speed continuous shooting (or Burst Mode). Every camera has something called FPS, or Frames-Per-Second. What this discloses is how many pictures a camera can snap per second of shooting.
To access this feature to its maximum potential, you have to go to the menu of your camera and set it to either “Burst Mode” or “High Speed Continuous Shooting” (depending on your camera brand). Your camera will then fire off as many photographs as it is capable of taking per second. This allows you to capture an entire series and pick out the best moment.
Lighting?
If you’re doing outdoor natural light, then chalk dust photography is easy- natural sunlight does wonders for the powdery colorful substance. Ambient light works well too, so long as the illumination is from the bottom or behind the chalk dust. Small powdery particles work best when light gets them from the back, as it brings them clearly to light.
If you’re doing studio work with chalk dust or are in a darker space, you’ll need to illuminate your frame in order to capture it well. You can use flash and strobes or continuous light. Continuous light is always on and does not flash. These can range from LED strips and LED bulbs all the way to tungsten bulbs. These lights tend to have a softer look to them. Flash/Strobe/Speedlites are devices used in photography that bursts a powerful bright light. This lighting tends to have a sharp and contrasted look to it.
The best lighting arrangement would be a Triangle Arrangement, in which you use three lights to bring it all to life. Place one light in front of your subject, and two lights behind the subject on either side. Aim all of the lights towards the subject. The one overhead produces the nice even illumination while the ones on either side create a rim and separation! This will also light up the chalk dust from behind, playing on the principles of capturing dust in natural or ambient light.
In conclusion, chalk dust can add that fun extra twist to your photography work.