
If you want to give your photos a boost unlike any other, ultraviolet photography may be the way to go! You may have heard the term ‘ultraviolet’ used in relation to the sun (as that accounts for tans and sunburns), as well as at a nightclub where UV waves cause certain colors to glow. But in photography, UV refers to using light beyond our own visual spectrum to capture unique images.
Everything we see sits on a wave of light. Ultraviolet is a form of electromagnetic radiation with wavelength from 10 nm to 400 nm, shorter than that of visible light but longer than X-rays. In ultraviolet photography, the camera sensor can be modified to be sensitive enough to photograph near the ultraviolet spectrum, below 380nm. In order to do this, you first have to understand the two types of UV photography and then modify your equipment accordingly!
The Two Types of Ultraviolet Photography
Most photographers think there is only one way of capturing UV light, but that isn’t true- there are actually two ways! Both result in different kinds of images.
UV Reflectance
UV Reflectance is one that isn’t used as a term very often, even though this tends to be the most popular method of UV photography. Like the name implies, UV reflectance is using a light source that contains UV light (such as the sun or a full-spectrum light source) and collecting only the ultraviolet light that hits the camera sensor. Basically, the reflected light is what you’re photographing.
UV reflectance requires a camera to be permanently modified in order to work, like you would for infrared photography. Emphasis on permanent, because you will not be able to get the sensor back to how it originally was.
However, the awesome thing about UV reflectance is that you can suddenly see the world in the same fashion as, say, an insect! This method can reveal hidden patterns in flowers that the plants use to attract small critters to their pollen. This method is also much more sure-fire to capture UV images no matter what!
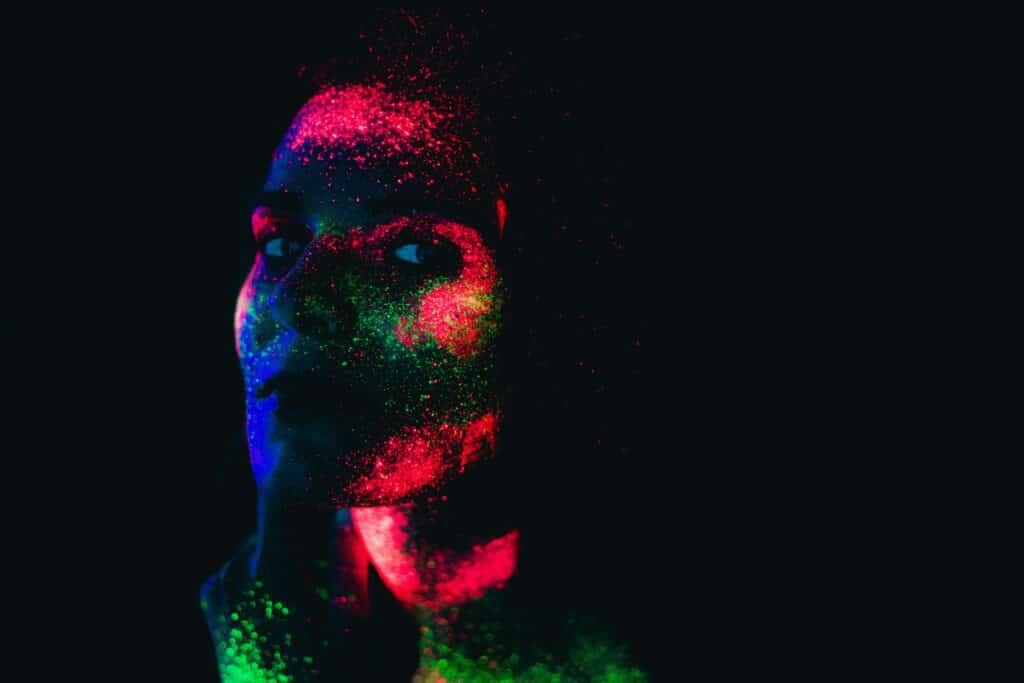
UV Fluorescence
If you’re into unique experiences, you have seen UV fluorescence happen in real time, such as going to a black light party (a party in the dark with only UV light).
UV fluorescence is a great method to use for those that do not want to permanently modify their camera (as you will never be able to get the original camera ability back). The downside, however, is that there is more room for error in capturing images this way. UV fluorescence requires a regular unmodified camera, but careful attention to ensure only pure UV light hits the subject. If anything in the frame fluoresces, visible light bounces back to the camera.
This method also shows that if you bring forth enough UV-only light, everything will appear to glow as UV. The trick is that the intensity of the light needs to be “pure”, as even a fraction of a percentage of spill-over into the visible spectrum will contaminate your results (hence the room for error here).
What is Required for Ultraviolet Photography?
The big elephant in the room- what do you need for UV photography? It depends on what kind of UV photography you do.
For UV reflectance, you can start with a professional camera modifier. This is because your sensor will need to be altered. The type of modification you are doing is called a full-spectrum conversion, which makes the camera sensitive to UV light waves. If you’ve done this, no additional equipment is necessary (easy!). Make note, full-spectrum conversions can run an upwards of $500 – $1,000 per sensor.
For less permanent adjustments, UV fluorescence can be done with some specifically modified equipment that you can use with your camera. This is what you will need:
Acquire a UV transmitting bandpass filter to attach to the front of your lens. Filters are additional glass elements that you screw on to the glass of your lens (make sure to check your lens filter thread to know the diameter size of the bandpass filter).
Then, buy or modify lighting units to transmit UV light. Many photographers opt to modify their off-camera flash units (flashes that are not build into the camera). You need to disassemble the flash (Warning: this is high voltage equipment you’re opening up, so hiring a professional may be the best bet here) and remove two pieces of plastic that are in front of the xenon flash tube. These control the flash beam but also block UV light, and in this case, you want the UV light to show. Paired with the filters listed above, you should be able to only capture UV light.
As for the best lenses to use, to ease your UV shooting experience, it’s best to buy a lens that does not have UV coating. Most kit lenses and cheap lenses do not have UV coating, which sucks for regular photography but is ideal in this case! For the first time, the lens is the least expensive part of a photography niche.
How To Shoot UV Photography
There really isn’t a checklist or step-by-step needed here, you capture UV photographs like you would regular light spectrum shots. The only difference is that you’re using UV-modified equipment!
Make note that UV still runs fairly dark, so you will find yourself bumping your ISO quite a bit regardless of the amount of available light. You can use post processing to adjust any noise that may appear in your shot.
White balance is also fairly important for UV photography, regardless of the fact that the color spectrum has now severely altered. For perfect white balance, use a gray chart instead of a white one.. This way, the sensor will be calibrated to offer perfect hue and contrast without a color cast.
In conclusion, if you have the time and money to spend- UV photography is an absolutely marvelous niche to get into. With the idea that photography is intended to show the audience a new way of looking at things, you can take that concept and enhance it tremendously with UV photography- showing your fans what lies in the invisible color spectrum.