
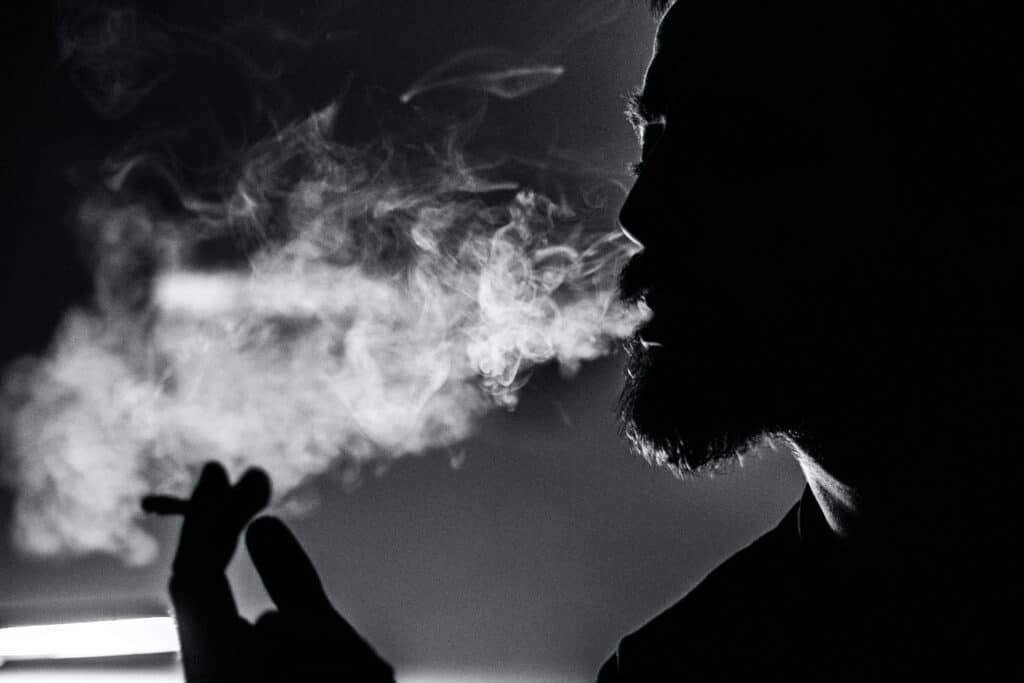
Although we really shouldn’t condone smoking due to its health implications, as artists, we have to admit that there is something really beautiful about the smoke itself. From the patterns it creates to how smoke dances in the light, there is a lot of opportunity for stunning images at the butt of a cigarette. Here is our step-by-step guide on how to take advantage of this phenomena!
Step 1: Choose the Right Lens
Everything comes down to how the final image looks! Although the camera plays a much more minor role in this specific type of photography, the lens plays a tremendous one. The optics you are using will affect perspective, field of view, and the depth of field.
First thing’s first, determine how close or far away from the smoke you will be. For the most part, photographers choose standard lenses or telephoto lenses for this type of work, rather than wide angle lenses.
Wide angle lenses have a wide field of view, not really useful for something like cigarette smoke which can be fairly small!
Standard lenses range from 35mm all the way to 70mm and are amongst the easiest lenses to use because they feature no distortion (the glass is flat). Standard lenses are the closest to the human eye and what you see, which makes these millimeters popular choices for easier photography compositions. These lenses are also commonly seen with wide apertures, which is great for smoke photography because you can just focus on the smoke and blur the rest of the background away.
You may not initially consider telephoto lenses for smoke photography, but they can actually work out really great! Telephoto lenses are long lenses that can remind you a bit of a telescope. These lenses can zoom you very close to your subject! They range in millimeters from 70mm all the way to 300mm. Although commonly used by sport and animal photographers, there is something magical that happens when you use a telephoto lens for non-sporting subjects: the zoom range actually creates an optical compression when used, which creates more flattering proportions and perspective on whatever subject you capture! Plus the bonus of not needing to be near the smoke.
So needless to say, step one is determining the lens you want to use.
Step 2: Find a Good Light Source
Next, you need to find a good light source. Even when looking at smoke with the naked eye, you may have noticed that it tends to disappear in direct light and really shows its shape prominently in backlighting. As such, you need to apply these principles to your smoke photography.
Look for a light source that positions behind your subject rather than in front. As well, it’s a good idea to have the light source be behind but from below so it doesn’t overtake the smoke and cause it to be lost as well!
You can do this with natural, ambient light that is available at your shooting location or with an artificial light. Video lights that are continuous and don’t flash work very nicely.
Step 3: Adjust Camera Settings
Now, the trickier part… camera settings. Camera settings are very dependent upon your location, the type of lighting, and the type of look you’re wanting to capture. Set the camera to M (Manual) mode and focus on the exposure equation:
Exposure is a formula: ISO + shutter speed + aperture = exposure.
Like a mathematical formula, if one variable is changed, the rest are affected by the change.
The ISO controls how the sensor responds to the light that hits it, whether it’s sensitive to the light (because there is less of it) or not very sensitive to the light (because there is more of it).
The shutter speed is how fast your camera takes the photograph.
The aperture controls how much light does (or doesn’t) hit your sensor.
For cigarette smoke photography, you’ll likely want to freeze the smoke so you can capture it dancing in the air, so the priority will be your shutter speed first. The higher the shutter speed number, the more frozen the action will be (but the photograph will be darker). The lower the shutter speed number, the more motion blur your photograph will have (but the photograph will be lighter). For smoke, a minimum shutter speed of 1/300 can suffice.
Next, you’ll probably want to make sure that the smoke is nicely isolated from the background and foreground. The lower the aperture number, the more light the camera lets in. The higher the aperture number, the less light the camera lets in. The lower the aperture number, the shallower the depth of field. The larger the aperture number, the deeper the depth of field. An F/2.8 is pretty excellent. Now, to go back to lens choice, the widest aperture is determined by the lens- not the camera. If you have an F/4 lens, for example, it cannot widen to F/2.8.
Then, you’ll need to find an ISO that balances out the shutter speed and aperture setting. The lower the ISO number, the less sensitive the camera is to light (but the less noise the photograph has). The higher the ISO number, the more sensitive the camera is to light (but the more noise the photograph has). Noise are the obnoxious little specks you see in photographs.
As well as this, cameras can sometimes have a hard time focusing on cigarette smoke because it can be so pale and fleeting. To help with focus, set your camera to the proper autofocus mode. By default, your camera is set to One-Shot right out of the box. One-Shot achieves automatic focus on your subject for only one image, not applicable for moving smoke. As such, switch the camera over to Continuous Focus. For this, the camera’s focus keeps refocusing on the subject as it moves.
Then, utilize your Autofocus Points. These points tell you (and the camera) where to focus. Each point refers to an area the camera is able to focus on. By switching to a mode such as AF Selection, you can tell the camera exactly what points you need it to use to focus on your subject!
Step 4: Compose the Shot
Composition is everything! Composition is the arrangement of everything in a shot- from the subject, to the background, and even the foreground.
For smoke, because it is something that moves, the primary compositional rule you’ll want to focus on is the sense of implied movement. Implied sense of movement means the direction that you think the movement will go in a still image. How this factors into composition is that you always want to leave more negative space in the direction of implied movement. This keeps your photograph from feeling claustrophobic or too abruptly cropped.
So if the smoke is blowing to the left, you want more negative space to the left of the frame, to give the smoke some room to go!
Step 5: Direct Your Subject and Click!
You don’t want to run out of smoke before you’re ready to take the shot! Direct your subject to light the cigarette and start puffing after you’ve done the aforementioned four steps. Then aim your camera, get the focus, and take the shot!
In closing, these five simple steps should aid you in capturing some dramatic and fun smoke shots.