
The beauty of photography is capturing parts of life that we don’t normally pay any attention to; We can suddenly expose the secrets of a tiny world and capture them in a fascinating way. So, did you know that photographing something as inattentive and mundane as dust can produce interesting and unique images?
It sure can! But creating dust images isn’t as simple as it may seem, due to the tiny nature of such things. Dust photography requires specific illumination in order to see these tiny particles, as well as a contrasting background to bring the beautiful patterns of dust to life.
So… Why Dust?
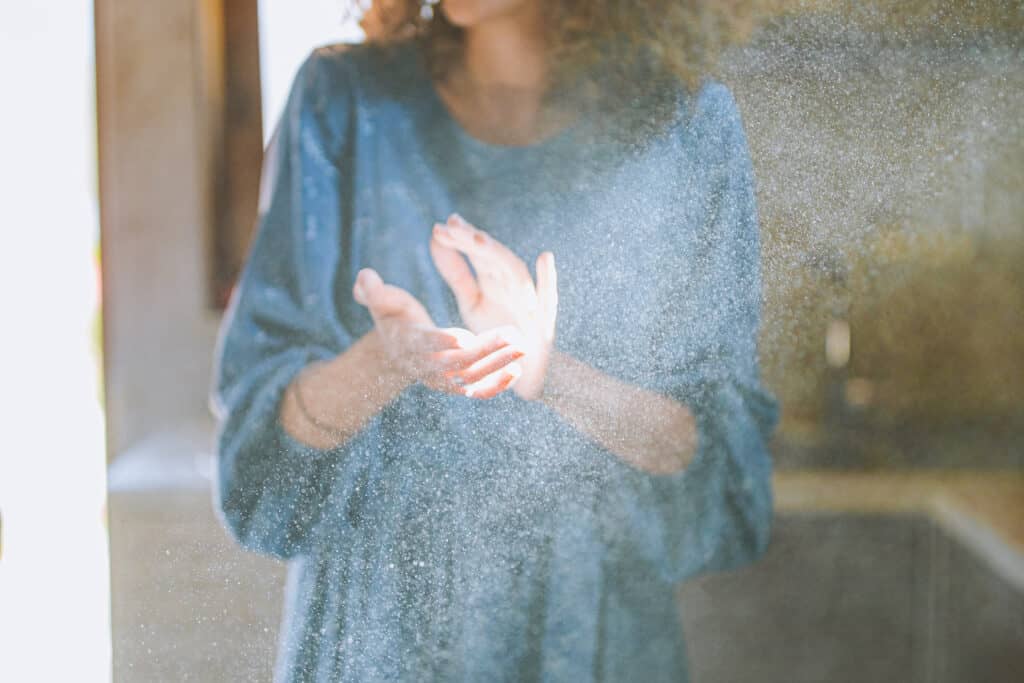
Dust is something that lurks around us all the time- no matter how much we clean, it can still find its way to linger in the air. If you’ve ever looked through a sliver of light through a window, you can watch dance dust around in the illumination. As photographers and visual artists, we can find a beauty in it all.
Dust is easily accessible and can create cool patterns through its movement- why not capture it?
What Do You Need?
What you may need really depends on what kind of dust photography you want to do.
As a general statement, truly any camera will do, it’s the lens that can make a difference- you want a lens that has the option of manual mode and one that is either a standard type or a macro type.
Standard lenses are those that range in focal length from 35mm to 70mm. Standard lenses are amongst the easiest lenses to use because they feature no distortion. Standard lenses are the closest to the human eye and what you see. These lenses are excellent for more natural photographs of dust, such as in the sliver of light we spoke about above.
If you want to get even closer and more detailed, a macro lens may be more your fancy for dust photography. Macro is a unique type of photography in which small objects are photographed so close up that they are made to look life-sized or larger than they are in a photograph. True Macro photography is done with dedicated macro lenses. For dust, you’d likely look at intermediate or long macro lenses, ranging in focal length from 90mm to 200mm. Macro lenses are great for dust photography in which you very specifically capture dust in a contained box.
As for manual mode, you want a lens whose focus you can adjust by hand. As the name implies, manual focus is when you lock on to a subject by hand. You find focus by turning the focus barrel ring until the subject is nice and clear in your viewfinder. Dust is so small that it can be hard for a camera to use its autofocus and find the subject.
Now, if you’re doing lifestyle dust photography, then your gear list can end there. However, if you’re looking to capture dust and various patterns it creates in a more controlled environment, you’ll need a few extra pieces of gear.
Firstly, you’ll need illumination. Dust can only be seen with light hitting it a certain way. If a sunbeam shines through a window into an otherwise dark room, you can always see dust particles floating in the air. To mimic that, you can use a 300 watt halogen light which is about as bright as sunlight.
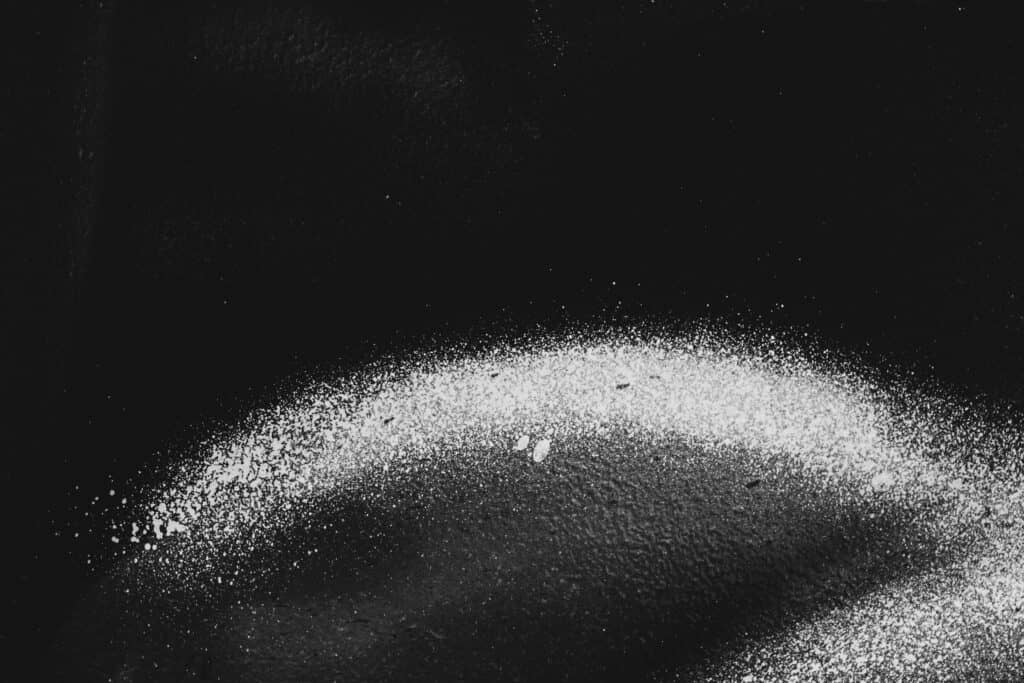
Next, you’ll need a lot of contrast. Best way to create this contrast is to either use an all-black studio or create an all-black little containment box. The black will create a good dark backdrop to bring all of the dust out in camera.
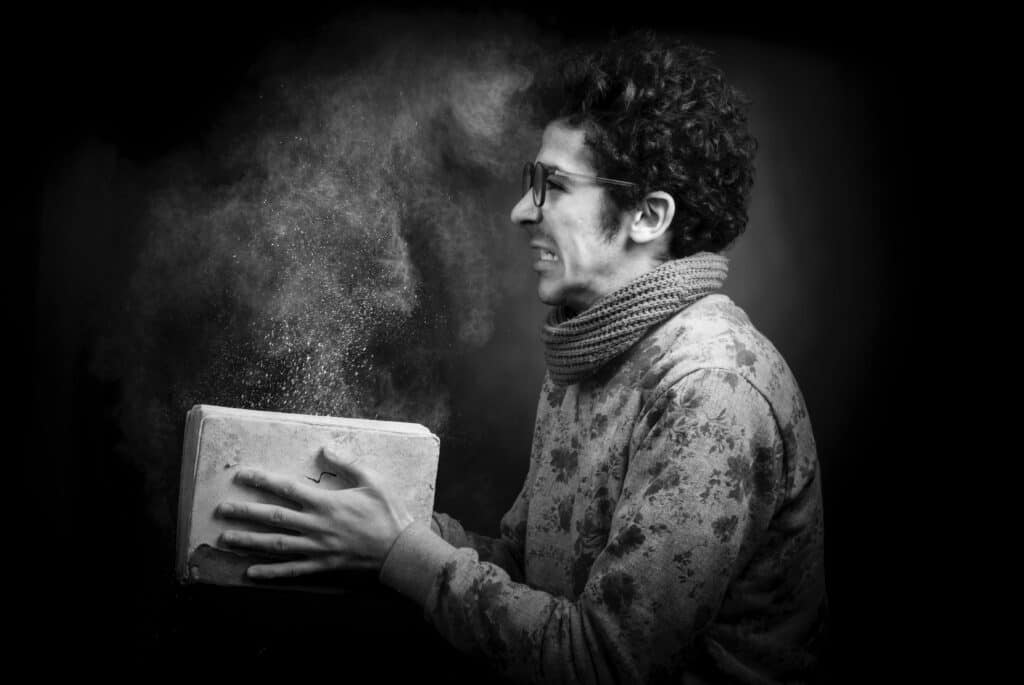
Finally, you’ll need an object that happens to have a lot of dust on it. An old book, a piece of wood, anything like that will do.
How To Photograph Dust
If you’re capturing lifestyle photography, early mornings or late evenings do great! Look for sunbeams to come through windows or any other openings in older rooms (where dust particles have a higher likelihood of hanging in the air) and position yourself in such a way that they become visible to your eyes. Then use the manual focus on the lens to adjust focus until the particles are nicely visible in the viewfinder.
If you are finding that focus is difficult to achieve, you’re likely too close to the dust- move yourself further away until it is easier to lock focus.
If you’re looking to capture dust in a more controlled environment, go ahead and go to your dark studio (or dark studio box). Now, take your halogen light and place it either below your composition or off to the side- that is because dust is best seen when illuminated from below or off to the side. If you need to encourage more dust, go ahead and take your dusty object and give it a good shake! Just be careful not to inhale a lot of it, as that can pose some health risks.
Then go ahead and shoot!
In conclusion, dust can make a fascinating subject if captured right! Don’t overlook it!