
We are so easily dazzled- place a bright, vibrant color in front of us and we are amazed! Neon has been a common photography subject and photography accessory since its creation due to the properties associated with neon. From the bright glow to the beautiful ambience it creates, these beautiful characteristics can be surprisingly tricky to capture.
Being able to effectively photograph neon has most to do with your exposure and white balance settings, as that affects the color and makes it actually appear neon.
Exposure and White Balance- How This Factors Into Color
How we see color in an image is a clever mix of the proper white balance setting and how we expose for the image. Neon is no exception to this rule, in fact, this rule matters even more here!
To explain what white balance is, we must first define the term Color Temperature. Color Temperature is defined as the characteristic of visible light. What this means is that color temperature determines if colors are cold, warm, or neutral depending on the amount of light present. Neon never tends to be neutral, and as a general rule, it runs pretty cold.
In layman terms, white balance adjusts colors so that they look more natural, or accurate to the scene. White balance gets rid of something known as a Color Cast. Color Casts are visible tints in an image. For example, a blue color cast makes every color look very cold and blue-ish. In order to reduce color cast, white balance adjusts the temperature to bring colors back to their natural state.
Neon has a unique property of color casting all the time, and that is a reason it is so beloved. It is so powerful it tends to color everything around it! The white balance is intended to have the neon cast in the tone we want it to. Tungsten tends to be the most common choice for white balance on a neon color.
As for exposure, remember that exposure is the amount of light that reaches your camera. Too much light and your image will be too bright, called overexposure. Too little, and it’ll be too dark, called underexposure. Good exposure is constituted as an image in which you can see the details and clarity in the shadows, highlights, and midtones. Having one or the other lose its detail is considered a poor exposure. Exposure is a formula, sometimes demonstrated as a triangle: ISO + shutter speed + aperture = exposure. The combination of these settings dictates how light or dark your image is.
If we are talking about neon as a color (such as a neon green shirt), then you’re going to want the exposure to be nice and bright in order to capture that image. If we are speaking of neon light, then you’re going to want to darken the exposure because neon burns very brightly and has a tendency to be overexposed.
Photographing Neon Colored Objects
If you’re capturing objects or products that are neon in color, your goal is to ensure that the color is expressed properly. Because this is a color and not a light, all you need to do is ensure your exposure settings are bright enough to express the color.
Sometimes you’ll need to help your exposure by adding artificial lights, either continuous studio lights or a flash. It is suggested to use continuous studio lights because they aren’t as bright or harsh, but flash works as well so long as it is not directed at the subject and is instead bounced off of a wall.
It is best to light neon as a color from the front rather than the sides, and evenly at that!
Photographing Neon Light
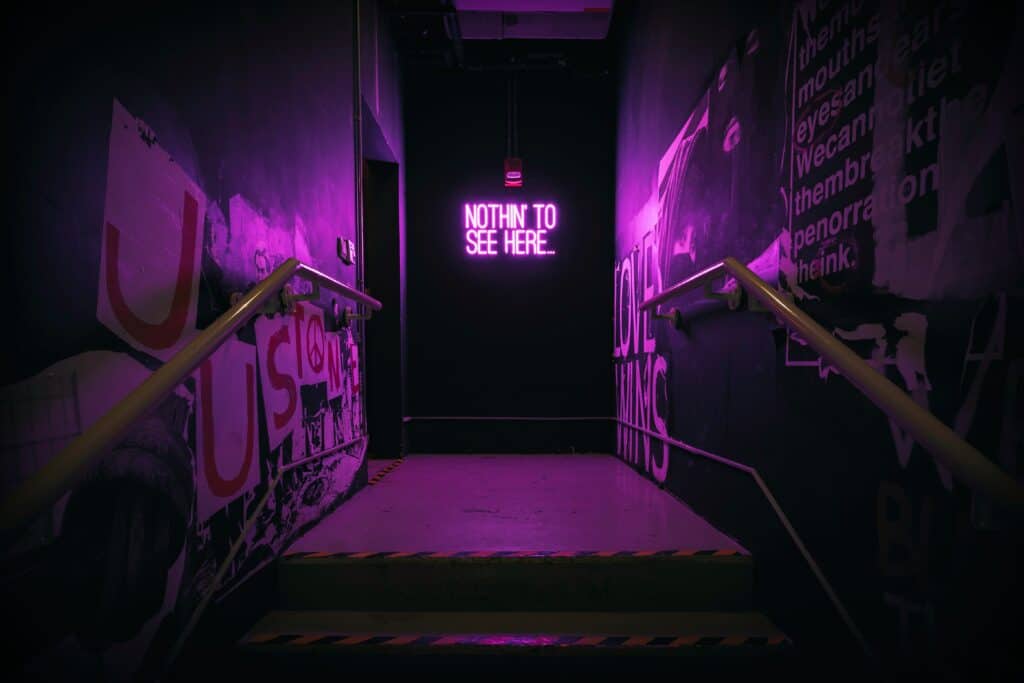
Now, if you’re photographing a neon sight or neon as a light, your settings will be vastly different. Because neon burns so brightly, you’ll find that your settings are actually a lot darker than you may have expected! Lower that ISO to ensure you have minimal noise and play with lower shutter speeds and wider apertures.
Compositionally, leave enough space for the neon light to have room to ‘breathe’ so to speak. You want to be able to see its glow fully, and the only way to do that is to have something around it to contrast and show off the glow.
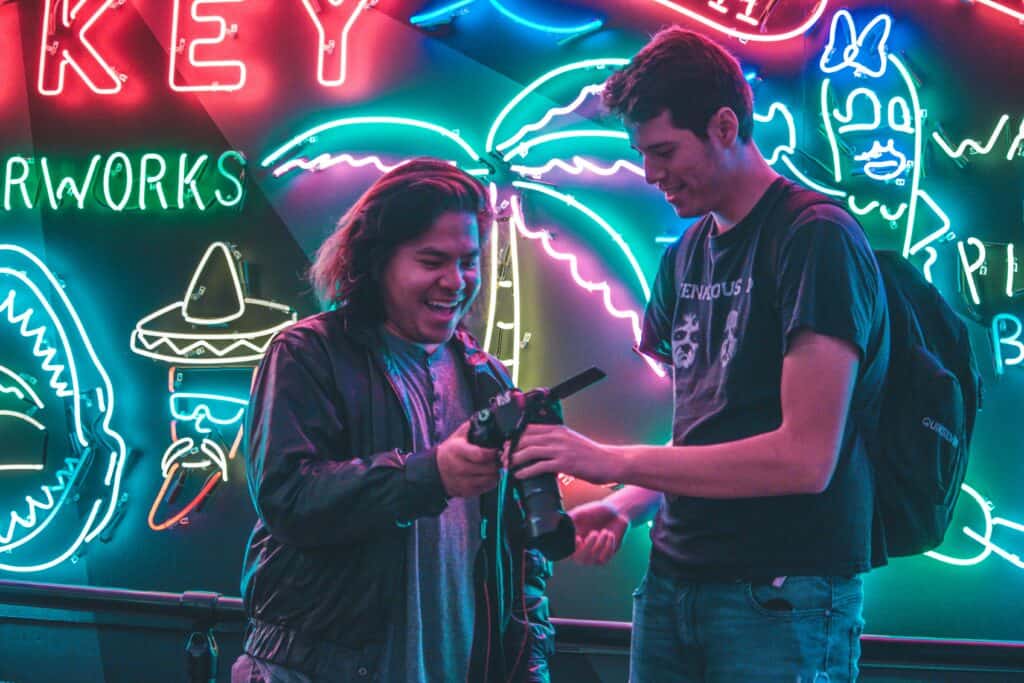
Photographing Subjects with Neon Light
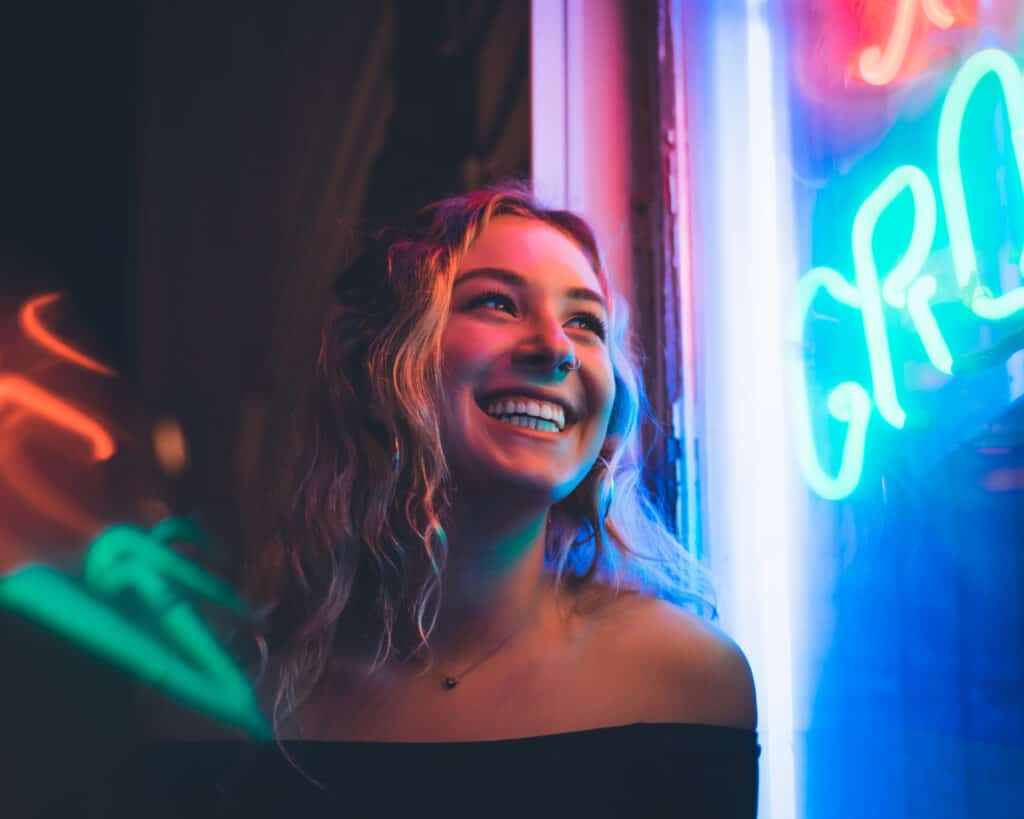
A lovely way to utilize neon is to have a model posing with it! But this presents its own new set of challenges.
When placing a model against the neon light (with the neon behind the model), exposure becomes a challenge. If you are metering off of the subject, the settings will majorly overexpose your shot, in which the subject may have proper exposure, but everything around will be painted too bright with little to no detail. If you are metering off of the neon, then the neon light and all around it may be nicely exposed, but your subject will be so dark you won’t be able to see any details on the model!
The remedy to this is to place the model in front or to the side of the neon light and let the glow of color paint the subject. Check your settings to make sure the skin doesn’t become too overexposed.
Editing Neon Color, RAW Format Is Your Friend
The most fool-proof way to capture neon and make sure that the color is accurate is to utilize RAW format in your camera. RAW is a file format that is famous for recording completely uncompressed images.
You see, when a photograph gets recorded as a file format, it becomes compressed to fit within that format and you may lose some quality or some forms of editing capability. Basically, RAW contains the direct image data from the camera sensors with no loss of quality and alteration. This stores the fullest details of an image.
RAW is intended for those that edit and manipulate photographs, as the fullest details and the lack of file alteration allows significantly more control over large editing adjustments such as overblown highlights or an underexposed image. This is because you’re able to, in most situations, recover information in the image that would otherwise be lost if it is compressed.
This is really key for neon because, as mentioned in the beginning, neon has a tendency to be overexposed due to its natural properties. With editing software such as Adobe Photoshop or Adobe Lightroom, you can bring some of the details back and ensure that the neon is the proper color. shade, tone, hue, and brightness. You can use the HSL (Hue, Saturation, Luminance) sliders to adjust your neon color properly.
Neon may be daunting and frustrating to capture at first, but with the above advice, you’ll be a neon-photography-master!